

To remove steady background noise from spoken audio in Audacity, select a short piece that contains only the noise and capture a Noise Profile. Then select the section you want to clean, reopen Noise Reduction, and preview a light pass. Keep the version that makes the words easier to hear without thinning consonants or turning the room sound metallic.
This works best on something like a steady fan or hiss. A nearby person talking at the same time as your narrator is a different problem. Before applying a filter to an entire interview, identify what you hear and when it happens.
Decide what kind of noise you have
Listen once with your eyes off the waveform. If you hear a similar sound across every pause, you have a candidate for a noise profile. If you hear a low electrical tone at a stable pitch, it may respond better to a narrow notch after you identify the frequency. If the problem is an isolated click, repair that moment instead of filtering the entire file.
An air conditioner that starts halfway through makes two different rooms for editing purposes. Profile and process the affected region separately, then listen across the edit so the transition does not sound like a mute switch. For a cough under an important word, consider an alternate take or a pickup. A process that can identify steady noise has far less separation to work with when two voices overlap.
A recording that sounds dull even during a clean pause may need a different diagnosis. The muffled voice guide separates articulation, distance and playback problems from noise. Heavy reduction can make a dull take even harder to understand.
Take a profile from the same recording
- Import the original and keep a copy before processing. Use a duplicate track or working file to make the comparison easy.
- Find a gap with the fan or hiss and no speech, inhale, music or movement. Prefer a nearby sample where the microphone and room were behaving the same way.
- Select that region and open Effect → Noise Removal and Repair → Noise Reduction. Choose Get Noise Profile.
- Select the affected speech region, reopen Noise Reduction, and preview a conservative pass. Leave the reference unprocessed.
- Listen to the whole phrase, including its opening consonant, last breath and the pause after it. Compare at a similar listening level.
Audacity's Noise Reduction manual explains the profile, frequency smoothing and the Residue option. Residue plays what the process would remove. If you can make out part of a word in that preview, back off and check whether your profile included speech.
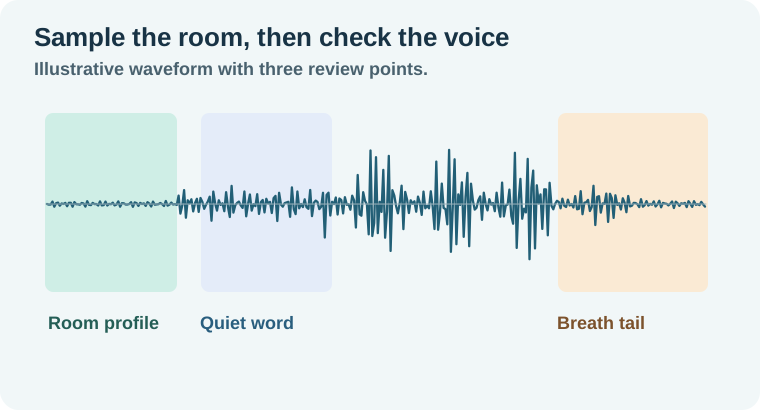
Work through a short narration example
Imagine a narrator says “Set the cap beside the cup” after a one-second pause. A fan runs throughout the take. Use the steady part of the pause, starting after the previous movement and ending before the inhale, for the profile. Duplicate the file before trying two settings on the same sentence.
In the light version, listen for the first S in “set,” the two P sounds and the tail of “cup.” In the stronger version, listen to the same spots. A quiet pause is easy to notice, but missing consonants can be harder to notice until you play the sentence without reading the script. If the strong version makes the voice ring or smears its edges, choose the lighter one and listen under the intended picture.
A real take can call for still less treatment. A consistent low fan may be unobtrusive when the final mix includes room tone or a quiet music bed. Turn off the music during the diagnostic pass, then put it back during the delivery pass. This tells you whether the treatment survives by itself and whether it is useful in context.
Treat the Audacity controls as a listening experiment. Noise Reduction sets the amount of attenuation. Sensitivity affects what the process classifies as noise, so increasing it can catch more of the voice. Frequency Smoothing spreads the reduction across adjacent frequency bands. Start by adjusting the reduction amount and keep the other controls fixed for the first comparison. If one setting sounds acceptable in the pause but damages the spoken line, save a gentler version before trying to rescue the stronger one with another effect.
Fix the transition and keep a natural voice
If a processed stretch becomes noticeably drier than the next clip, compare both sides of that join. A short fade or a quiet piece of matching room tone can make an edit less obvious. Keep tone from the same setup where possible. A different microphone or a louder take can reveal the change even if you place the clips at similar levels.
Avoid judging only the loudest sentence. Soft endings and breaths show the damage first. Try headphones for metallic or watery artifacts, then a small speaker at a normal level to check word clarity. Write down the problem you still hear before adding another effect. This keeps you from stacking processing on a take that is already good enough.
If the original voice is too difficult to rescue, compare a short replacement take with the treated one before processing the rest of the project. For a separately enhanced candidate, use the speech enhancement comparison and keep the same listening checkpoints.
How QuestStudio helps
Use Voice Lab to create a separate scratch narration if you need to test whether a shorter line or different pace fits the edit. Keep it separate from the original speaker's recording. The voiceover delivery guide shows how to label the source, clean take and final export so an editor knows what to use.
Export a working master, reopen it and play the worst section once more. The best pass is the one that lets you stop thinking about the fan while the speaker still sounds like themselves.
Download the noise reduction listening log.
Frequently asked questions
Can a noise profile remove other people talking?
Steady profiles are a poor fit for overlapping speech. Try an alternate take, an isolated track or a careful specialist repair.
Can I use a quiet section from another recording?
Prefer the same take and setup. A different noise floor can lead the effect to remove frequencies you want to keep.
What if there is no clean gap?
Look for a nearby recording from the same setup or use a different repair. Avoid selecting a gap that contains speech or breaths.
Why does the clean result sound watery?
The reduction may be too aggressive or the profile may include wanted sound. Compare a gentler pass and preview what would be removed.
Should I overwrite the original audio?
Keep the original and export a clearly named cleaned copy for the edit.