
A clean background changes everything.
It can turn a casual product photo into something that looks store-ready. It can make a profile picture feel intentional. It can make a design instantly easier to reuse across thumbnails, ads, listings, and social posts.
This guide shows you exactly how to remove a background the right way, how to avoid common quality problems, and how to finish your image so it looks sharp and natural.
QuestStudio includes a Magic Editor that combines three steps creators usually need in separate apps:
- Background remover
- Upscaler (to make the result sharper and higher quality)
- Photo restorer (to fix older or damaged images)
That means you can go from messy photo to polished final image in one workflow.
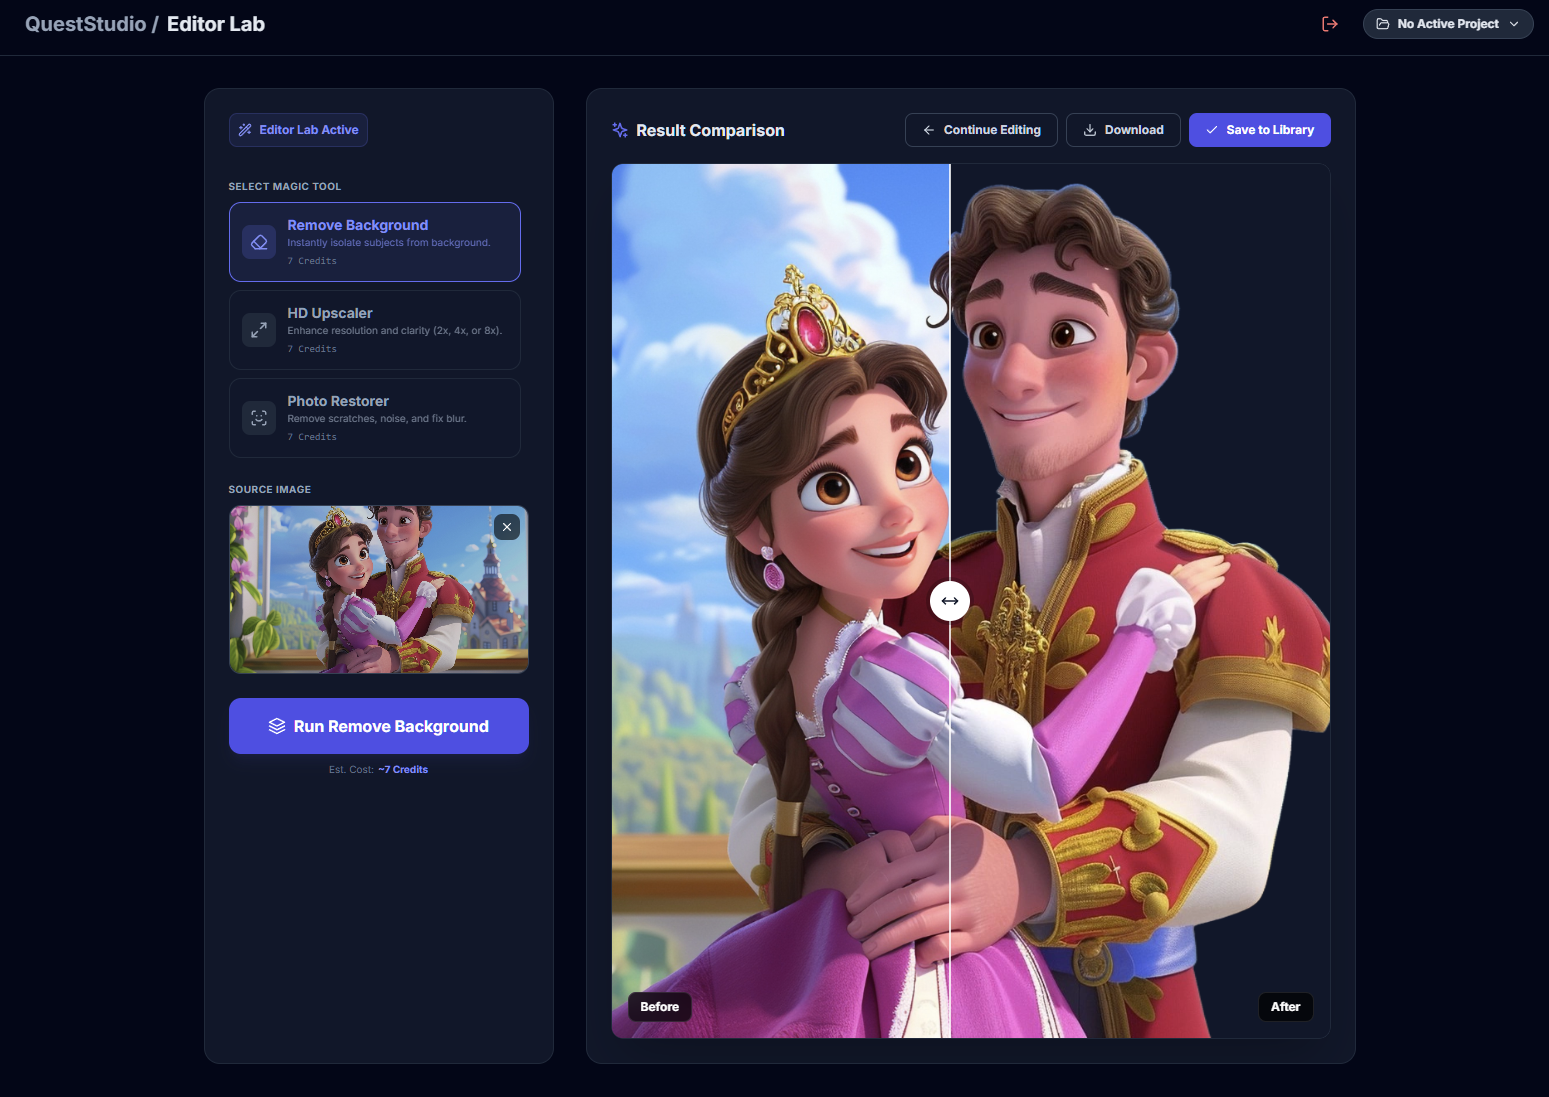
QuestStudio's Magic Editor combines background removal, photo restoration, and upscaling in one workflow. Open Magic Editor →
What is a background remover?
A background remover is a tool that separates the subject of an image (a person, product, pet, or object) from the background.
Instead of manually tracing edges for 20 minutes, an AI background remover detects the subject automatically and cuts it out so you can:
- export with a transparent background
- replace the background with a solid color
- place the subject on a new scene
- build cleaner designs, listings, and marketing assets
When should you remove a background?
Here are the most common reasons people remove backgrounds:
Product photos (ecommerce and marketplaces)
- • clean white background for listings
- • consistent brand look across all products
- • faster thumbnail creation
Social media and content
- • YouTube thumbnails
- • Instagram story graphics
- • TikTok promo images
- • ad creatives that need quick variations
Headshots and profile pictures
- • remove distractions behind you
- • swap to a neutral background
- • make the image look more intentional without heavy editing
Logos and graphics
- • turn a logo into a transparent PNG
- • place it on mockups and banners
- • build clean overlays and watermarks
Real estate and local business visuals
- • highlight objects or people
- • make marketing materials cleaner and more readable
How AI background removal works (simple explanation)
Most modern background removers do the same basic job:
- Detect the main subject in the photo.
- Build a mask around it.
- Remove everything outside the mask.
- Let you download the cutout, usually as a transparent image.
The difference between a decent result and a professional result usually comes down to edge quality:
- hair and fur detail
- smooth curves (shoulders, arms, product edges)
- avoiding halos
- keeping shadows realistic
That is why the "finishing steps" matter.
How to remove a background in QuestStudio Magic Editor
Use this workflow whenever you want a clean, reusable image.
Step 1: Start with the best image you have
Better input always produces better cutouts. If you can, choose a photo with:
- clear subject
- good lighting
- separation between subject and background (contrast helps)
- minimal motion blur
If the image is old, noisy, or low-resolution, do not worry. You can still get a good result, you just want to use restoration and upscaling after the cutout.
Step 2: Remove the background
Run the background remover and look at the edges:
- zoom in around hair, hands, and thin details
- check the outline for jagged edges
- watch for missing pieces (like a shoulder or product corner)
If your editor includes any refine tools, this is where you use them lightly. The goal is clean edges, not overcutting.
Step 3: Decide what you need: transparent or replaced background
You usually want one of these outcomes:
Transparent background (best for reuse)
- • perfect for designers
- • easiest for overlays and thumbnails
- • best for logos and cutout assets
Solid background (best for listings and consistency)
- • common for product photos
- • consistent across catalogs
- • makes images feel cleaner and more professional
Image background (best for lifestyle, ads, and scenes)
- • great for marketing and promos
- • helps tell a story
- • makes content feel higher value
Step 4: Restore and upscale if your image needs it
This is where most background removers stop, but most creators are not done yet.
After a cutout, images often need:
- more sharpness
- cleaner texture
- less noise
- better clarity around edges
If your photo is older, compressed, or slightly blurry:
- use Photo Restorer to clean it up
- use the Upscaler to increase clarity and detail
This step is what makes your final result look polished instead of "AI edited."
Step 5: Export the final image
Export based on your goal:
- Use PNG when you need transparency.
- Use JPG when you want a solid background and smaller file size.
If you are building listing images or thumbnails, export at the highest quality you plan to use. Downscaling later usually looks better than upscaling later.
Pro tips for cleaner cutouts (the difference between okay and professional)
1) Give the subject breathing room
If the subject is cropped too tight, AI edges get harder. When possible, use an image where the subject is fully visible with space around it.
2) Watch for "halo" edges
A halo is a faint outline of the old background around the subject. It happens a lot when the background is bright or colorful.
Fix it by:
- • choosing a background color that matches your final scene
- • refining edges slightly
- • upscaling after the cutout to clean softness
3) Hair and fur: less is more
Over-editing hair is the fastest way to make the cutout look fake. If hair looks slightly soft, that is usually more natural than harsh, crunchy edges.
4) Keep shadows when you can
A shadow anchors the subject. Without it, the cutout can look like it is floating. If you are placing the subject on a new background, try to keep a subtle shadow or recreate one softly.
5) Transparent objects are the hardest
Glass, veils, shiny plastic, and reflective surfaces can confuse masks.
The best approach is:
- • start with a clean, high-quality input
- • accept that you may need light manual refinement
- • use restoration and upscaling after
6) If the image is small, upscale after background removal
When you remove a background from a small image, the subject edges can look soft. Upscaling after removal helps the cutout look sharper and more usable.
Common background removal problems and how to fix them
Problem: The tool removes part of the subject
This usually happens when the subject blends into the background.
Fix:
- use a higher contrast photo if available
- restore the photo first if it is noisy or washed out
- refine edges around the missing area
Problem: Jagged edges around arms, shoulders, or products
Fix:
- refine the mask lightly (do not overcut)
- upscale after removal to smooth and sharpen edges
- export at higher quality
Problem: Hair looks chopped or too sharp
Fix:
- avoid aggressive refinements
- keep the edge slightly soft
- if needed, use a background that matches the original lighting so the hair blends naturally
Problem: The cutout looks fake on a new background
Fix:
- match lighting direction
- match color temperature (warm vs cool)
- add subtle shadow
- avoid backgrounds that are too busy
Problem: The final image looks blurry
Fix:
- upscale the subject after background removal
- avoid repeatedly downloading and reuploading compressed files
- export once at high quality
Background remover workflows for real use cases
Workflow: Product photos that look consistent
- Remove background
- Replace with a clean solid background
- Upscale for sharpness
- Export for listings
Best for: ecommerce, Etsy, Shopify, Amazon-style catalog visuals.
Workflow: Headshots and profile pictures
- Remove background
- Replace with a neutral background
- Restore lightly if the image is noisy
- Upscale for clarity
- Export
Best for: LinkedIn, resumes, team pages, creators.
Workflow: Old photos you want to reuse
- Restore the photo first
- Remove background
- Upscale for final clarity
- Export
Best for: family photos, scanned images, older low-quality files.
Workflow: Thumbnails and marketing graphics
- Remove background for a clean subject cutout
- Place on a bold background
- Upscale so the subject stays crisp
- Export and reuse across designs
Best for: YouTube thumbnails, ads, promo images, course graphics.
Background remover vs manual editing (and when manual still matters)
AI background removers are the fastest option for 90 percent of images.
Manual editing still helps when:
- the subject has extreme fine detail (very messy hair, lace, thin wires)
- the object is semi-transparent
- you need perfect edges for print work
A smart approach is: use AI first, then refine only where it matters.
FAQ: Background remover questions people ask the most
What is the best file format for a transparent background?
Can I remove a background from a logo?
Why do my edges look rough after removing the background?
How do I avoid a white outline around my subject?
Can I remove backgrounds from product photos for listings?
Why does hair look weird after background removal?
What if my photo is old or damaged?
Can I replace the background after removing it?
Does background removal reduce quality?
What is the fastest way to get a professional result?
Final thoughts
Background removal is not just a trick. It is one of the highest leverage edits you can learn because it makes every photo easier to reuse.
If you want the fastest workflow from raw image to polished final asset, use an editor that does more than cut out the subject.
QuestStudio's Magic Editor helps you: remove the background, restore photos when quality is not great, and upscale for sharper, cleaner results. That way your final image looks finished, not just edited.
Try Magic Editor