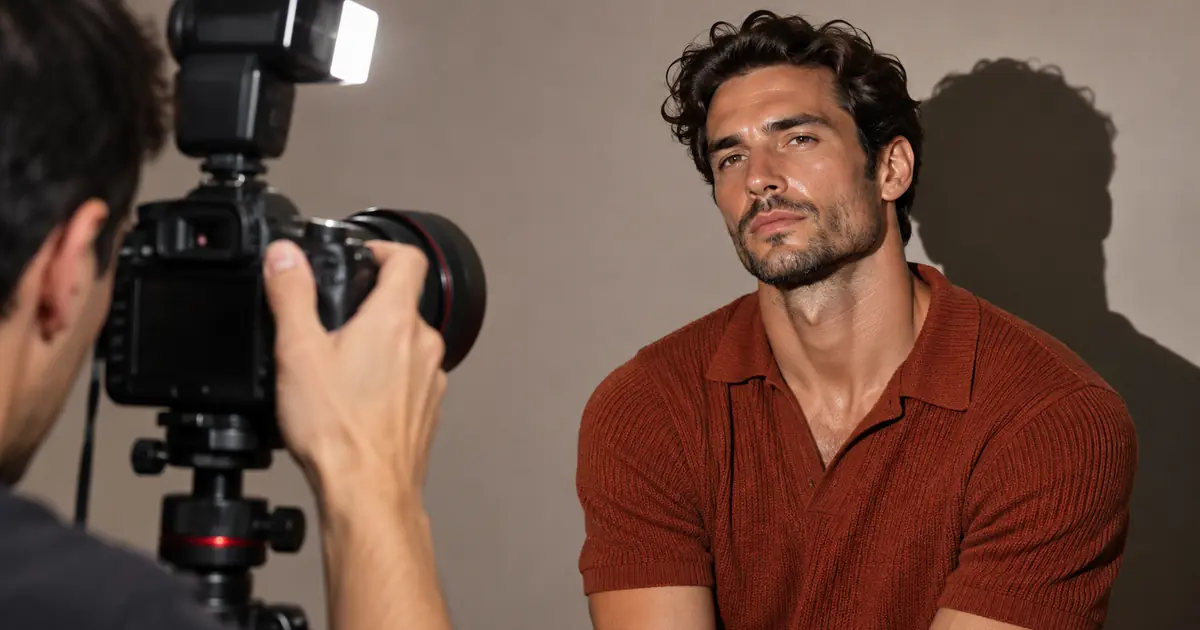

Direct flash portrait prompts should change the light without quietly recasting the person. A hard shadow and bright skin highlights can make a portrait look convincingly flash-lit, but they do not prove the edit preserved every facial detail. Compare the lighting result and the reference likeness as two separate decisions.
The example below uses one original fictional adult portrait and two independent lighting edits from that same file. One request asks for compact direct flash, and the other asks for a large soft source. There was no second editing pass on either result. This gives you a concrete comparison to inspect rather than a promise about what a lighting phrase will always produce.
Start with a source you can compare
The reference is a chest-up portrait of a fictional man in a teal shirt against a gray wall. Both eyes, the hairline, mouth and shoulders are visible. Its broad, fairly even light makes it a useful source for comparing later changes.
Choose an authorized reference with similarly clear features for your own test. A heavily filtered image, hidden face or strong existing shadow can make it harder to separate a lighting change from a reconstructed feature. Keep the original file available throughout the experiment.
Decide which elements must stay fixed: the person, expression, shirt, framing, camera position and wall. If you also change the outfit and pose, the result may be attractive but will answer a different comparison question.
Define hard and soft light in visible terms
Ask for a small, relatively direct source when you want a crisp shadow edge and pronounced highlights. For a softer treatment, describe a large diffused source and gradual transitions. Name the source direction as well as the character of the light.
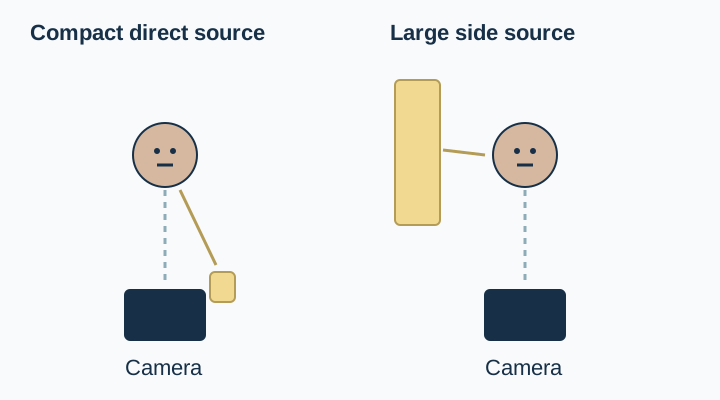
Adobe's explanation of diffused light discusses the visible difference between hard and soft illumination. Use those visual characteristics to review the result instead of relying only on the prompt's camera vocabulary.
For broader source descriptions, the lighting prompt guide provides a reusable structure. This test narrows that structure to two specific edits of one reference.
Make both edits from the original
Create the direct-flash version from the reference, then start the soft-light version from the original reference again. Using the first result as the input for the second would mix a new lighting change with any changes already introduced by the first edit.
The direct-flash request used in the example was:
Edit only the lighting of the supplied fictional adult man's portrait. Preserve the same recognizable face, expression, age, skin tone, curly hair, mustache, beard, plain teal shirt, exact crop, camera position and gray wall. Use a compact direct flash just above and slightly camera-right of the lens: crisp bright facial highlights, small clear catchlights and a distinct hard-edged shadow cast onto the gray wall to viewer-left. Keep believable natural skin texture and realistic exposure. No new objects, face changes, smoothing, color styling, text or watermark.The second request used the same preservation brief but changed the source description:
Edit only the lighting of the supplied fictional adult man's portrait. Preserve the same recognizable face, expression, age, skin tone, curly hair, mustache, beard, plain teal shirt, exact crop, camera position and gray wall. Use one large diffused soft light to camera-left, slightly above eye height: broad gradual facial transitions, a large soft catchlight and a gently fading wall shadow. Keep believable natural skin texture and realistic exposure. No new objects, face changes, smoothing, color styling, text or watermark.Save the exact requests with the outputs. If the experiment fails, that record helps you decide whether to revise the lighting description, improve the reference or choose a different editing method.
Read what actually changed
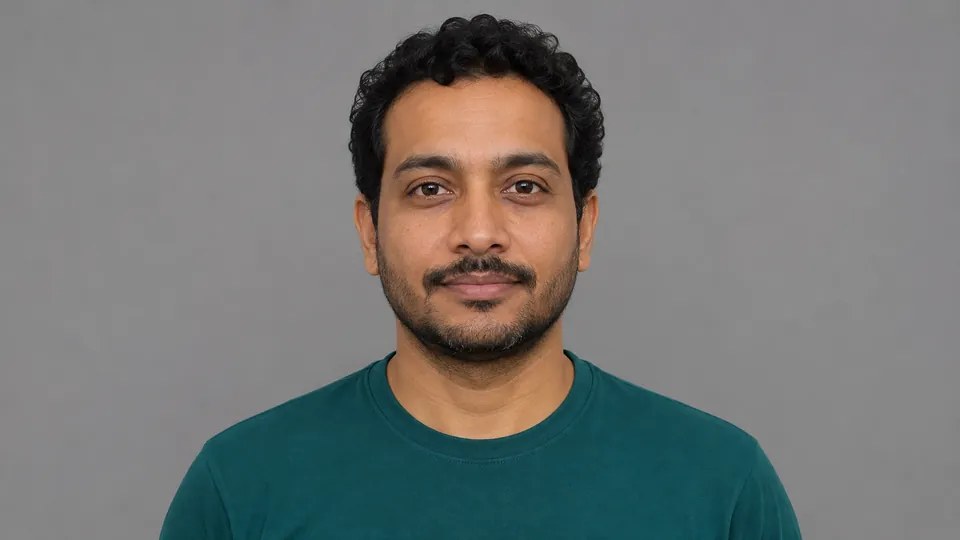
Original reference
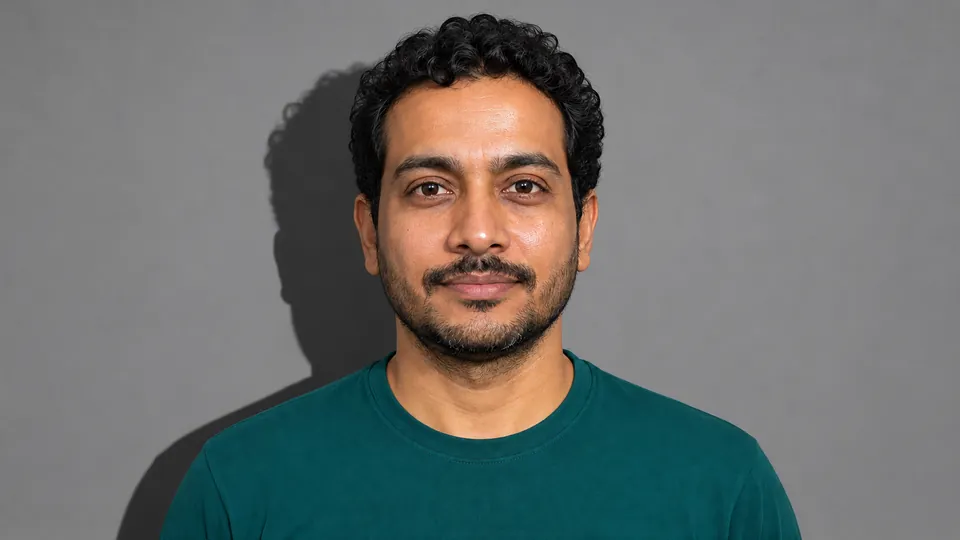
Direct flash edit
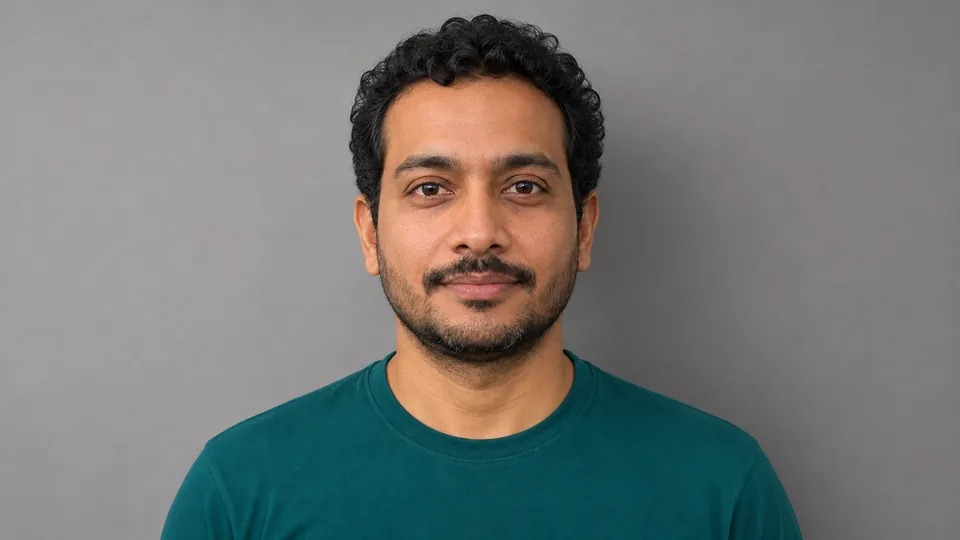
Soft light edit
The hard-light edit creates a conspicuous wall shadow to viewer-left and stronger highlights on the forehead, nose and cheek. The softer edit largely removes that hard-edged wall silhouette and produces more gradual facial shading. Both retain the overall pose, teal shirt and gray-wall setting.
Those observations support using the pair as a lighting illustration. They do not establish pixel-level preservation of the person. Fine skin and hair rendering differ from the reference, and a similar-looking face still needs its own review before a personal or business use is approved.
For this example, the decision is keep the pair as a creative lighting comparison. It is not an approved edit of a real client's identity. Your acceptance criteria may be stricter when the photograph must remain an exact likeness.
Check the wall before judging the mood
The wall makes the shadow difference easy to see. Follow its edge near the head and shoulder. A direct-flash request that produces several unrelated shadow directions needs another look, even if the face itself seems dramatic.
Then inspect the highlights. Stronger shine can be part of the requested look, but a featureless white patch over the nose or forehead can remove useful facial detail. Review the delivered file at a useful zoom and at its intended display size.
Soft light does not mean a completely flat face. Look for a coherent transition between brighter and darker regions rather than demanding that every shadow disappear. The test should help you choose a lighting character, not force every portrait toward the same finish.
Review likeness in a separate pass
Compare eyes, nose, mouth, jaw, apparent age and hairline with the source at approximately the same scale. Then review shirt neckline, shoulder position and the background. A strong lighting effect can make small changes easier to overlook.
For an exactness-sensitive portrait, return to the original when important features change. A conventional tonal adjustment can preserve the captured pixels, while a new physical photograph can capture a genuinely different light. Choose the method that fits the requirement rather than assuming every change belongs in a generative edit.
The realistic portrait guide covers a broader reference-first process. Apply that review here before moving from a fictional experiment to a real person's image.
Choose the light before adding a period style
Decide whether the hard or soft treatment suits the intended portrait, then add any wardrobe or color direction as another experiment. Keep an accepted comparison version so later changes do not erase the evidence of what the lighting request did.
The 1980s photo guide provides a separate set of period-style choices. Establish the lighting first, then decide whether grain, clothing or print texture actually helps the project.
Download the lighting comparison log below. Record the reference, changed variable, visible result and likeness decision. A useful note such as “hard wall shadow works; skin rendering needs review” is more actionable than “good image.”
Run a bounded comparison in QuestStudio
Use Image Lab with a model and mode that support your image reference. Start each candidate from the same original and keep the requested change small. Save the lighting briefs and acceptance notes in Prompt Lab.
The finished result is a choice you can explain: which source character fits the portrait, which visible details support that choice and whether the edit preserves the person well enough for the intended use.
Download the lighting-comparison worksheet and replace its fictional example entries with your own approved sources.
Frequently asked questions
Should the soft-light edit start from the flash version?
For this comparison, start both from the same original. Editing the first result again would carry its earlier changes into the second candidate.
Does a hard wall shadow prove the edit is accurate?
It supports the requested lighting appearance, but it does not prove likeness or pixel preservation. Review the face and scene separately.
Can soft light still create shadows?
Yes. The transition is generally more gradual. A soft-light request does not need to remove all shape and shading from the portrait.
Were these edits made from a real person's photo?
The source is an original fictional portrait created for this example. Real personal portraits need authorization and their own likeness review.
What if the light looks right but the face changes?
Reject it for a likeness-sensitive use. Return to the source and consider a more controlled edit or a new photograph when exact features matter.