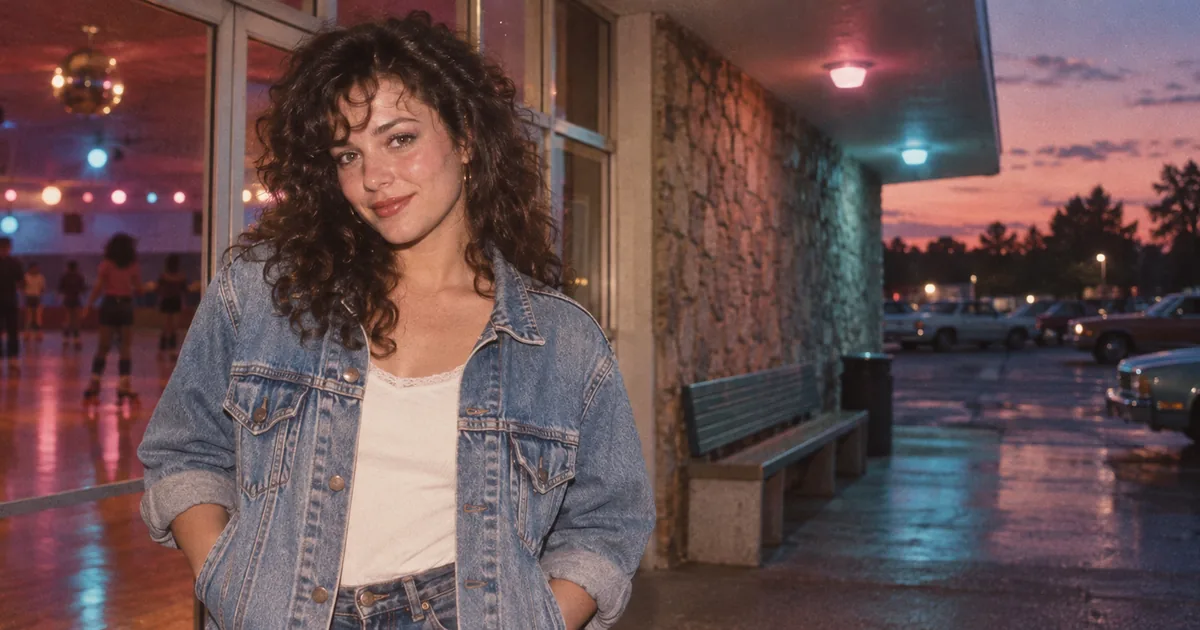

The current 1980s photo trend works best when you can still recognize the person beneath the styling. A faded family snapshot and a glossy mall portrait belong to the same decade, but they need very different instructions.
Download the five original retro prompts · Try a retro photo edit
Editorial guide checked September 13, 2026. Examples and worksheets are original planning material; the hero is an AI-generated illustration, not a model benchmark.
Choose a kind of photograph before choosing the filter
The 1980s AI photo trend is drawing renewed interest, including a rising “1980s ai photo prompt” query in the US Google Trends view reviewed for this guide. Trends measures relative search interest, not the number of people who will see or like your photo. You can inspect the current Google Trends view as the trend develops.
The useful creative choice is more specific than “make it 1980s.” A family snapshot might have direct flash, casual framing, and a slightly faded print. A mall portrait might have soft studio light, a posed expression, and a mottled backdrop. A roller-rink picture might mix flash with colored practical lighting. These are different photographic situations.
The five prompts below are original starting points. The hero is a generated illustration of a fictional person, not evidence that any tool preserved a real person's face. When editing your own image, judge identity against the actual source rather than against the attractiveness of the new portrait.
Prepare a source that gives the edit a fair chance
Use a clear image with the face visible and reasonably even exposure. Avoid a tiny screenshot or a source already covered by a heavy beauty filter. If the eyes, jawline, or hairline are unclear, the model has more room to invent details that change the person's appearance.
Choose the crop for the destination before styling. A chest-up portrait is a practical starting point for a profile or social post. A full-body source is better if the clothing and shoes are essential to the idea. Asking a tight headshot to become a full-body fashion photograph adds a large amount of newly invented information.
Use your own image or one you have permission to edit. Keep the unedited original. In your chosen editor, select a mode that accepts a source photo rather than generating a new person from text. In QuestStudio, begin in Editor Lab and check the selected model's input controls.
1. Direct-flash party portrait
Use this look when you want an informal portrait that feels like a photograph someone took at a real gathering. The background should provide context without becoming a glowing fantasy scene.
If the result looks too polished, reduce the fashion language before adding more damage. An ordinary expression and simple room often communicate “snapshot” more effectively than scratches and heavy blur. If flash creates a pale mask on the face, ask for controlled highlights and retain the source's facial contours.
2. Soft mall-studio portrait
This option works for a deliberately posed photograph. Give the backdrop one job: support the face. It should not compete with hair, jewelry, or clothing.
A second floating face is a recognizable retro trope, but it makes the composition more complicated and can distract from resemblance. Get one convincing portrait first. Add elaborate effects only if the project actually calls for a playful studio parody.
3. Sun-faded outdoor print
Choose this for a relaxed daytime image. The warmth should belong to the light and print finish, not to an orange layer covering every color.
If the image becomes muddy, remove “faded” for one test and establish a clean color balance. You can add a small amount of fading later. A strong period impression does not require sacrificing the information that makes the photograph recognizable.
4. Family-album living-room snapshot
This look depends on an ordinary environment and unforced composition. It is a good option when the emotion matters more than a dramatic fashion transformation.
Do not ask the tool to invent family members if the purpose is to restyle an existing person. A simple photograph can suggest an era without creating a false personal history. When sharing an edited family image, describe it as a retro edit so viewers understand what they are seeing.
5. Roller-rink portrait at dusk
This is the most colorful option in the set. The key is to separate the subject's flash exposure from the background's practical lights. That gives you color without turning the face into a neon sculpture.
If the background overwhelms the face, reduce its brightness and saturation. If the person stops resembling the original, temporarily return to a neutral background and test identity preservation on its own. The environment should be the final layer you approve, not an excuse to accept a different face.
Keep photographic texture separate from video damage
Film grain, faded print color, soft focus, and direct-flash falloff describe different aspects of a photograph. Scan lines, tracking errors, and tape dropout describe a video aesthetic. You can intentionally combine them, but doing so creates a stylized collage rather than a straightforward photographic look.
For a believable still, start with one texture treatment. Review at normal display size before adding another. Heavy grain can hide facial detail; aggressive blur can erase the eyes; large artificial scratches can become the first thing a viewer notices.
A useful progression is composition, identity, light, color, then texture. If the composition is wrong, more grain will not fix it. If identity is wrong, a convincing print finish will not make the result a successful edit of that person.
Use a two-pass identity check
First compare the original and edited image side by side at the same size. Check eye spacing, brows, nose, mouth, jawline, hairline, and any visible marks. Do not accept a changed feature merely because the new version is flattering.
Then view the final crop at its real social-post or profile size. The person should remain recognizable without zooming in. Check that hair, ears, and shoulders survive the crop and that the background does not make the face difficult to read.
If one feature changes repeatedly, simplify the requested transformation or use a more suitable editing mode. Avoid endlessly repeating “exact same face” while changing the source, pose, lighting, and hairstyle in every attempt. Preserve the accepted parts and give each retry one visible problem to solve.
Save a small set that tells one visual story
For an instant-print set, use the AI Polaroid prompt and three-photo layout to keep the treatment consistent and assemble the borders without redrawing an approved face.
For a carousel, choose one look and apply it across a few images with consistent color and texture. Five unrelated retro filters can make a set feel less intentional than three coherent photographs. Keep the strongest frame as the reference for later edits.
The downloadable prompt sheet contains all five starting points and the identity checklist. Open Editor Lab with an authorized source, choose the photographic situation that fits the image, and save the final prompt beside the accepted edit. That gives you a reusable style without losing the person who made the photograph worth editing.
Frequently asked questions
What should a 1980s AI photo prompt include?
Specify the photographic setting, light, clothing direction, print or film finish, composition, and the identifying features to preserve from the uploaded image.
Why does the edit look like cyberpunk?
Strong neon, futuristic language, extreme contrast, and glowing backgrounds can overwhelm the period reference. Start with ordinary flash photography or a simple studio portrait.
Should I add a VHS filter?
Only when you want a frame from consumer video. VHS defects describe a different medium from a photographic print and usually confuse a still-photo brief.
Can these prompts preserve my face perfectly?
No prompt guarantees exact identity. Compare the result with the original and reject changes to facial geometry or identifying details.