
If you have ever tried to enlarge a small image, you already know the problem: it gets blurry fast.
An AI image upscaler solves this by increasing resolution while rebuilding detail, reducing noise, and improving clarity so your image still looks natural.
This guide covers:
- what image upscaling actually does
- when to use 2x, 4x, or higher
- how to avoid the most common "AI artifacts"
- practical workflows for product photos, profiles, old photos, and content thumbnails
QuestStudio includes an Image Upscaler inside the Magic Editor, alongside tools like Background Remover and Photo Restorer, so you can go from low-quality input to a clean final asset in one workflow.
QuestStudio's Magic Editor combines image upscaling, background removal, and photo restoration in one workflow. Open Magic Editor →
What is an image upscaler?
An image upscaler increases the pixel dimensions of an image, for example from 1000×1000 to 2000×2000 (2x) or 4000×4000 (4x).
Traditional resizing stretches pixels. AI upscaling predicts missing detail and reconstructs edges and textures so the enlarged result looks sharper and more realistic.
When should you use an image upscaler?
Product photos (Etsy, ecommerce, ads)
Upscale helps when your original photo looks soft after cropping, removing a background, or placing it into a listing template.
Thumbnails and social content
If you crop in tightly for a YouTube thumbnail or a short-form cover image, upscaling helps keep faces and edges crisp.
Printing
Printing needs more pixels. Upscaling can help prepare images for larger print sizes, especially when your original file is small.
Old photos and compressed images
Older photos often have noise, blur, or compression artifacts. The best results usually come from restoring first, then upscaling.
Upscaling vs enhancing: what people actually mean
Many tools combine upscaling with enhancement such as denoise and sharpening.
In real terms:
- Upscaling makes the image larger.
- Enhancement makes the image cleaner, sharper, and more usable.
Most users want both, but the key is to apply them in the right order.
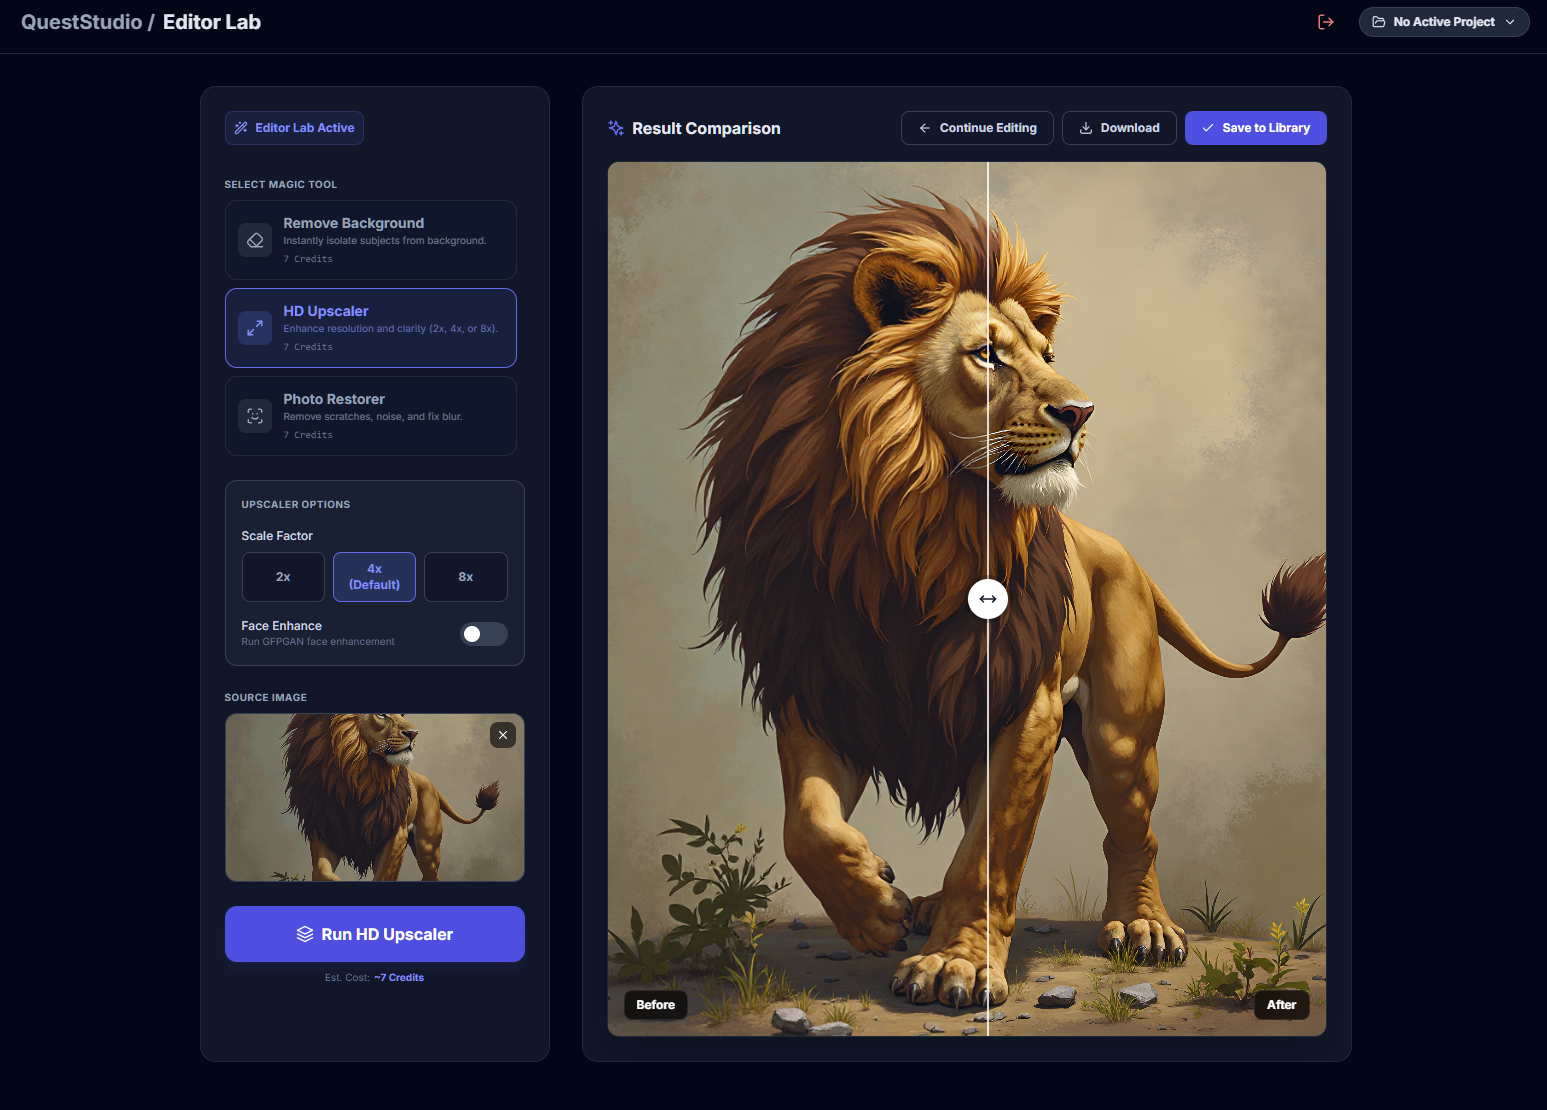
How to upscale an image in QuestStudio
Step 1: Start with the best version of your file
Before you upscale, use the highest-quality source you can find:
- original photo instead of a screenshot
- PNG instead of a heavily compressed JPG when possible
- avoid re-downloading from social platforms if you can
Step 2: Decide the target size you actually need
Use simple rules:
2x: best for mild improvement, social, light cropping, general clarity
4x: best for heavier cropping, larger layouts, and more flexibility
8x: maximum upscaling for extreme enlargements, use when you need the highest resolution possible
Step 3: Upscale
Run the upscaler and inspect the result at 100% zoom:
- edges (jawline, product borders, text)
- fine textures (hair, fabric, wood grain)
- flat areas (skin, sky, backgrounds) for "plastic" smoothing
Step 4: If the image is old or damaged, restore first
If your image is noisy, faded, or low-detail, you usually get better results by restoring first, then upscaling.
Step 5: Export with the right format
- Use PNG for graphics, logos, screenshots, and anything with text.
- Use JPG for photos where file size matters.
Common upscaling mistakes that ruin quality
Mistake 1: Upscaling a tiny, heavily compressed image and expecting miracles
Upscalers help a lot, but if the input is extremely low quality, you may need restoration and careful expectations.
Mistake 2: Over-upscaling when 2x would have been enough
Bigger is not always better. Over-upscaling can create fake-looking textures, especially on faces.
Mistake 3: Upscaling text-heavy images without checking for artifacts
Text and logos can get wobbly or smeared if the model tries to "paint" detail.
If your image contains text:
- • prefer PNG input
- • inspect letters at 100% zoom
- • consider lighter scaling if letters start to distort
Mistake 4: Confusing "4K" with "4x"
Some tools market "4K / 8K / 16K," but what matters is your final pixel dimensions. Example: 1000×1000 at 4x becomes 4000×4000. That is already larger than many typical "4K width" needs.
Mistake 5: Using a creative upscaler when you need faithful results
Some upscalers are designed to add or reimagine detail, which can be great for art, but risky for product accuracy and faces. If accuracy matters, aim for faithful upscaling.
Best workflows by use case
Workflow: Make product photos look sharp after background removal
- Remove background
- Place on a clean solid background
- Upscale to regain crisp edges
- Export PNG or high-quality JPG
Why it works: cutouts often soften edges, so upscaling after cleanup improves the final polish.
Workflow: Fix a blurry profile picture
- Restore lightly if the image is noisy
- Upscale 2x or 4x
- Inspect skin texture and hair edges
- Export
Goal: natural clarity, not "over-sharpened" skin.
Workflow: Upgrade a screenshot for a thumbnail
- Use PNG input if possible
- Upscale 2x
- Check text edges and UI lines
- Export PNG
Workflow: Restore and upscale an old photo
- Restore first to reduce damage and noise
- Upscale 2x or 4x depending on target use
- Inspect faces and fine details
- Export
FAQ: Image upscaler questions people ask most
What is the best upscale setting?
Will upscaling change my image?
Can I upscale images in batches?
Why does my upscaled image look fake?
What format should I use?
Final thoughts
Image upscaling is one of the highest leverage edits you can make because it turns "almost usable" images into crisp, professional assets.
The key is choosing the right scale, keeping results faithful when accuracy matters, and using restoration when the input is weak.
If you want a simple workflow, QuestStudio's Magic Editor lets you upscale images, remove backgrounds, and restore photos in one place so you can finish the entire asset instead of stopping at "bigger."