
Pre-wedding photoshoot prompts work better when they lead to a shoot plan you can carry to a location. A collection of attractive scenes is only the beginning. The useful version tells you which outfits, poses, backgrounds and light conditions belong together, and what to do when a location or the weather changes.
Use this workflow to build a six-frame moodboard for an adult couple, then turn it into a practical route. The examples are planning concepts. They do not imply that either person visited the generated location or wore the pictured outfit in a real photograph.
Agree on what the photographs are for
Start with the output. A wide image for a wedding website, a vertical save-the-date portrait and a private album may require different framing. Ask the couple which use matters most and which photographs must leave space for names or a date.
Choose a mood in ordinary language: quiet city walk, relaxed garden afternoon or a dressier architectural portrait. Then make two decisions that limit the shoot. In this example, the couple chooses two outfits and two nearby locations. Adding a third location means giving up time elsewhere, not simply adding another row to the moodboard.
Write down any non-negotiables: comfortable shoes, a garment that must remain unchanged, privacy, accessibility or a specific family item. A prompt should work within those choices rather than replace them with a generic luxury scene.
Prepare two identity references and an outfit note
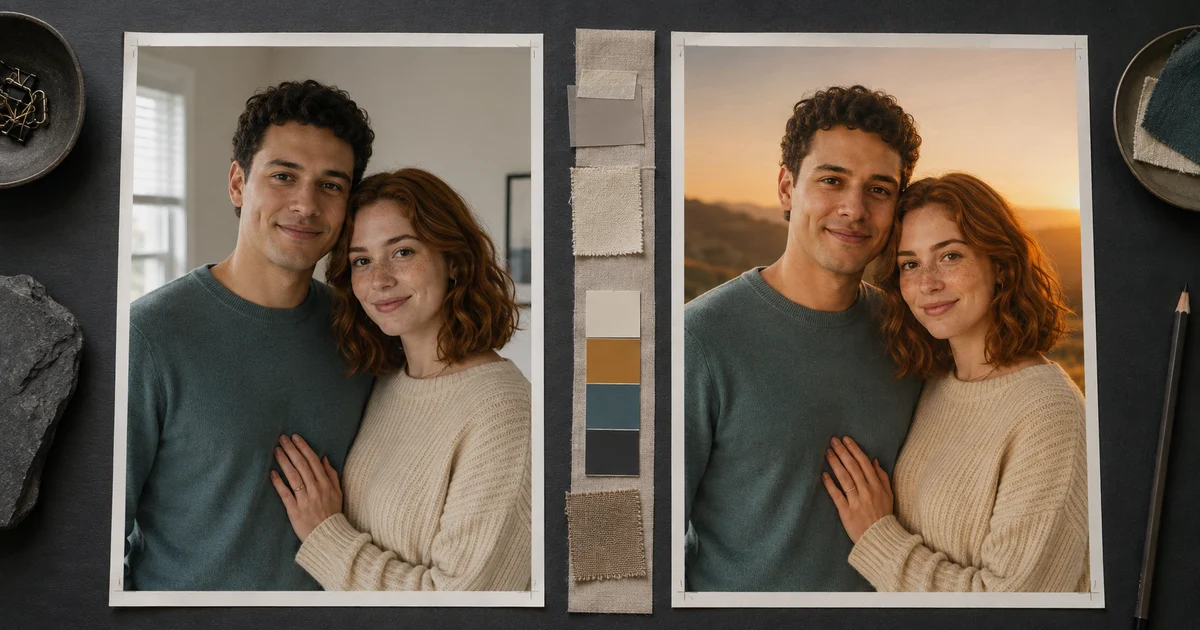
Use a clear reference for each person, plus a shared photograph if it helps explain their height difference and comfortable spacing. Avoid using a heavily filtered selfie as the only identity reference. Name the references A and B so later instructions can identify the correct person.
An outfit note should describe real garments the couple can bring. “Cream jacket, dark trousers and brown shoes” is more actionable than “timeless editorial fashion.” If the image invents a different neckline or an impractical train, correct the concept instead of treating the garment change as a styling recommendation.
The couple photo editing guide is useful when the task is to edit an existing couple image. Here, the reference photographs anchor a planning concept, and the final deliverable is a route and shot sequence for a photographer.
Give the six frames different jobs
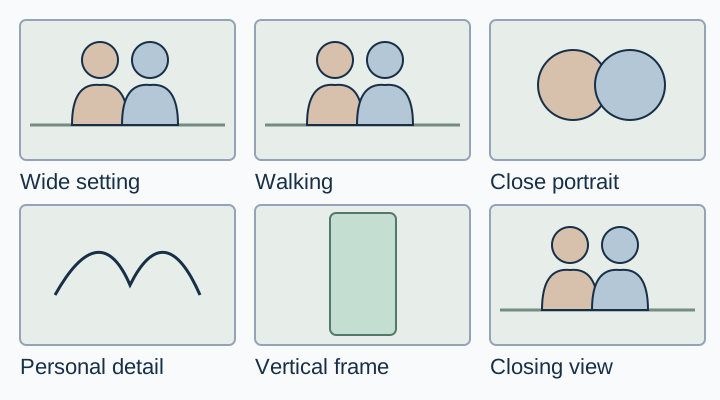
Plan an establishing view, a walking interaction, a closer portrait, a quiet detail, an alternate orientation and a closing frame. Those roles create variety without asking the couple to learn six unrelated poses.
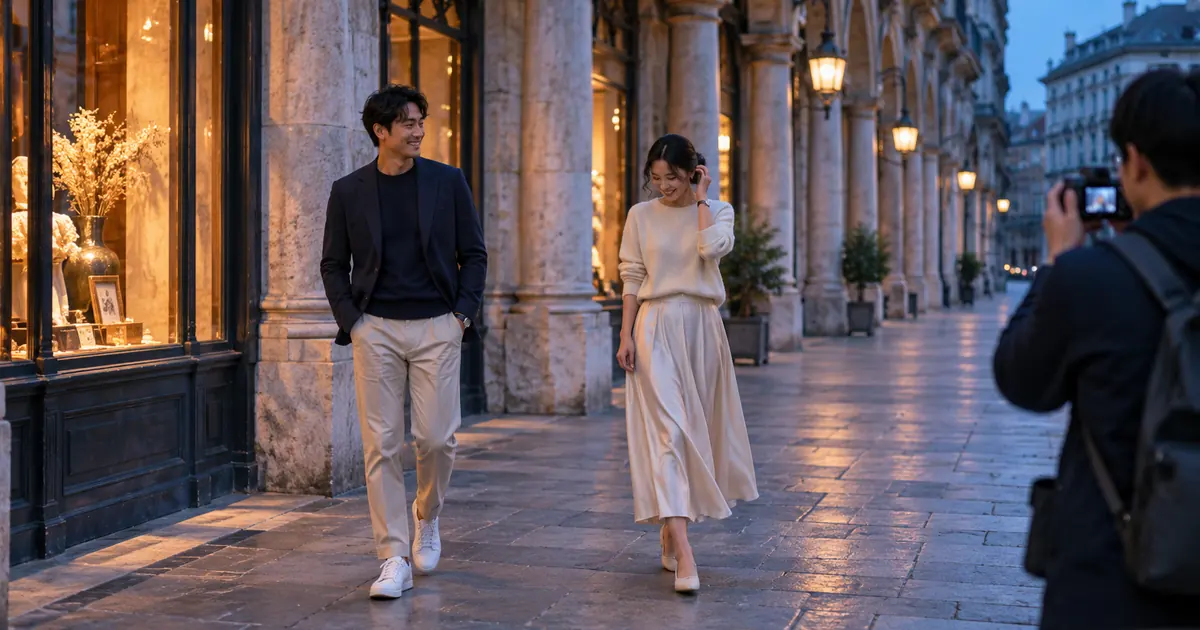
For the fictional arcade location, the establishing view shows the columns and both people full length. The walking frame uses the same area with a small change in direction. The close portrait can happen under the same covered walkway. That is three useful frames without a location move.
Do not use a pose that only works because the generated bodies bend unrealistically. Check feet, hand positions and the space between faces. A pose should be comfortable to explain and repeat in a real setting. Save the approved idea with a short instruction such as “walk slowly toward the open end of the arcade, looking at each other.”
Write a moodboard prompt with physical constraints
Make one concept first. Review the identities and wardrobe, then ask for the remaining frames within the same direction. Asking for six separate styles is a quick way to create six shoots you cannot complete in one afternoon.
Use the authorized adult references A and B to develop a pre-wedding shoot concept. Preserve both people's recognizable features, skin tones, proportions and relative height. Use our actual outfits: [describe them]. Setting: a quiet covered stone arcade that we can access. Plan a wide establishing frame, a walking interaction and a closer portrait in the same area. Natural spacing, comfortable poses, one consistent light direction. Do not invent a wedding ceremony, change the garments or add props. Treat the images as moodboard concepts for a real photographer.Keep the first request small enough to diagnose. If the architecture is wrong, fix the location description before changing the expressions. If one face drifts, return to its reference. Preservation language is a review instruction, not a guarantee that the output will match.
Turn the board into a route
For each approved frame, record the location, outfit, orientation and light you need. Add the time to walk between positions, change clothes and prepare a backup. Use a real map or a location visit to confirm distances. A model cannot tell you that a gate is open merely because it appears open in a concept image.
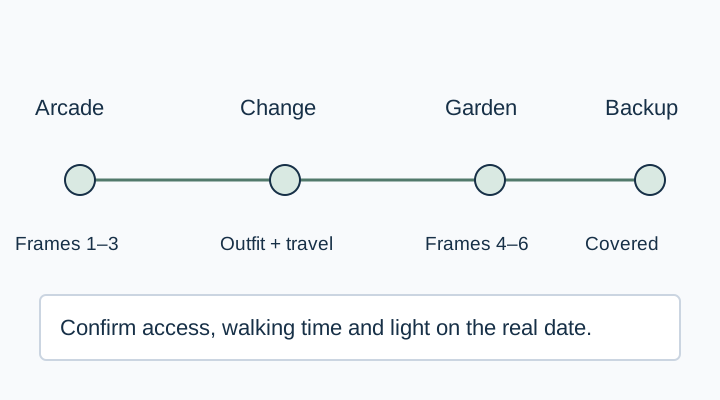
Work with the photographer to choose timing. The board can ask for soft open shade or blue-hour atmosphere, but actual light depends on date, location, weather and surrounding buildings. Keep those observations in the plan rather than relying on a universal “best hour.”
An efficient route often uses the same background in more than one way. Turn the camera, change the distance or use the opposite orientation before moving the couple. A coherent set does not require a new landmark in every photograph.
Prepare one realistic fallback
Choose a covered location or an indoor option with confirmed permission. Adapt the shot roles to that space. A wide architectural frame may become a doorway portrait, while the close interaction can remain almost unchanged.
Do not promise the same appearance in different weather. Instead, decide what matters: recognizable people, approved clothes, natural expressions and enough framing variety for the intended uses. Those are easier to preserve than an exact beam of sunlight.
Keep a short bag list alongside the plan: the garments, comfortable shoes, water and any approved personal item. Avoid bringing styling props merely because an image generator added them. The best fallback removes decisions when conditions become difficult.
Review the board with both people
Ask each person whether the poses and clothing feel comfortable. Check whether the references preserve age, skin tone and body proportions. Remove images that change someone into a different version of themselves even if the scene is attractive.
Then ask the photographer which ideas are feasible at the actual location. Their feedback may change the order, camera position or number of planned frames. Record those changes in the worksheet rather than keeping the approved plan in several disconnected messages.
Organize the handoff in QuestStudio
Use Prompt Lab to keep the approved identity instructions and frame roles together. Image Lab can help explore a restrained concept from your references; inspect the result before adding it to the board.
Download the shoot-plan worksheet and give the photographer the six approved frame roles, outfit note, route and fallback. For individual wedding-image concepts, the broader wedding photo guide provides a separate starting point. This plan is finished when both people and the photographer can understand what happens next at the location.
Download the shoot-plan worksheet and replace its fictional example entries with your own approved sources.
Frequently asked questions
Are pre-wedding AI images a replacement for a real shoot?
They can help explore ideas and communicate a direction. Keep generated concepts distinct from photographs that document a real place, outfit and moment.
Do both people need reference photos?
Use a clear authorized reference for each person. A shared reference can also help explain relative height and comfortable spacing.
How many locations should the plan include?
Choose a number that fits access, travel, clothing changes and the photographer's schedule. The worked example uses two nearby locations to keep the plan manageable.
What if the suggested pose looks awkward?
Reject it or simplify it. Ask the photographer for a comfortable action, such as walking or turning toward each other, instead of copying distorted anatomy.
Should the moodboard show final names and dates?
Keep factual text editable and verify it separately. The board mainly establishes framing and atmosphere; final invitation or website text belongs in the design file.