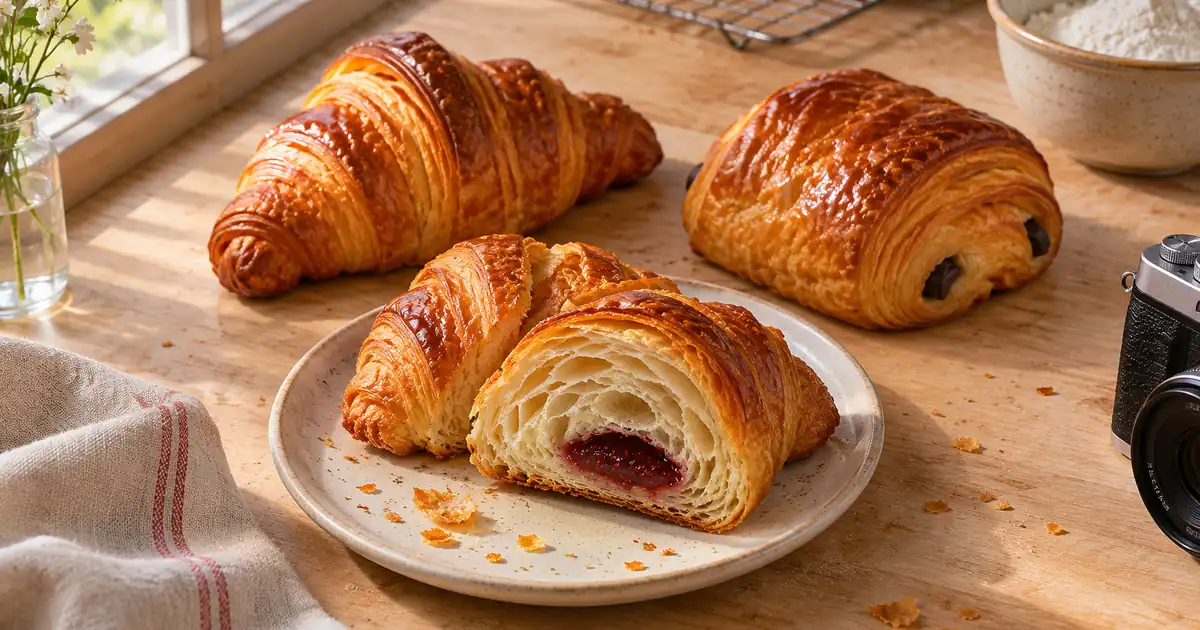

A croissant can look delicious and still be the wrong croissant. An image edit may add another filling layer, enlarge the portion or turn a soft center into a crisp spiral. For bakery menu photography, the real pastry should decide what stays in the picture. Use AI for a supporting setting only after you have a clear record of what the customer receives.
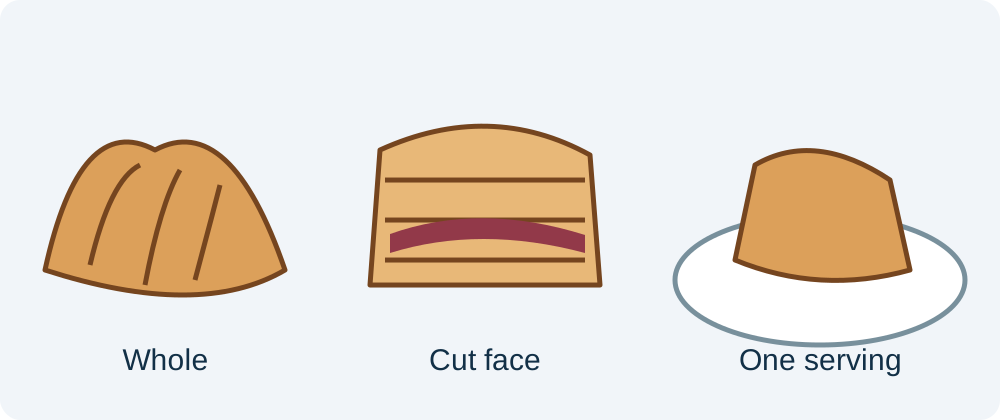
Start with three photographs of one actual serving: a whole view, a cut view and a view beside its usual plate or wrapper. Keep the original files. Then make one restrained scene edit and compare it with all three references. A beautiful background does not compensate for a changed filling.
Open Image Lab with a permitted source, or download the bakery portion review sheet before preparing a full menu.
Give the pastry a clear menu identity
Write down the product name, selling unit, included toppings and serving format. “Almond croissant, one piece, sliced for illustration” gives the reviewer a better starting point than “premium bakery breakfast.” If the item is sold whole, a cut photograph should help explain the filling without suggesting that two pieces are included.
Choose an ordinary representative serving. A specially enlarged pastry can create the wrong expectation even when the photograph itself is real. Ask the person who prepares the item which details vary naturally and which define it. A little variation in crust shape may be normal; a different filling or doubled garnish is a different offer.
Capture the whole, the cut and the serving
Use the same pastry for the first two views when practical. Photograph the whole item before cutting it. Make the cut cleanly enough to show the interior without rearranging it into a structure the bakery cannot reproduce. Add the serving view before the filling dries, cream melts or fruit shifts.
Keep the light and camera position steady. Include enough detail to distinguish crust from filling, especially where both have a similar color. If a dark interior is unreadable, retake it with gentler light. Asking a model to reveal a hidden filling invites it to invent one. A prompt cannot recover product evidence that the source never recorded.
Work through one filled pastry
Our fictional example is a rectangular pastry with a single visible fruit filling and a light sugar finish. The café sells one piece on a small plate. The supporting image is intended for a menu card, so the pastry needs to remain recognizable when the image is small.
First, choose the whole view as the editing source. Keep the cut view available for review, rather than asking the image system to merge both views. Define a plain surface, soft side light and enough room for the menu crop. Leave the plate and pastry relationship intact. Moving the item into a giant bowl would make the serving harder to judge.
Use the supplied pastry photograph as the product reference. Create a quiet bakery menu setting with soft light from the left and a simple pale surface. Preserve the pastry outline, crust folds, visible filling, sugar finish and one-piece serving. Keep the original plate relationship. Do not add fruit, cream, utensils or a second pastry. Leave room around the complete serving.
This is an editing brief, not a guarantee that the product will remain unchanged. Compare the candidate with the source before judging whether the scene feels inviting. If you need a cutaway image, work from the actual cut photograph in a separate edit.
Review layers before judging the styling
Inspect the outside edge, the cut edge and the filling boundary at a useful zoom. Count obvious structural features only when they are actually visible in the reference. Do not turn an indistinct crumb into a requirement for a made-up exact layer count. The useful question is whether the edit has introduced a different construction.
Then inspect the serving as a whole. Has the pastry become thicker? Does the plate appear smaller? Has a new pool of sauce increased the apparent filling? These changes can misrepresent the portion without changing the product's name. Record a concrete defect such as “new cream layer under the fruit,” rather than “looks too AI.”
Use the sheet to mark each zone as accepted, rejected or uncertain. Uncertain details should return to the source photographer or bakery owner. They should not become accepted simply because another generated image repeats them.
Make the menu and delivery crops separately
A wide menu banner and a square delivery tile need different framing. Derive both from the accepted image, then check them at their actual display size. The cut face may disappear in the smaller crop; an attractive crumb detail may make the product look like a different pastry.
Keep room around the serving until the destination crop is known. Follow the separate restaurant menu crop workflow for placement decisions. That guide handles sizes and framing; this one establishes whether the pastry itself survived the edit.
Repair the smallest failed region
If the setting is good but the filling changed, return to the accepted source and protect the food while revising the background. Do not keep feeding a rejected pastry into new edits. Each attractive revision can move farther from the actual serving.
When the crust is too dark to inspect or the cut surface is hidden, retake the photograph. When the portion is accurate but the crop is cramped, adjust framing. When the photograph is correct but the menu description is wrong, fix the description with the bakery. Different problems require different repairs.
How QuestStudio helps
Use Image Lab to explore a supporting scene from the actual product reference. Keep the first brief narrow, save the accepted result and compare it beside the original. The full menu consistency workflow becomes useful after this single item passes review.
For additional food styling directions, consult the food photography prompt guide. Treat those directions as creative options. Ingredient, portion and preparation information should come from the bakery. Finish with one approved menu image and its source record before expanding to the next item.
Frequently asked questions
Can I generate a bakery menu image without a real photograph?
You can develop a fictional concept, but an image representing an actual menu item should start with evidence of the real serving. A generated pastry cannot establish the bakery's ingredients or portion.
Should I show the pastry cut open?
Use a cut view when it helps explain the filling. Photograph a real cut serving and clarify the selling unit so the image does not suggest that extra pieces are included.
What if the edit makes the filling more attractive?
Compare it with the actual product. Reject added layers, fruit or cream that change what is sold, even when the result looks more appealing.
Can one image work for every delivery platform?
Start from an accepted master, then review each destination crop. A serving can be accurate in the master and misleading after a tight crop removes the plate or part of the pastry.
How many pastries should I test first?
Begin with one difficult item whose filling and portion are easy to verify. After that passes, test different shapes before applying the treatment to the complete menu.
Try one reviewed production step
Bring the approved source and the smallest useful brief to Image Lab. Compare the result with your reference before expanding the project.