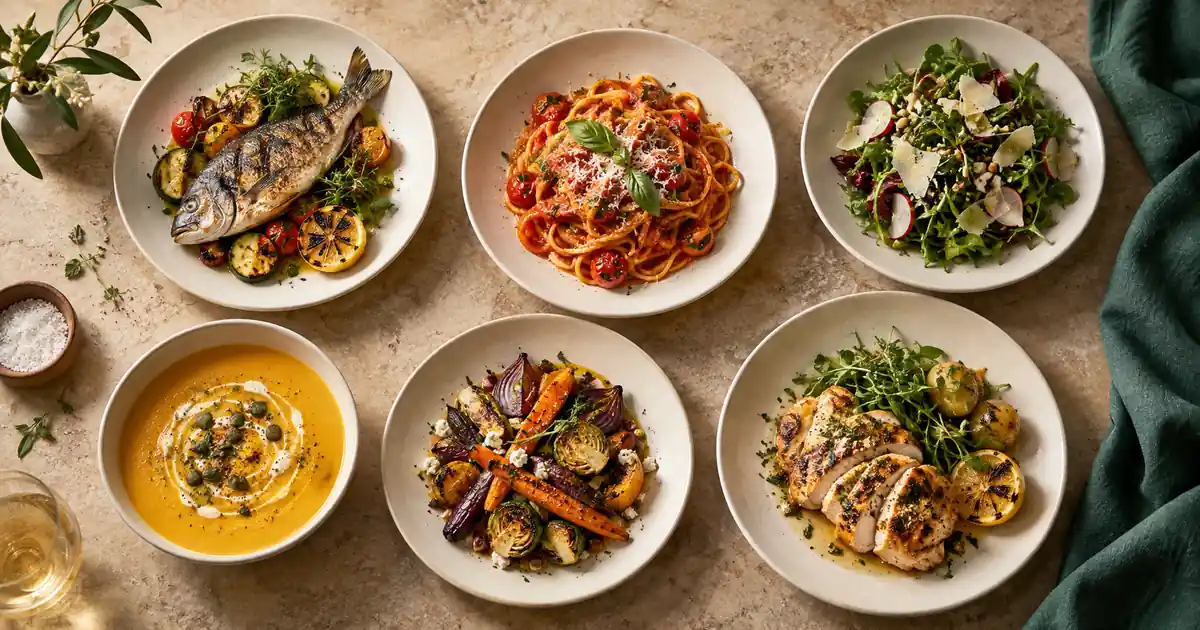

One attractive food photo is easy to approve. Twelve photos are harder: the soup looks like lunch by a window, the pasta looks like a studio advertisement, and the dessert appears to come from a different restaurant. AI menu photography works best when you treat the menu as one photographic set. Start with the food you actually serve, then define the treatment that every dish must share.
Download the 12-dish menu acceptance worksheet · Try one menu photo in Image Lab
Begin with a menu record, not an image prompt
Write down the twelve dishes before editing anything. For each, record the serving vessel, portion, main ingredients, garnish, and what the customer receives. A bowl of tomato soup with one slice of bread must remain that meal after editing. The record gives the chef and the person making the images a shared reference.
Use a simple identifier such as M01 for soup and M02 for pasta. Attach it to the source photo and the worksheet. Names alone become confusing when the lunch and dinner versions differ. Include a short note for variations, such as sauce served separately or an optional topping. Do not let a generator silently decide those details.
Choose the destination now. A printed menu, a delivery listing, and a vertical social story need different compositions. Read the destination’s current image requirements and decide which crop is the master. Keep enough space around the plate to make the other exports without cutting off food.
Capture real dishes under repeatable conditions
Place the food near one soft light source and keep the camera position stable. A tripod helps, but a marked phone position can also make a small restaurant shoot more repeatable. Turn off conflicting room lights if they give one side of a white plate a different color. Photograph a clean plate and a neutral surface reference before the food arrives.
Shoot the dish when it looks like the serving you intend to sell. Wipe distracting marks from the rim, check that the expected garnish is present, and photograph the entire plate. Capture another angle if the food’s height matters. A tall sandwich may read poorly from directly above even though an overhead angle suits a flat pizza.
Take a useful source photograph before expecting AI to help. Severe blur, clipped highlights on sauce, and hidden ingredients are not styling decisions. If the photo fails to show what matters, retake it while the dish is available. Reconstruction introduces uncertainty that a clear source could have avoided.
Define the visual rules that make the set coherent
| Decision | Example rule | Acceptance check |
|---|---|---|
| Surface | Warm light stone, no patterned cloth | Same hue and visual texture across the set |
| Light | Soft window light from upper left | Plate shadows fall in the same direction |
| Plate scale | Similar apparent size in the menu tile | No dish dominates because it was cropped closer |
| Color | Natural white plates and recognizable ingredients | Tomatoes stay red; greens avoid neon saturation |
| Props | One approved cutlery treatment or none | No unexplained drinks, sides, or garnish |
Choose a look that the restaurant can maintain. A complex arrangement of scattered herbs, tableware, candles, and steam creates more variables to review. A restrained background lets the food carry the image and makes a future addition easier to match.
Save a single approved style reference with the written rules. The reference should define treatment, not replace the identity of each dish. If you supply a soup photo as a reference for pasta, explicitly separate the surface and lighting from the food contents. Some tools support multiple references; others do not. Check the selected model before planning around that capability.
Test three difficult dishes before editing twelve
Choose a pilot that spans different visual problems: glossy soup, textured bread, and a plated main with several components. Three similar pasta dishes are a weak test because they do not expose how the treatment behaves on reflections, crumbs, height, and mixed colors.
This is a starting brief, not a universal command that locks the food. Compare each candidate to its own original. Check the number of bread pieces, the shape of the protein, the sauce boundary, and the plate rim. A result can follow the background instruction while quietly changing the meal.
Put the three candidates beside one another at the intended menu size. If one looks colder or more dramatic, revise the treatment now. Do not approve three images independently and assume they form a set. The pilot is finished only when both the individual food facts and the shared photographic style pass.
Expand the set with a contact-sheet review
Work through the remaining dishes using the same approved treatment and identifiers. Keep the source, candidate, and accepted version in separate folders. A filename such as M04-pasta-v02-candidate prevents a promising experiment from being mistaken for the final photo. Record any instruction changes so a later correction can be explained.
Build a contact sheet in the order customers will see the menu. Review apparent plate size, spacing, background color, shadow direction, and overall brightness. Then inspect every accepted image at full resolution. The contact sheet catches inconsistency; the close review catches melted cutlery, duplicated garnish, broken plate edges, and strange food texture.
Use two approvals when possible. The person responsible for the food checks whether the meal is accurate. The person responsible for the menu checks the presentation and export. They can be the same person in a small business, but keeping the two questions separate makes the review more reliable.
Fix the mismatch that caused the failure
Suppose eleven images have neutral cream plates but the soup image has a strong orange cast. Do not warm all eleven to hide the mismatch. Compare the soup source and candidate: was the source lit by a warm ceiling light, or did the edit introduce the color? Correct that specific cause and review the soup beside its neighbors again.
A shadow mismatch is different. If the accepted style uses light from the upper left but one plate casts a shadow toward the upper left, changing color will not fix the scene. Revise the background and grounding shadow while protecting the dish. If the editor cannot isolate that change cleanly, a simpler surface may be the better production choice.
Avoid forcing all foods into identical exposure. White rice and dark stew naturally differ. Consistency means they appear photographed under the same conditions, not that every image has the same average brightness. Preserve the food’s actual color and texture even when a more saturated version looks dramatic.
Add the next special without restyling the menu
A week later, photograph the new dish with the same capture notes. Place its candidate between two approved menu images, rather than judging it in an empty editor. Use the saved reference and check the same plate scale, background, lighting, and crop. Add one row to the worksheet and retain the approval date.
If the new dish needs a different angle to be understandable, make that an intentional exception. A tall layered dessert may need a lower view while the rest of the menu is overhead. Keep the surface, color treatment, and light direction consistent so the exception still belongs to the same restaurant.
Export copies for each destination from the approved master. Check the actual tile after upload: automatic cropping can remove a side dish or make the plate appear too large. Retain the untouched source and the full-size accepted file so the next menu redesign does not begin from a small compressed thumbnail.
How QuestStudio helps with the first photo
Open Image Lab and choose a model that supports the source-image workflow you need. Begin with one authorized dish photo and a narrowly defined edit. Approve its food accuracy before using it as a style reference for the rest of the set.
For a broader starting point, the food photography guide covers individual scenes. This workflow adds the production record and full-menu review. Provider pages such as MenuCapture’s food photography overview illustrate the category, but an attractive demo is not evidence that your twelve dishes will require no corrections.
About this guide
This is an editorial production method, not a claim that every AI model can perform every step. Examples and worksheets are illustrative; no measured generation results are implied. The hero is an original AI-generated illustration.
Frequently asked questions
Can I make AI menu photos without photographing the dishes?
You can generate illustrative food images, but they may not represent what the restaurant serves. This workflow uses actual dish photos so portions, ingredients, and presentation can be checked.
Should all twelve dishes use the same camera angle?
Use a consistent angle where it shows the food clearly. A tall dish may need an intentional exception while keeping the same lighting, surface, and color treatment.
What should I check before approving AI food photography?
Compare the result with its source for portion, ingredients, garnish, plate shape, and texture. Then compare it with the menu set for crop, scale, lighting, and color.
How do I make a new menu special match older photos?
Retain the approved style reference and capture notes. Review the new image beside two existing photos and use the same acceptance worksheet before exporting.