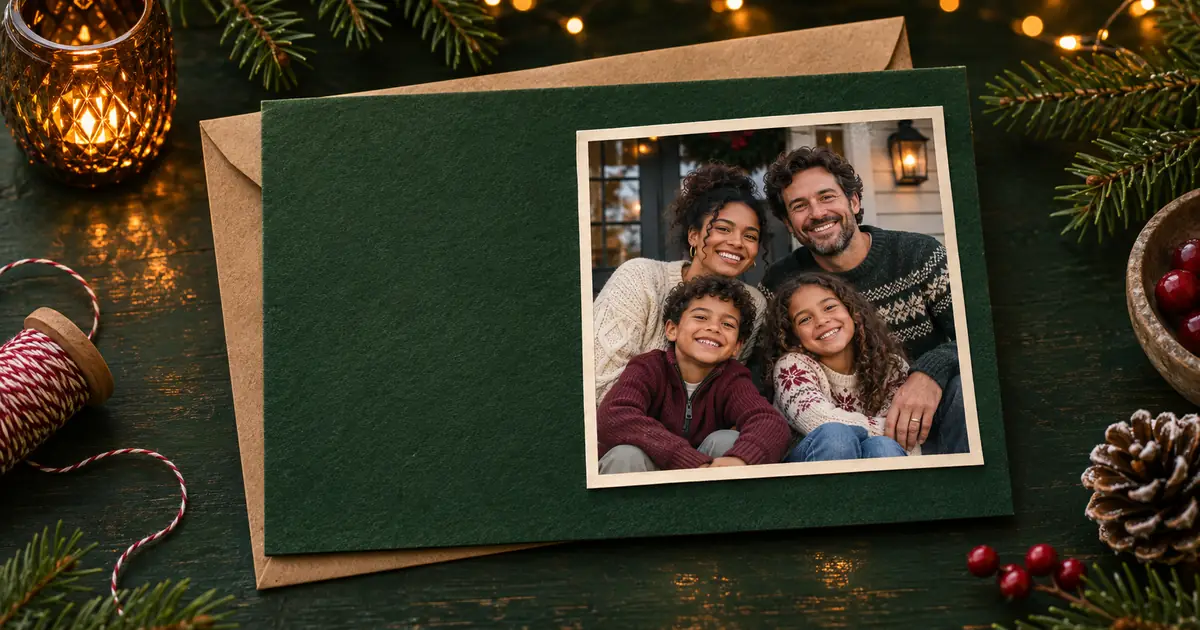

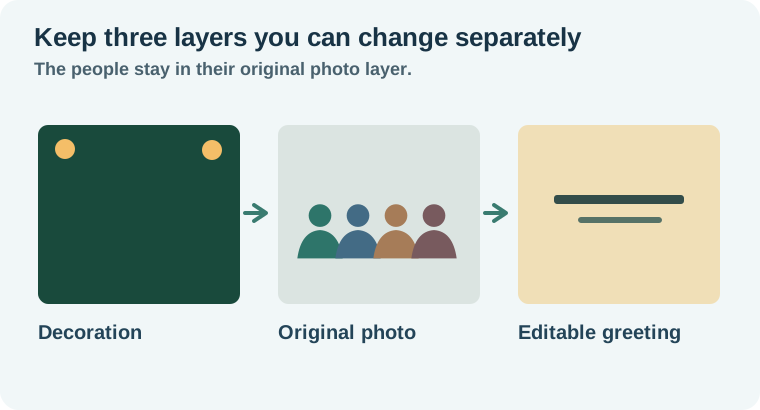
The simplest way to make an AI Christmas card from a real family photo is to use AI for the border or backdrop and place the original photo on top. Type the greeting in your design editor. You get the festive treatment without asking a model to redraw anyone's face, guess the spelling of a name, or fill in the hand hidden behind a shoulder.
Start with a photo everyone recognizes and a card size you can proof. The workflow below gives you two prompts: one for a decorative background and one for a limited scenery edit when a photo needs extra space.
Pick a photo and decide what may change
Choose an image where the people are in focus and the faces are visible. Open the full file and check glasses, hands, hair and clothing around the edges before editing. If two people overlap naturally in the original, keep that overlap. A slightly messy but familiar group photo often makes a better card than a cleaner-looking redraw.
Write down the changes you can approve. For example, replace the decoration around the frame, keep the people and their clothes exactly as photographed, and reserve the lower third for text. Decide whether the original can be uploaded to an outside service at all. When you use the decorative-only route, you can generate the background without sending any family picture to a generator.
If the source is a group photo with a tough crop, the group photo prompt and reference guide gives ways to inspect identity and placement. The card layout still works with the original family photo placed as a separate layer.
Prompt a border you can actually lay out
Begin by making a decoration plate with an open center. Use one strong idea, such as fir and warm lights, or paper snowflakes and a soft blue palette. Ask for more room than you think you need around the photo. A busy band of ornaments at the edge might look good full screen and lose its shape when you crop to the card template.
Create a portrait-format holiday card background with a deep evergreen paper texture, soft amber lights near the top corners, and sparse fir sprigs along the side edges. Leave the center clear for a separate rectangular family photo and leave a quiet cream area near the bottom for a typed greeting. Use soft, even lighting. No people, photos, words, letters, or mockup perspective.
Use that output as a background layer in Canva or another layout editor. Place the original photo above it as a regular image or in a simple frame. Canva's frame instructions show how to adjust the media within the frame. Crop by the photo's subjects first. Move or resize the decoration when it crowds a face.
Use a restricted edit only if you need more space
A photo that is already close to the edge may need extra empty scenery for a wide design. Try extending beyond the existing photo or changing a selected background area. Duplicate the source and use a mask or selection where supported. Keep the people out of the editable area.
Extend the plain wall to the right of the existing photo for a greeting. Match the source wall color and light direction. Keep the original photograph and every person exactly as supplied. Add no people, hands, letters, or objects in the extension.
Review the result at full size beside the original. Compare one person at a time. Check eye shape, teeth, glasses, fingers, and the overlaps where one person stands in front of another. A background instruction alone is not a guarantee. If the edit changes a person, keep the original photo and make the extra room in the card layout instead.
Build a card proof with real dimensions
Suppose you are making a portrait card and the photo is a horizontal porch shot. Place it as a wide inset with a border on all sides. Give the names their own line below the greeting and allow room for longer wording before making it larger. A forest-green background with a cream text area gives you a place for dark type that survives a small phone preview.
Start with the actual printer template if you are printing, or with the final share dimensions if you are sending the card digitally. Check trim, safe area and folds against that destination. Keep faces and type inside the safe area. For a folded card, confirm which panel faces the front when folded. A design that looks right as a flat spread can still have the front and back reversed.
Use the editable text box workflow for names, punctuation and line breaks. Make one export and proof it away from the editor. Check at phone size for a digital version. For print, proof one at the intended size if possible and read the greeting aloud while someone checks the original name list.
Check the photograph before you send it
Count the people in the source and the proof. Check where the frame cuts through a shoulder or edge of a sleeve. A face placed too close to the border can feel pinched even when it technically clears the trim. Look at the darkest clothes against the background and at the contrast behind the greeting.
Keep a version without the names if you want to share the design publicly. Save the family-only version as a separate export. Put the chosen photo, card file and approved export in one folder so the next revision starts from the editable layout. The worksheet is a useful way to record the two versions and catch a greeting left on the wrong one.
How QuestStudio helps
Use Image Lab to try the evergreen background prompt without uploading the family photo. If the decorations leave too little room, revise only the background request and reuse the real photo. The wedding photo workflow is a related reference for handling portraits you want to preserve.
A finished card can be simple. Get the right photo, leave a calm place for the words, and approve the export before sharing or printing.
Download the family holiday card proof sheet.
Frequently asked questions
Can I make the card without uploading a family photo to an AI tool?
Yes. Generate the decoration separately and place the real photograph in your layout editor.
Why did an AI edit change a face?
Some edits redraw pixels outside the requested area. Compare with the original, then use a separate photo layer if any person changes.
Should the model write the greeting?
Type the greeting as an editable text layer so you can proof names, spelling and alignment.
Can I make both print and digital versions?
Yes. Review the crop and text separately against the printer template and the digital display size.
What if the photo feels too small in a portrait layout?
Try a landscape card or a larger horizontal inset before cropping through people to fill a taller opening.