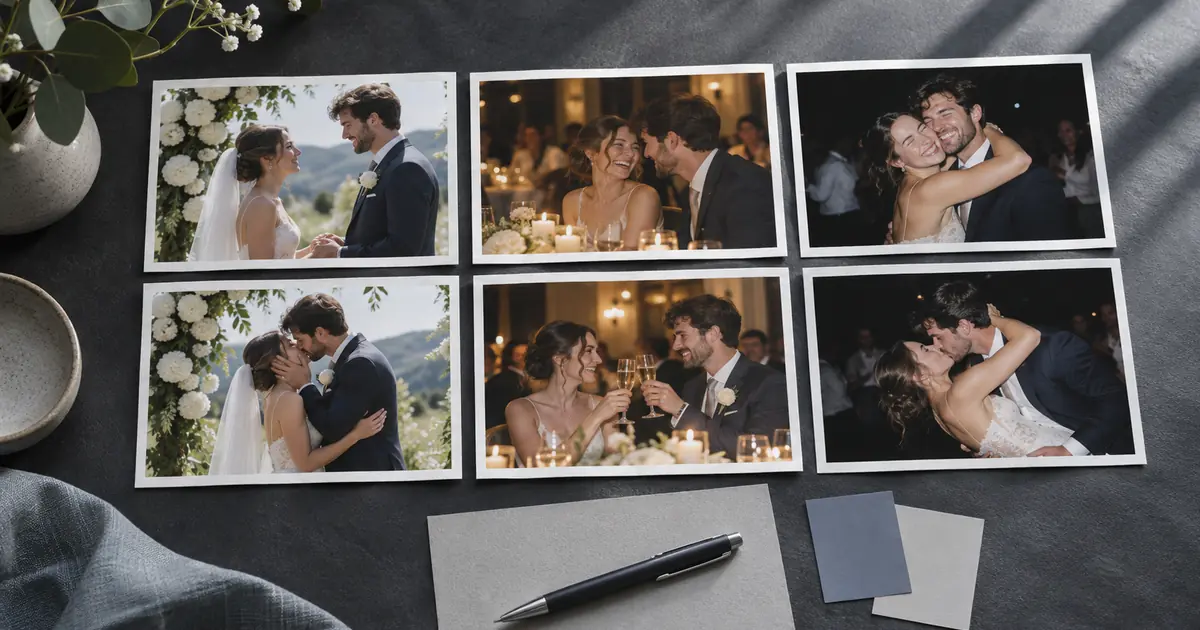

Batch edit wedding photos in groups that share the same light, then review the groups together as an album. Copying one bright outdoor edit across a window portrait, a reception table and a flash photograph can create a consistent mistake rather than a consistent set. Choose a reference frame for each lighting group and transfer only the adjustments that belong to it.
The worked plan here uses fictional file IDs for a small wedding selection. It shows how to organize the edit and catch an unsuitable copy operation. Your originals stay intact, and the final photographs still document the people and event that were actually captured.
Sort by lighting before choosing a look
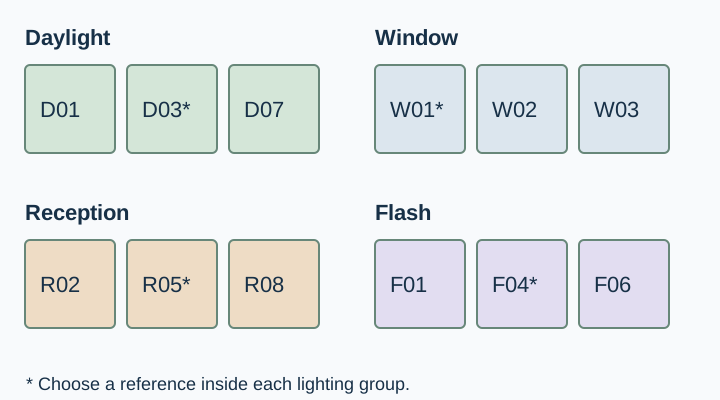
Start with the camera originals and make the first pass about conditions. Useful groups might include open-shade portraits, window-lit preparation, a warm reception room and direct-flash dancing. A scene change can matter more than a timestamp: two photographs taken minutes apart may need different treatment if one person moved beside a colored wall.
Within each group, look for changes in light direction, distance and brightness. Split a group again when those differences make the reference edit unsuitable. Keep a few meaningful groups rather than creating a separate category for every photograph.
The existing wedding photo prompt guide helps with individual creative concepts. Batch correction is a different job: preserve the captured moment while making the real photographs read coherently together.
Pick a reference that represents its group
Choose a sharp, reasonably exposed frame with the important people and fabric visible. Avoid using the most dramatic image as the automatic reference if its backlight or spotlight is unusual for the rest of the group.
For the fictional daylight group, D03 shows both partners under the same open shade as D01 through D08. It is a better starting point than D07, where the couple stepped briefly into a shaft of sun. Put D07 in a separate review position rather than forcing the same exposure correction onto it.
Set the general color direction, contrast and exposure on D03. Inspect skin and the bright garment areas before you move on. A pale dress is not necessarily a neutral color target, and a white-looking fabric can reflect nearby foliage or colored room light. Use a captured neutral reference when one exists instead of guessing from the wardrobe.
Transfer a selected adjustment set
In Lightroom Classic, identify the active photograph before synchronizing. Adobe documents that the active image is indicated by the brighter Filmstrip border. Select the other photographs that belong to its group, use Sync, choose the settings you want to transfer and confirm the synchronization. Adobe's synchronization instructions explain the current workflow.
For a deliberately small first test, use Copy and Paste with selected settings on one other photograph. Adobe's copy-and-paste settings guide describes choosing the adjustment groups rather than transferring everything automatically.
Leave crops, local masks and spot repairs out unless you have a specific reason to transfer them. A crop that suits a close portrait can cut a guest out of a wider frame. A local correction made for one face can land on somebody's clothing in the next picture. Keep Auto Sync off while you intend to change only one image.
Test the copy on a difficult frame
Do not approve the batch because the reference still looks good. Check a second frame with a slightly different angle or brighter fabric. That is where an unsuitable exposure or local adjustment becomes easier to see.
In the example, D03's edit is copied to D05 and D07 as a test. D05 remains a plausible member of the daylight group. D07 needs its own exposure review because of the brighter patch of sunlight. The right decision is to separate the exception, not to weaken the whole group's edit until every image is equally dull.
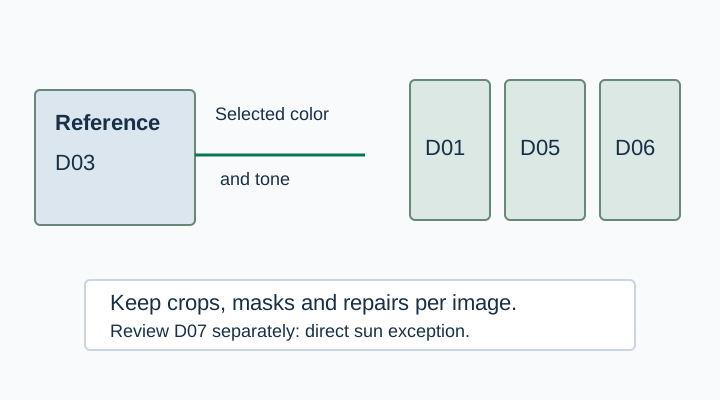
Use a small contact sheet to inspect the group at once, then enlarge the difficult frames. The Photoshop contact-sheet workflow demonstrates the broader idea of reviewing a set together, although its example concerns products rather than wedding photographs.
Match the album without erasing the room
A warm reception does not need to look like a daylight ceremony. The goal is a coherent treatment of people, contrast and color, while preserving the atmosphere each scene actually had. Neutralizing every lamp can remove a meaningful part of the event.
Place a daylight portrait, a window image, a reception frame and a flash picture beside one another. Ask whether the people still look like themselves, whether the bright fabrics retain useful detail and whether the contrast changes feel intentional. Adjust each reference in relation to the set, then recheck the members of its group.
An AI-generated reconstruction is not a substitute for this tonal work on documentary photographs. If you make a creative wedding concept, keep it in a separate project. The album review should not quietly introduce changed faces, clothing or guests.
Keep skin and fabric checks separate
Skin can look acceptable while a garment clips to a blank patch. A dress can retain texture while faces become too orange. Inspect those questions separately so one attractive feature does not hide a failure elsewhere.
Use the editor's clipping display where available, then inspect the actual export. A bright highlight is not automatically a defect, but a large featureless region over important lace or facial detail deserves attention. Look for abrupt color transitions around faces after local adjustments.
Treat mixed cameras, file types and strong mixed lighting as additional review conditions. A correction that behaves well on one source may need refinement on another. Record exceptions by filename rather than trying to remember them while scrolling through the gallery.
Export a review set before the final delivery
Export a small proof set using the intended delivery settings, reopen it and review it at a normal viewing size. Check orientation, crops, names and the order of the photographs as well as color. Keep the proof separate from the final approved export.
Download the lighting-group worksheet below. Each row records a group, its reference frame, the shared settings, the exceptions and the approval decision. Once the photographs are accepted, the wedding album layout guide helps turn the selection into spreads without losing the image IDs.
Use QuestStudio to organize the review brief
Use Prompt Lab to structure the filename groups and review notes. Ask it to organize the information you supply, flag missing reference IDs and keep exceptions visible. Apply the actual corrections in the photo editor that holds your originals and adjustment history.
A useful review request is short: “Group these approved file IDs by the lighting notes I supplied. Keep the reference frame and exceptions in separate columns. Do not infer settings or change the group membership.” That keeps the assistant in the planning job instead of pretending it measured a gallery it has not seen.
Download the lighting-group worksheet and replace its fictional example entries with your own approved sources.
Frequently asked questions
Should I apply one preset to the whole wedding?
Use a preset as a starting direction if it helps, then review images in lighting groups. Different scenes and exposures can need different corrections.
Why does the wrong edit spread across my photographs?
Check the active reference, selected images and synchronization options. Auto Sync can apply subsequent changes to all selected images when it is enabled.
Should I synchronize crops and masks?
Only when the images and task justify it. Keep image-specific crops, local repairs and masks separate in the first test.
Do all white clothes need the same color value?
No. Fabric, light and reflected color can differ. Review the real garment and scene rather than forcing every pale area to one neutral value.
Is a contact sheet enough for final approval?
It helps reveal set-level inconsistencies, but enlarge difficult frames and reopen the actual exports before final delivery.