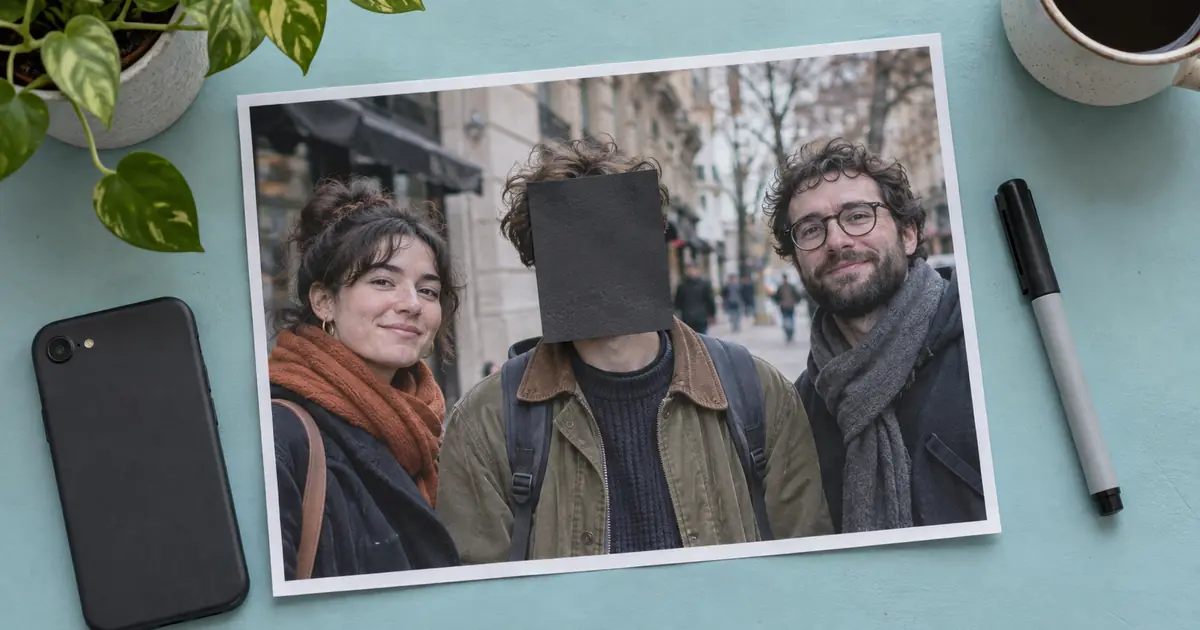

Blurring a face is an editing operation. Deciding whether a photograph is safe to share takes a second review. A person can remain recognizable through a name badge, uniform, reflection, location or the people beside them, even when their face is difficult to read.
This guide explains how to blur faces in photos, when to use an opaque cover instead, and how to inspect the exported file. The worked example uses a fictional drawing made for this article. It demonstrates a flattened raster export; it does not establish that a particular blur strength makes a real person anonymous.
Choose the sharing version first
Keep the original in a private working folder. Make a separate sharing copy with a filename you can recognize, such as event-share-redacted.png. Do not put the source and final file beside each other in a public download folder, where a viewer might open the wrong one.
Write down what the recipient needs to see. For a venue review, the useful information may be the room, seating and stage. For a repair report, it may be the broken fixture. If people are incidental, cropping them out can preserve the purpose of the photograph with fewer details to manage.
This is different from removing a person from a photo. Removing someone changes the depicted scene. Covering a face leaves a visible indication that information was withheld. Choose the treatment that fits the use, and explain a material alteration when the context calls for it.
Find every appearance before applying an effect
Inspect the full image and its edges. Mark each face, including people reflected in windows, mirrors, screens or polished surfaces. Look at partially visible faces and small background groups. A face detector can help locate candidates, but a missing detection does not mean a person is absent.
Give each marked region an identifier: F01, F02 and F03. Record the source filename, the intended treatment and any surrounding identifying detail. For F02, the note might be face plus badge; for F03, it might include a reflection in the shop window.
Select a margin around the face rather than tracing only the eyes and mouth. Check the forehead, ears, jaw and recognizable hair boundary. If the person must be hidden more completely, covering only their facial features may not meet that goal. Review the entire person and context before proceeding.
Apply a blur in GIMP using a bounded selection
In GIMP, open a working copy and select the relevant layer. Use a selection tool to surround the marked face with a margin. Check that the selection belongs to the intended face, especially when several layers or imported images are present.
Choose Filters, then Blur, then Gaussian Blur. The GIMP 3 manual documents the Size X and Size Y controls and the filter's operation on a layer or selection. Increase the effect while inspecting the result at the size people will actually view, then also inspect the full export resolution.
There is no universal safe radius. A value that obscures a small face in a reduced preview may leave useful structure in a larger original. The subject's appearance, source resolution and surrounding context also differ. Treat blur as a visual treatment to review, rather than a certified anonymity setting.
The alternative Pixelize filter replaces detail with blocks controlled by block dimensions. It produces a different appearance, but increasing block size is still not a guarantee that the person cannot be recognized. Repeat the context review after either effect.
Use an opaque replacement when facial detail must be removed
A solid cover is easier to inspect than a partially obscured face. Create a fully opaque shape over the entire region and its margin. Choose a plain color that clearly signals redaction, and check that the shape has no transparency, soft gaps or uncovered corners.
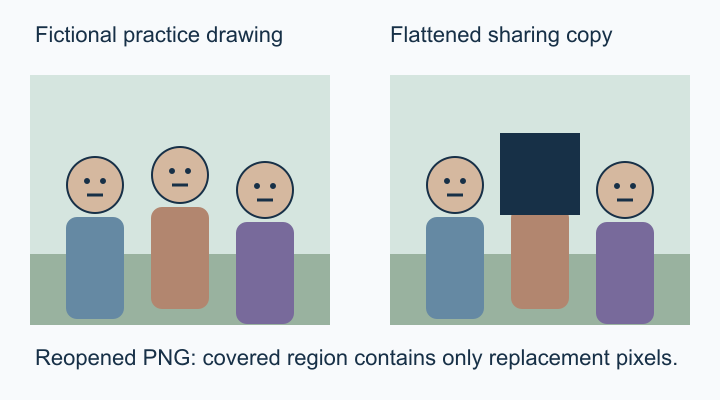
Keep the editable source private. Export a flattened PNG or JPEG sharing copy and reopen that copy in a separate viewer. A layered project, a presentation with removable shapes or an SVG that still contains the original face beneath an overlay is a different artifact from a flattened raster image.
The example below was built locally from a fictional drawing. Its covered output is a PNG whose marked rectangle contains only opaque replacement pixels. Reopening the file confirmed the same dimensions and a complete cover within that region. Those checks establish what this demonstration file contains; they do not assess a real photograph or a person's recognizability.
Inspect the exported file, not just the project preview
Open the exact file intended for sharing. Zoom into every marked region, check all image edges, then fit the entire picture on screen. Review both the full-resolution file and a smaller preview. A large opaque cover can be complete while a nearby name badge still reveals the person.
Confirm the filename, dimensions and file type. Make sure you exported the treated version and did not attach the source by mistake. Review location and other metadata with a tool that actually displays those fields; do not assume a visual edit removed them. If you remove metadata, inspect the resulting file again.
Upload only the intended sharing copy. Where a service creates a preview, open the recipient-facing page and inspect its thumbnail and full-size image. If you replace an earlier public file, check which version the page currently serves. A corrected project on your computer does not establish what an existing link displays.
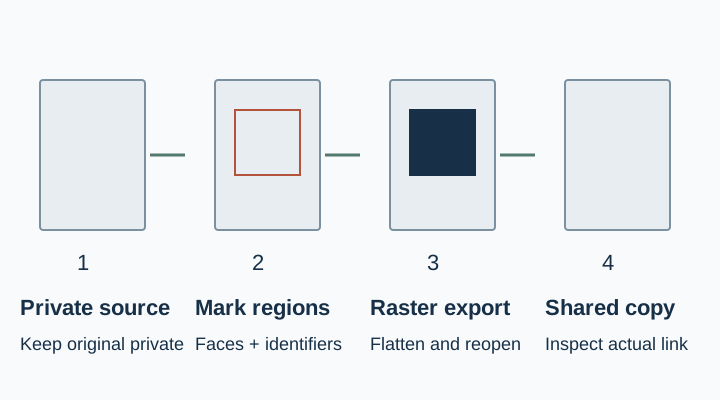
Keep a short review ledger
The worksheet at the end provides fields for face ID, treatment, surrounding identifiers and final-file review. For a small event photograph, one reviewer can mark the regions and another can compare the exported image against that list. A second review is particularly useful when the background is crowded.
Record decisions plainly. F01: cropped out. F02: opaque face cover; badge also covered. F03: reflection still visible; hold sharing copy for correction. This gives the next editor a specific task instead of a vague instruction to make the image more private.
You can use Prompt Lab to turn a non-sensitive list of review requirements into a reusable checklist. Keep the actual redaction and export inspection in an image editor. Generating an altered face is a different task and does not demonstrate that the original person's identity has been removed.
Before sharing, verify that the photograph still communicates the intended information. If the only useful subject was the person you needed to hide, a different photograph or a simple diagram may be a clearer choice. Save the approved export separately from the private source so the next handoff remains unambiguous.
Download the sharing-copy-review worksheet and replace its fictional example entries with your own approved sources.
Frequently asked questions
How much blur should I use on a face?
There is no universal safe value. Review the effect at full export resolution and final viewing size, then check surrounding identifying details. Use a complete opaque cover or crop when retaining facial structure does not fit your sharing goal.
Is pixelation safer than Gaussian blur?
Neither treatment alone guarantees anonymity. Both can leave recognizable structure or context. Choose a treatment based on what must be hidden, then inspect the actual exported file and the surrounding information.
Does a black rectangle remove the underlying face?
A fully opaque rectangle replaces the covered pixels in a flattened raster export. An editable overlay can leave the underlying image available in a project or document. Reopen the exported PNG or JPEG and verify the complete covered region.
Should I blur faces in the background too?
Inspect every visible person, including reflections, and decide which appearances need treatment for the intended use. Small size in an editor preview does not establish that a face is unrecognizable in the full-resolution file.
Can I check only the image on my computer?
Check the exact exported file and, after uploading, the recipient-facing preview and full-size copy. Confirm that the shared page points to the approved version rather than an earlier original or an untreated thumbnail.