
If you have ever watched a behind the scenes clip and seen a light with a round, ridged glass lens and metal flaps on the front, you have probably seen a Fresnel. Creators love Fresnel lights because they give you control. You can tighten the beam to punch light exactly where you want it, or widen it to cover more of the scene, without moving the stand.
This guide breaks Fresnel lighting down in plain language, then gives you real setups you can copy for interviews, product videos, and dramatic fake sunlight.
What is a Fresnel light
A Fresnel light is a focused light fixture designed to produce a clean beam with a soft edge. The key idea is control: you can aim it, shape it, and change how wide the beam spreads.
Most Fresnel fixtures share the same core parts:
- Lamp or LED engine (the light source)
- Reflector (pushes more light forward)
- Fresnel lens (the ridged lens that helps form and smooth the beam)
- Focus mechanism (lets you go from flood to spot)
- Beam control (often barn doors on the front)
Fresnel lens in simple terms
A Fresnel lens uses rings to behave like a much thicker lens, but with less material. In practice, that ridged lens helps you get a beam that feels smooth and even, instead of a messy splash of light.
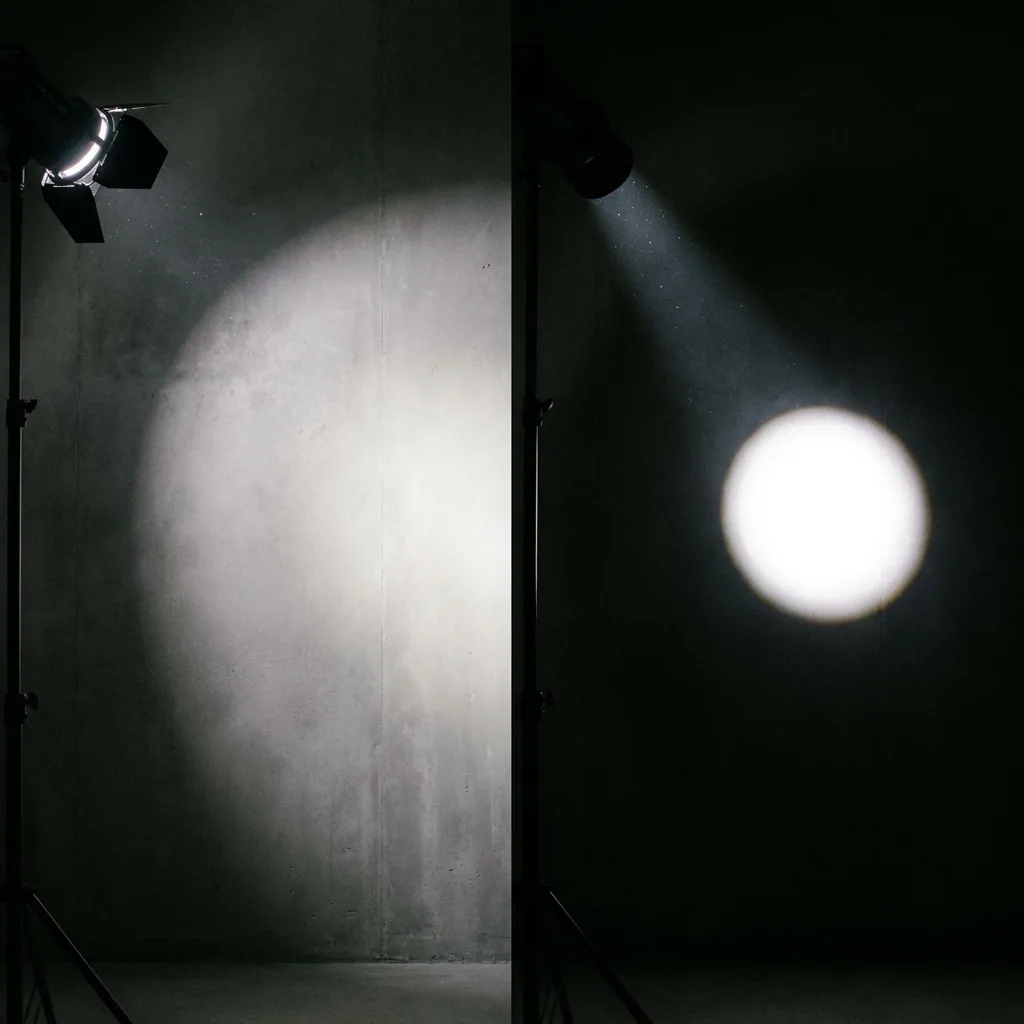
Spot vs flood: the one adjustment that changes everything
Think of spot and flood as the beam width knob.
- Spot: tighter beam, more intensity, more drama, easier to keep light off the background
- Flood: wider beam, softer feeling coverage, easier to light more than one person or a larger area
A quick way to learn this fast:
- Aim the Fresnel at a blank wall.
- Set it to flood and note the beam size and how quickly it falls off at the edges.
- Set it to spot and notice how the center gets brighter and the beam tightens.
- Now add barn doors and see how much spill you can remove.
What Fresnel lights are best at
1) Lighting from farther away
If you cannot place a light close to your subject, a Fresnel can still reach. This is helpful in wide shots, small rooms where stands must stay out of frame, or when you want a crisp highlight.
2) Shaping light with intention
Barn doors and flags work especially well with Fresnels because the beam is already organized. You can carve the light so it hits the face but avoids the background, or skims across an object for texture.
3) Creating believable sunlight
Creators often use a Fresnel to mimic sun because you can tighten the beam, raise it higher, and create harder shadows that feel like daylight coming through a window.
5 Fresnel setups creators actually use
Setup 1: Clean interview key light (YouTube talking head)
Goal: flattering face light with control, minimal spill.
Steps:
- Place the Fresnel 30 to 45 degrees to the side of the camera and slightly above eye level.
- Start in flood so the beam covers the face and upper chest.
- Soften it with diffusion (a diffusion sheet, a softbox designed for your fixture, or a bounce into a white wall).
- Use barn doors or a flag to keep light off the background if you want separation.
- Add a small fill (reflector or dim LED panel) on the opposite side if shadows feel too deep.
Creator tip checklist:
- If the face looks too harsh, add diffusion or bounce it.
- If glasses reflect, raise the light higher and angle it down more.
- If the background is too bright, cut spill with barn doors first, then move the light slightly.
Setup 2: Fake window sunlight (cinematic look)
Goal: one strong directional beam that feels like sun through a window.
Steps:
- Move the Fresnel farther back than you think you need and raise it higher.
- Set it toward spot to tighten the beam.
- Aim it through a window frame, blinds, or a cookie pattern to create shadow lines.
- Add haze only if you want visible rays, and keep it subtle.
- Balance with a softer fill from the opposite side so faces do not go fully black unless you want that look.
What to change first:
- Not sun-like enough: tighten toward spot, raise height, increase distance.
- Shadows too sharp for your scene: add a light diffusion layer, not heavy diffusion.
Setup 3: Rim light for separation
Goal: separate subject from background with a clean edge.
Steps:
- Place the Fresnel behind the subject, slightly to one side.
- Start in spot so the beam does not hit the lens or wash the background.
- Use barn doors to keep flare off the camera.
- Aim for hair and shoulder line, not the cheek.
Quick check:
- If you see flare, cut with barn doors or add a flag between light and lens.
- If the rim is too thick, tighten toward spot or move the light farther back.
Setup 4: Background splash and texture
Goal: make a plain wall look intentional.
Steps:
- Aim the Fresnel at the background, not the subject.
- Use spot to create a circle, or flood for a wider wash.
- Add barn doors to shape it into a vertical strip or a triangle.
- Put an object close to the light to cast an interesting shadow pattern.
Setup 5: Product highlight that looks premium
Goal: controlled reflections and defined edges.
Steps:
- Put the Fresnel at an angle that creates a clean highlight across the product surface.
- Use diffusion to soften reflections, but keep direction.
- Use flags to remove unwanted glare.
- Move the light in small increments. Product lighting is often about inches, not feet.
How to soften a Fresnel without losing control
There are two different problems people mix up:
If the light is too harsh, soften it
Try these in order:
- Bounce the Fresnel into a white wall or foam board
- Add diffusion between the light and subject
- Use a larger diffusion surface farther from the light for a smoother wrap
If the light is spilling everywhere, shape it
Try these:
- Close barn doors until the beam stays off the background
- Add a flag on the spill side
- Add distance and tighten toward spot so the beam stays contained
Fresnel vs softbox vs LED panel
Choose based on the job, not the hype.
Pick a Fresnel when:
- You need throw, punch, and control
- You want a sunlight look or dramatic shadows
- You want to shape light with barn doors and flags
Pick a softbox when:
- You want fast flattering softness for faces
- You are lighting close in a small room
- You want predictable wrap with minimal fuss
Pick an LED panel when:
- You need quick, even fill
- You need ultra compact placement
- You are working in tight spaces where stands must stay small
Many creators use a hybrid: Fresnel as the key or sun, panel as fill.
Buying checklist for beginners
If you are choosing your first Fresnel style light, prioritize these:
- Beam range: can it go reasonably wide and reasonably tight
- Mount and modifiers: can you add barn doors and diffusion options that fit
- Output and distance: can it still look good when placed farther back
- Power and heat: tungsten runs hot, many LEDs run cooler but can have fan noise
- Size: larger Fresnels can be harder to rig in small rooms
- Color control: if you mix lights, consistent color matters
Safety basics:
- Keep fabric diffusion at a safe distance from hot fixtures
- Sandbag your stand if you are raising the light high
- Do not look directly into a high intensity beam
How QuestStudio helps
Even if you already know what a Fresnel is, planning the look can still take time, especially when you are trying to match a reference shot or build a consistent style across thumbnails, ads, and videos.
QuestStudio helps in three practical ways:
- You can generate lighting references and previs images in your browser, then refine the look before you touch your real lights using Image Lab.
- You can test multiple visual styles across popular models side by side, which is useful when you want one consistent lighting signature for a brand.
- You can save your best lighting prompts in a structured Prompt Library so you stop reinventing setups every time using Prompt Library.
Here are prompt templates you can save and reuse in QuestStudio:
If you also produce content beyond lighting tutorials, you can carry the same look into assets like YouTube Thumbnail Generator, AI Album Cover Generator, or character based scenes with AI Character Generator.
FAQ
Are Fresnel lights hard light or soft light
A Fresnel is usually considered a harder source because it can produce defined shadows, especially when focused toward spot. You can make it softer by bouncing it or adding diffusion.
What does spot vs flood mean on a Fresnel
Spot tightens the beam and increases intensity in a smaller area. Flood widens the beam to cover more area and feels less intense per square foot.
Can I use a Fresnel as my main key light
Yes. Many creators use a Fresnel as a key because it is controllable. If it looks too harsh, soften it with diffusion or bounce and keep barn doors for spill control.
What are barn doors and why do Fresnels use them
Barn doors are the metal flaps on the front that shape and cut the beam. They help you keep light off walls, ceilings, and backgrounds so the frame looks intentional.
How do I recreate sunlight with a Fresnel
Place the light higher, move it farther back, and focus toward spot to tighten the beam. Add a window pattern like blinds if you want recognizable shadow lines.
Fresnel vs softbox: which is better for YouTube
If you want fast flattering softness, a softbox is often easier. If you want more control, distance, and shaping, a Fresnel plus diffusion can look excellent.
Conclusion
A Fresnel light is one of the most useful tools you can learn because it teaches control. Once you understand spot vs flood, and the difference between softening light and shaping light, you can recreate clean interview lighting, dramatic sunlight, and premium product highlights on purpose.
If you want to plan looks faster and save lighting prompt templates you can reuse, try QuestStudio and build a small library of your best Fresnel setups you can apply across images and videos.