
To use graphs in CapCut on a computer, make at least two keyframes for the same property, such as Position. Open the clip's keyframe or graph controls if your desktop version exposes them for that property. Select a curve or easing option and play the move. Keep the start and end values the same while you compare how the motion travels between them.
Position easing changes how fast a layer moves during an animation. CapCut's Speed → Curve workflow changes the playback speed of the video itself. Use the graph that controls the thing you intend to change.
Make a simple two-keyframe move first
Select a clip or overlay, move the playhead to the starting frame, and add a keyframe beside Position in the property controls. Move to the ending frame and set the new position. Verify a second keyframe exists on the same property. CapCut's desktop keyframe guide explains where to add and adjust keyframes.
Keep scale and rotation steady while you test position. If the element gets larger and moves at the same time, the motion can feel faster for two reasons. Fix one property first and add a second movement only if it helps explain the shot.
Use an easy target to see. Put a product card at the left margin, then move it to the center over one second. Leave enough time after the move to read it. Duplicate the clip or project for the comparison so you can switch between the same two positions without rebuilding the keyframes.
Compare a linear move and an eased move
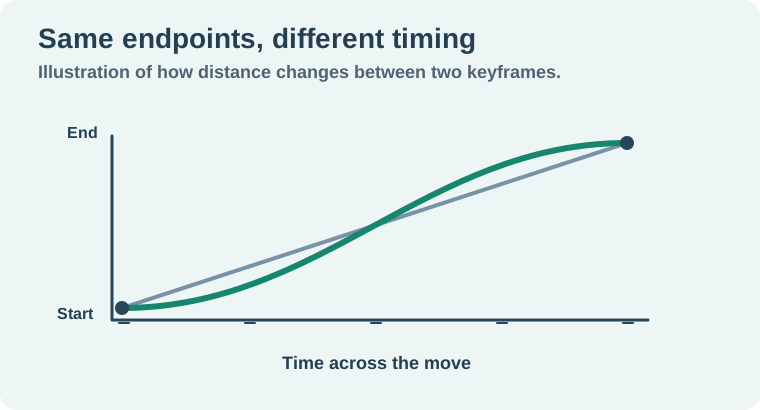
In the first version, leave the transition linear if that option is available. An ideal linear move covers equal distances in equal amounts of time. You might see a sudden start or a sharp stop when a graphic begins moving from a still frame and then settles into another.
In the second version, open the keyframe controls for the selected clip and property. Use an ease-in, ease-out, or combined curve as appropriate. Some desktop builds expose a graph or a show-keyframe-animation control when the clip already has keys. Use the controls present for your selected property. If graph editing is absent, compare any available easing preset and confirm you are adjusting the transform rather than playback speed.
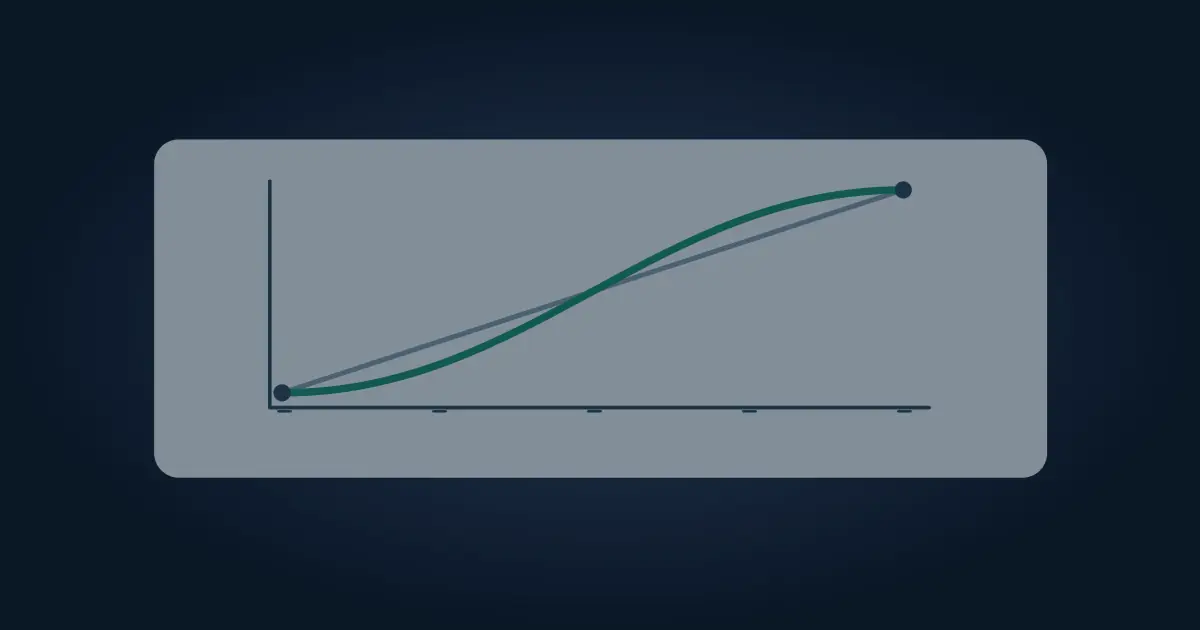
Play from a short hold before the first keyframe through a short hold after the second. Watch the start, the middle, and the stop. A combined ease can spend more time near the endpoints, with more of the travel occurring in the middle. The illustration shows this timing idea. It does not represent the exact shape of a CapCut preset.
Choose easing that fits the edit
Use a gentler stop when a card should settle in time to be read. A faster move can feel appropriate when it follows a cut or reveals something that already has the viewer's attention. If the movement appears to stall at the start, compare a different curve or a shorter duration. Avoid changing the curve and duration together on the first comparison.
On a vertical edit, watch whether the move crosses captions or important objects. The CapCut reframe guide covers the separate task of keeping the subject inside the canvas. A smooth animation that obscures the subtitle still fails the delivery check.
If the movement overshoots, inspect intermediate keys and the curve before moving the final keyframe. Make sure the last position itself is correct. If the layer jumps, look for a stray key or a discontinuity between adjacent clips. Scrub each intended endpoint and play the clip at normal speed.
When the graph controls are missing
Verify that the clip is selected and that the property has keyframes. CapCut's desktop keyframe troubleshooting points to selection, version, and supported features. Check the exact editor and property. A mobile tutorial or a speed-ramp example can show controls that differ from your desktop transform workflow.
If you meant to speed up the footage itself, use the CapCut retiming guide or the speed-ramp workflow. Confirm the distinction by comparing the clip duration. Easing a graphic's move between fixed keys and shortening the clip have different effects on the timeline.
Measure one movement at several points
Imagine a one-second horizontal move covering 300 pixels. With linear interpolation it travels 75 pixels by the quarter-second mark, 150 by the midpoint and 225 by the three-quarter mark. A conceptual smooth S-curve could instead reach about 47, 150 and 253 pixels at those same times. Those numbers illustrate the geometry and are independent of any CapCut preset. In your actual project, scrub to all three moments and compare the object to a fixed guide or a known feature in the frame. If the ending still feels abrupt at full speed, compare the last few frames before the keyframe. When the next clip cuts immediately at arrival, include that cut in your preview before changing the graph again.
How QuestStudio helps
Use Video Lab to make a separate supporting clip if the edit needs another view. Bring the approved clip into CapCut and set the exact position move there. Export a short proof and watch the start and stop without scrubbing. Save the version that lands cleanly and leaves the important content readable.
Download the capcut easing comparison sheet.
Frequently asked questions
Do I need two keyframes before adjusting a graph?
Start with two keyframes on the same property to define a change over time.
What is the difference between easing and a speed curve?
Easing shapes a property's animation between keys. A speed curve changes the video playback rate.
Does easing move the final position?
When the same endpoint values and times are retained, easing changes the motion between them. Verify the endpoints in your editor.
Why are graph controls missing?
Check the selected clip and property, the existing keyframes, and which controls your desktop version provides.
How do I judge which curve to use?
Compare the start, middle, and stop with the same endpoints. Choose the one that preserves readability and fits the action.