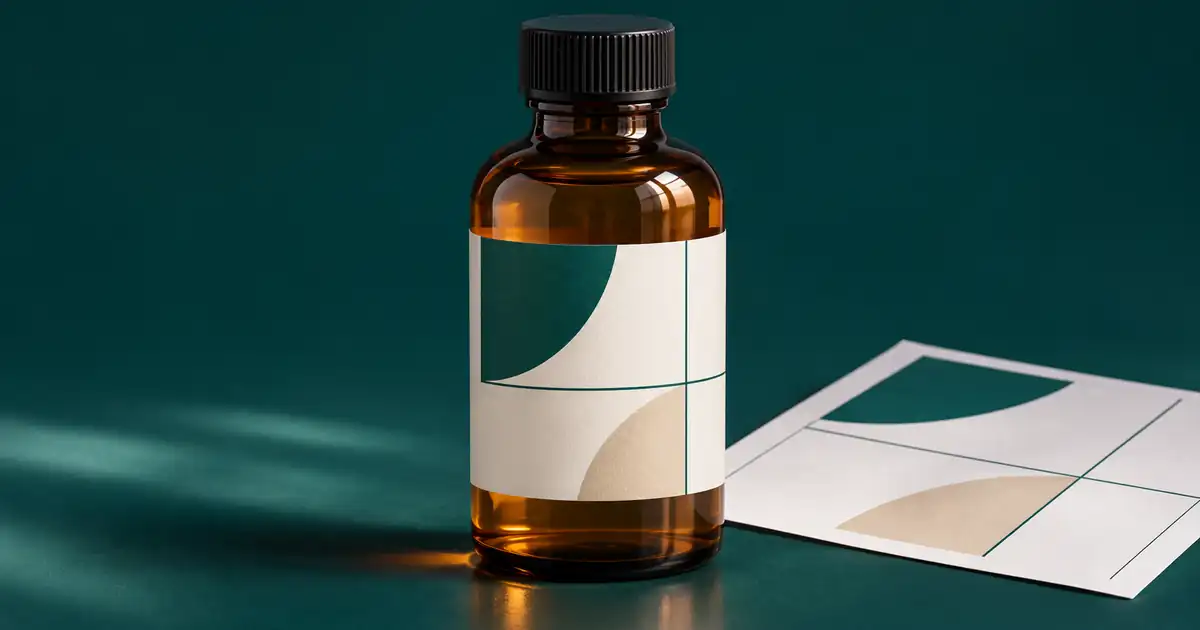

Use Photoshop’s Cylinder warp when flat label art needs to follow the curved front of a bottle, jar, or can. Start with a front-facing product photo and put the approved design on its own layer. Fit the center first, bend the boundaries to follow the bottle, and check the smallest lettering at the actual delivery size.
A believable label depends on the photograph, artwork, and light agreeing with one another. Begin with a simple cylinder. A tapered bottle, dented can, or angled shoulder can need a different shape, a separate mask, or a better source image.
Choose a plate with a readable bottle shape
Start with a clean product photo that shows both sides of the cylinder. In a front view, identify the bottle’s vertical center and the usable label zone between the shoulder and base. Use guides for the top, bottom, and center. Those lines are your reference when the artwork is temporarily hiding the shape underneath.
For a teaching example, imagine a 900 × 600 image with the body spanning x = 320 to 580 pixels. Put the artwork center at x = 450 and keep its active panel between y = 245 and 395. These coordinates describe the example image. Measure your own product plate and keep the label clear of any shoulder taper, seam, or cap.
Place an artwork copy and mark what must stay clear
Keep a master version of the flat artwork with its fonts or outlined text prepared for your project. In the Photoshop document, work from a duplicate or placed Smart Object where your workflow supports it. Give the layer a descriptive name such as “Front label v2.” Keep the source photo and any lighting treatment in separate layers so you can compare them quickly.
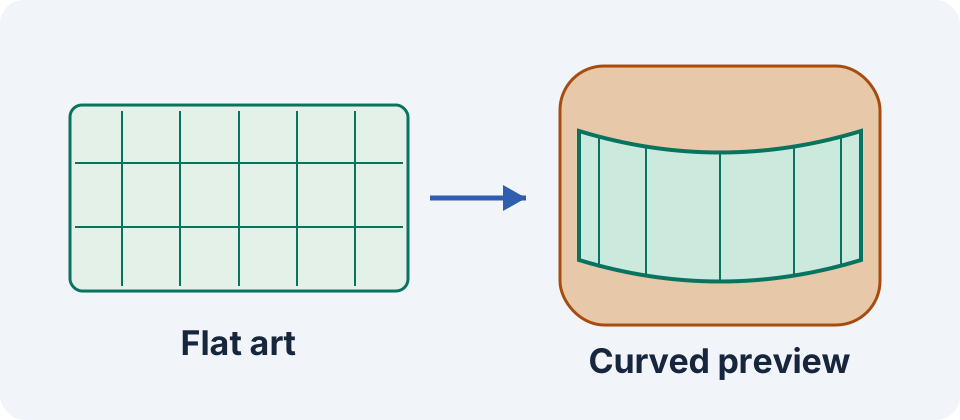
Put a simple practice grid over a copy of the art or use the downloadable diagram as a visual guide. The center line should land on the bottle axis in a straight-on photograph. The horizontal rules make upper and lower curvature easy to judge. The vertical rules help show whether side spacing narrows smoothly.
Apply Cylinder warp and adjust in a useful order
Select the artwork layer, enter Edit > Transform > Warp, and choose Cylinder in the warp style menu. Adobe documents corner sizing, curvature controls, and a center control for perspective. Adjust the layer to fit the usable body before shaping the top and bottom. Apply the transform after checking the label against the actual bottle. Adobe’s Cylinder warp instructions.
Set the size and center, then tune the curve. Treat the bottle edges as limits on what the camera can see. Make the curve small enough to agree with the photographed label zone. A near-level camera may produce a shallow arc. A camera above the bottle will show more of the top and may need a visibly different curve.
Keep a wordmark or the product name near the central panel when you have room to position it. If a short word looks squashed across the middle, correct the placement or curvature before touching individual letters. Preserve the graphic relationships in the source file. Check that the top and bottom boundaries describe the same surface.
Handle edge clipping and the photographed light
After the geometry works, use a layer mask to keep the artwork within the visible body. Zoom in to check the contour. A narrow white halo or an overhanging corner can make the label look detached. Fix the mask where the error occurs and leave the source art recoverable.
Compare the label’s light with the bottle’s existing light. A bright band across the glass may call for a gentle highlight on the artwork, while a shadowed side should retain lower contrast. Add subtle tonal adjustments clipped to the label so you can toggle them. Keep the brand color and small text usable, particularly where a highlight crosses a letter.
For a matte paper label, the transition from highlight to shadow may be softer than on glossy glass. Make that choice based on the intended material and photo. For a photographic composite with mismatched background light, the Photoshop Harmonize product guide covers that separate problem.
Check the mockup and preserve the production art
Make two reviews. At 100 percent, inspect mask edges, spacing, and any visible compression around type. At final size, check whether the buyer can identify the product and see the central label clearly. An attractive high-resolution view can collapse to a smear in a small product card. Keep a tighter crop or simpler placement available if the card is the main destination.
Deliver the mockup as a preview and retain a separate flat artwork file for manufacturing. The mockup is shaped for one camera angle, while print production relies on the flat dimensions, bleed, dieline, and printer requirements. If the package will actually be manufactured, confirm those specifications using the approved artwork.
Use the label placement review sheet for measurements and checks. For a related physical placement problem, see the print placement and artwork verification guide.
Frequently asked questions
What Photoshop warp should I use for a round bottle?
Cylinder warp is a useful first choice for a round, nearly straight body. Use a source photo that clearly shows its center and edges.
Why do the letters stretch at the side?
Check the size and center placement before adjusting the curve. Move essential text closer to the front panel where it can remain legible.
How do I keep the original artwork editable?
Save a separate flat source and place a working copy in the mockup document. Keep the artwork and its lighting adjustments in separate layers.
What if the bottle gets narrower toward the top?
Check whether the artwork can fit the straight section. For a tapered or irregular surface, review the shape with a custom warp and a carefully fitted mask.
Can I send the warped image to a label printer?
Send the approved flat production artwork with the required dimensions and dieline. Use the warped mockup to communicate the intended appearance.
Prepare the product plate
Use Image Lab to create or refine a supporting backdrop. Keep the approved label in an editable layer for precise placement.