
YouTube automation is most useful as a repeatable production process with clear human decisions: approve the brief, check the script, trace each asset, inspect the render, and authorize release. Automating a file handoff or a technical check does not remove responsibility for what the finished video says or shows.
This guide follows an original six-second silent tutorial through a local production run. The artwork, shot instructions, and test packet are authored for the exercise. A deliberately wrong-size render is used to test a quality-control gate, followed by a corrected render. No channel upload, income result, audience test, or monetization eligibility is claimed.
Define the job before building the system
The fictional job teaches a beginner to check an image crop. The three instructions are: keep the subject in view, inspect the safe area, and open the actual export. The exercise is intentionally small so each stage can be inspected. A real tutorial would need more explanation and timing appropriate to its audience.
Write the audience, desired action, source facts, deliverables, and acceptance criteria before choosing automation tools. A system that moves unclear instructions faster will still produce unclear work. For this run, success means a six-second silent file at the specified dimensions and frame rate, with all three labels visible and the source assets traceable.
Approve a script that matches what the screen shows
The script for the exercise is the three instructions above. Each instruction has a corresponding original visual. There is no claim that the safe area guarantees every platform crop or that opening a file proves its content is correct. The language stays within what the scene can demonstrate.
If narration is needed, hand off the approved script with pronunciation, pacing, and pause notes. Do not let the voice stage add a new product claim because it sounds like a smoother transition. In this actual local run, narration is not included: the render is silent. The packet includes a narration handoff for a later separately reviewed version, and the absence of audio is part of the technical acceptance rule.
A human reviewer should decide whether the lesson itself is sufficient before investing in a longer render. Three short labels are appropriate for a small production test. They are not a substitute for a complete beginner lesson with context, examples, and enough time to understand each action.
| Stage | Artifact in this run | Decision |
|---|---|---|
| Brief | Crop-review teaching job | Audience and scope defined. |
| Script | Three original instructions | No unsupported platform promise. |
| Assets | Three authored SVG scenes | Source ownership documented. |
| Voice handoff | Same instructions, calm pace | Not rendered; silent exercise. |
| Render | Six-second H.264 MP4 | Dimensions, frame rate, duration, and decode checked. |
| Release | Manual review | No automated upload performed. |
Give every asset a source record
The three scenes were made as original teaching diagrams, then rasterized for the render. Each filename corresponds to one shot. This is a simple asset manifest, but it answers the important question: which source file produced the visible frame? A real project should also record licenses, permissions, and approved revisions for outside material.
Avoid a folder containing several near-identical images with no accepted version. The renderer should consume a manifest or a clearly approved set, not whichever file a script happens to find first. If an asset changes, preserve the link between the new source and the resulting export. The stock-footage source-ledger guide shows how to handle licensed footage when the run uses outside clips.
Keep descriptive labels in editable text where possible. An attractive generated image can support the tutorial, but exact instructions are easier to correct when they are not baked into a bitmap. The source artwork in this exercise remains downloadable as original vector files.
Render a small proof before scaling up
The actual local render places each scene on screen for two seconds. The approved file is 800 by 560 pixels at 24 frames per second, six seconds long, with no audio. That is the exercise’s specification, not a universal YouTube format recommendation. A real delivery should use the dimensions and timing appropriate to its intended destination.
The file was rendered and decoded completely with FFmpeg as a technical check. The decoded frame sequence was also used to inspect the three labels. Technical decoding catches some broken-file problems, but it cannot judge whether the lesson is clear, whether the source facts are correct, or whether the visual style fits the channel. Those remain review tasks.
Test the failure gate with an honest fixture
To verify the dimension check, the run first created a deliberately incorrect 400 by 280 version. The gate expected 800 by 560, so that fixture failed. The corrected version then passed the dimension check and full decode. This demonstrates that the check can reject that particular defect.
The wrong-size file was intentionally constructed. It was not an unexpected model failure, and the retry is not evidence that a generation system repaired itself. Keeping that label clear matters: a useful test fixture should make the gate inspectable without turning a planned exercise into a fabricated incident.
After fixing the dimensions, recheck the dependent stages. A resized frame can affect label readability, safe margins, and the relationship between artwork and text. A successful dimension check does not prove those visual qualities. The acceptance record should show both the automated result and the human playback decision.
| Render | Observed dimensions | Dimension rule | Technical decode |
|---|---|---|---|
| Constructed failure fixture | 400 × 280 | Fail: expected 800 × 560 | Completed. |
| Corrected teaching render | 800 × 560 | Pass | Completed. |
Make retries start at the failed stage
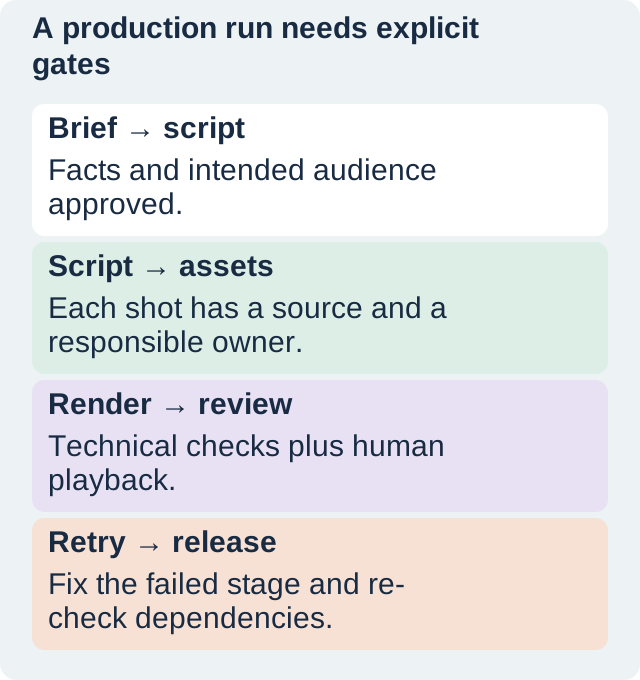
If the script contains an unsupported claim, return to script review before regenerating voice and visuals. If one source image is wrong, replace that asset and re-render the affected sequence. If only the output codec is unsuitable, keep the approved source material and change the export step. These are different failures with different retry costs.
Preserve the failed artifact long enough to explain the decision, then keep the accepted output clearly identified. A production log should say what failed, which rule detected it, what changed, and what was rechecked. “Retry succeeded” is too vague when the next person needs to know whether only the file opened or the full lesson was reviewed.
For voice-heavy work, listen to the actual rendered audio and captions together. For a silent tutorial like this one, check every label and the final hold. Use the video-editing workflow when the run expands into pacing, sound, and a longer sequence.
Keep publication and monetization as separate decisions
A locally valid video is not automatically suitable for a channel or eligible for monetization. YouTube’s channel monetization policies are the primary reference for those requirements. Do not turn a repeatable workflow into a promise of passive income or assume that changing a few words makes repetitive output useful.
The human release review should ask whether the video gives the intended audience a clear, accurate, original contribution. Check title, thumbnail, description, sources, and any disclosure needs with the actual content. Avoid a pipeline whose main success metric is the number of uploads while nobody inspects what the viewer receives.
This exercise stops at a reviewed local production file. The downloadable packet records the brief, script, asset sources, narration handoff, expected technical properties, and fixture. It does not contain channel credentials or an automated publishing step.
How QuestStudio helps with one bounded shot
Use Video Lab for a selected visual brief when the episode needs an original moving shot. Inspect that output against the approved script before adding it to the edit. Voice or music can be developed as separate reviewed assets where they serve the lesson; they should not conceal an unclear explanation.
Finish a production run with an accepted source manifest, the actual rendered file, technical check results, and a human release decision. A repeatable process becomes valuable when it makes those decisions easier to inspect and recover, not when it hides them.
Download the original practice worksheet
Frequently asked questions
What does automation mean in this guide?
Repeatable production and checking steps between human approvals, rather than unattended mass publication.
Was the failure fixture an actual model mistake?
No. The 400 by 280 file was deliberately constructed to test the expected-dimensions gate.
Does the example include voiceover?
No. The actual six-second render is silent. The packet includes a separate narration handoff for future reviewed work.
Does a valid render establish monetization eligibility?
No. Technical validity, content quality, channel policy compliance, and monetization are separate questions.
What should a retry record include?
The failed rule, affected artifact, exact change, dependent stages rechecked, and accepted output revision.
Prepare one bounded visual shot
Use Video Lab for a selected visual brief, then inspect the output before adding it to an approved edit.
Hero: AI-generated editorial illustration. Original teaching materials and documented feature research, checked November 1, 2026. Examples are labeled where synthetic or hypothetical.