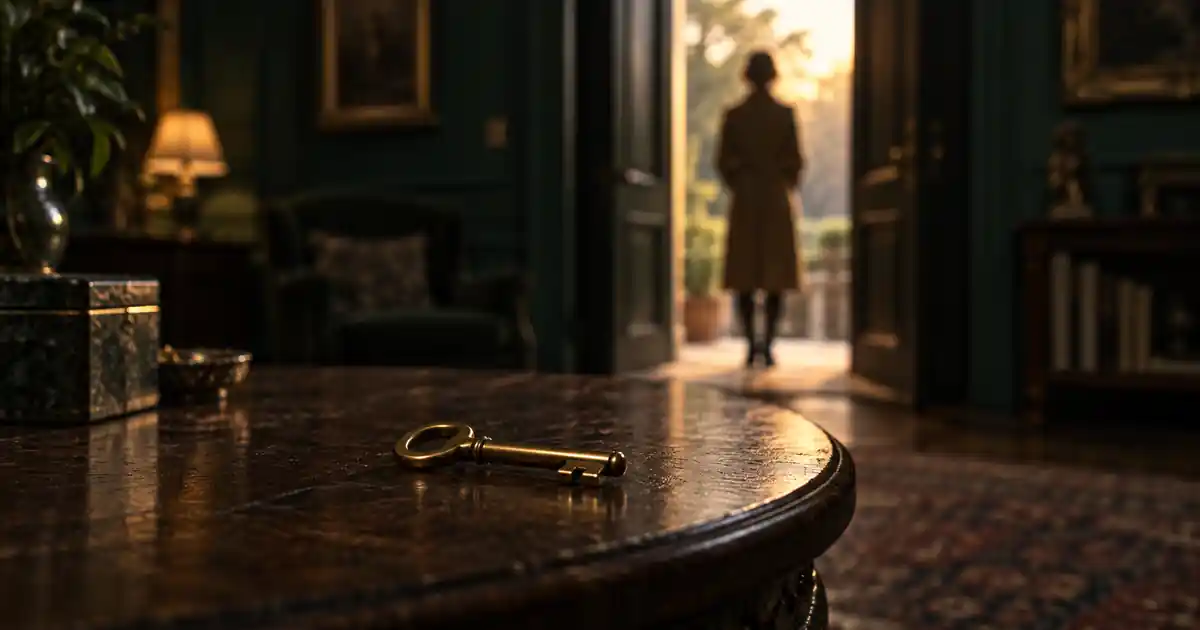

A key sits on a table. Someone appears in the doorway behind it. The camera does not move, but the story changes when focus leaves the key and settles on the person. That is the job of a rack focus. In AI video, asking for “cinematic focus” often produces a zoom, a blur effect, or a moving camera instead. A better plan specifies two depths and one clear transfer of attention.
Download the three-beat rack focus map · Plan a focus transfer in Video Lab
Separate focus, framing, and camera motion
A rack focus changes the distance at which the lens renders the scene sharply. A zoom changes the framing by changing focal length. A dolly moves the camera through space. These can be combined in filmmaking, but combining them in a first AI attempt makes it harder to know which instruction caused a failure.
For this exercise, use a locked shot. The table edge, doorway, and subject positions should remain in approximately the same places from beginning to end. The foreground object starts sharp while the background is soft; the relationship reverses by the end. A mild optical change may be believable, but a substantial push toward the doorway is a different shot.
Runway’s camera terminology guide includes focus-related shot language. That supports using specific photographic terms, but it does not guarantee that every model or every scene will execute the transfer. Treat the prompt as a direction that must be evaluated in the resulting clip.
Give the model two distinct depth planes
Choose subjects that can coexist in one readable frame. A key close to the camera and a person in a doorway several meters behind it create a clear near-far relationship. Two people standing shoulder to shoulder at the same distance are a poor starting point for demonstrating a depth-based focus shift.
Keep the foreground object recognizable even when it becomes soft. A simple shape with a clear silhouette works better than tiny writing on a complicated package. The background subject should also be large enough to read after the transfer. If the person occupies only a few pixels, the intended reveal may remain unclear regardless of focus.
When working from a source image, resolve composition before animation. The two subjects should already occupy the intended places. An image that shows only the key asks the video model to invent the doorway, person, and depth relationship as well as the focus change. That introduces several problems into what should be a focused test.
Write a three-beat focus map
| Beat | Attention | What should remain stable |
|---|---|---|
| Start | Key is sharp; person in doorway is soft | Camera position, table edge, key shape |
| Transfer | Sharpness moves smoothly from near to far | No new objects, no repositioning of the person |
| End | Person is sharp; key is softly blurred | Doorway geometry and overall composition |
The timing should serve the story. Hold the first subject long enough for the viewer to notice it, then allow the second subject to become readable before the shot ends. A transfer that occupies nearly the entire clip leaves little time to understand either state. Use relative timing first, such as a brief opening hold followed by one smooth change.
Exact second-by-second instructions are planning targets, not frame-accurate promises from a generative model. If the finished edit needs a precise cue, allow extra material at both ends and trim the accepted section. Record the actual point where focus settles so the next shot can be placed intentionally.
Use a short direction with one main action
The useful parts are the starting state, the transfer, and the ending state. Adjectives such as epic, beautiful, or cinematic do not substitute for those instructions. Add visual style only when it helps the scene: soft window light, a restrained interior, or a shallow depth of field.
Avoid asking the person to walk toward the camera during this first test. Moving subjects change their distance from the lens, which creates a second focus problem. Likewise, a hand picking up the key introduces contact, object motion, and anatomy. Establish a reliable stationary version before adding another action.
Runway’s video prompting guidance is useful for thinking about concise motion direction. Follow the actual selected model’s supported inputs and controls; a prompt written for one interface is not evidence that another exposes the same options.
Inspect the beginning, middle, and ending separately
Watch the clip normally once to judge whether the reveal reads. Then pause at three points: before the transfer, during it, and after it. Compare the same landmarks in each frame. The table corner and doorway provide stable references that make unintended camera movement easier to notice.
At the beginning, the key should contain more visible edge detail than the person. At the end, the person should contain more detail than the key. During the transfer, some temporary softness may be natural. What matters is whether the sharpness relationship changes convincingly rather than both subjects receiving a uniform blur filter.
Inspect identity as well as sharpness. The key must keep its shape, the doorway must retain its proportions, and the person should not change clothing or facial structure when becoming clear. A reveal that produces a different subject is not a successful focus transfer, even if the animation looks smooth.
Diagnose the visible failure before revising
| What you see | Likely instruction problem | Next attempt |
|---|---|---|
| The frame pushes toward the person | Focus and camera motion were conflated | Reassert the locked frame and remove movement language |
| Everything becomes blurry together | No clear depth-specific target | Name both subjects and their near-far relationship |
| Focus moves back and forth | The direction lacks one settled endpoint | Ask for a single transfer followed by a hold |
| The key changes shape | Object stability failed | Simplify the foreground object or use a stronger source frame |
| The person never becomes readable | Background subject is too small or poorly defined | Recompose the source with a clearer background subject |
Change one cause at a time. If you alter the lighting, camera height, character, lens description, and timing together, you cannot learn which correction helped. Save the accepted starting frame and record the specific revision beside the candidate.
Do not chase perfectly sharp frames everywhere. That would erase the reason for the shot. The acceptance question is whether the intended subject is readable at the correct moment while the other falls naturally out of attention. Judge the clip at the resolution and display size where the audience will watch it.
Know when a cut will tell the story better
A rack focus is one way to connect two pieces of information. If the model repeatedly deforms the foreground object or invents the revealed face, use two stable shots: a close view of the key followed by the person in the doorway. The cut can preserve the story with less visual uncertainty.
You can also begin with a sharp establishing frame that already shows both subjects, then cut closer to the person. This may be clearer on small screens, where a delicate focus shift is hard to see. Choose the transition for the audience’s understanding rather than forcing a technique because it sounds cinematic.
In an editor, a simple full-frame blur animation will not reproduce a depth-aware focus pull. Isolating subjects and managing edges can create a stylized approximation, but complex hair, glass, and overlapping objects make that work demanding. Label an effect as an approximation when discussing the method instead of presenting it as an optical capture.
How QuestStudio helps you test the shot
Use Video Lab to try a short, single-action shot with a supported model. If the chosen workflow accepts an image, start with the approved two-depth composition. Compare the actual result with the three-beat worksheet before extending the sequence.
Once the shot passes, place it in your edit and check whether viewers have time to understand the change. The cinematic editing guide can help with the surrounding sequence. Keep a record of the model, source frame, prompt, accepted output, and the usable time range so a later revision starts from evidence.
About this guide
This is an editorial production method, not a claim that every AI model can perform every step. Examples and worksheets are illustrative; no measured generation results are implied. The hero is an original AI-generated illustration.
Frequently asked questions
What is an AI rack focus video prompt?
It is a direction that specifies a focus change between subjects at different distances. State the subject that starts sharp, the single transfer, and the subject that ends sharp.
Why does my AI rack focus turn into a zoom?
The model may interpret the request as a broader camera movement. Simplify the shot, specify a locked camera, and describe a near-to-far sharpness change without push-in or zoom language.
Can I create a rack focus from one image?
An image-to-video model may attempt it when the source already contains clear subjects at different depths. The result still needs review for object changes, reframing, and unrealistic blur.
What should I do if the focus transfer keeps failing?
Try a simpler composition or a more legible background subject. If identity still breaks, use a cut between stable shots to communicate the same reveal.