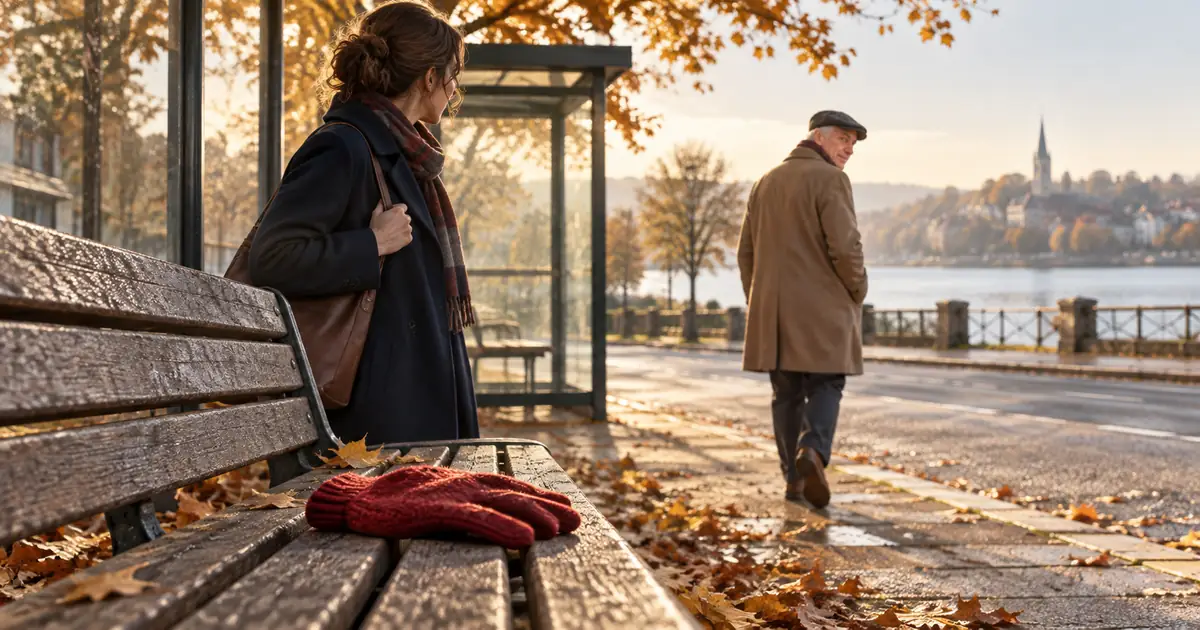

A multi-shot clip needs more than several camera angles. Each cut should change what the viewer knows. Kling’s shot controls become useful when you give the model a short story that fits the available time and a clear job for every shot.
Download the twelve-second storyboard sheet · Create your scene anchor
Feature documentation checked September 14, 2026. The red-glove story is an original planning example, not a Kling benchmark. The hero is an AI-generated concept still.
Choose the right kind of multi-shot control
The Kling VIDEO 3.0 guide describes Multi-Shot as an automatic shot-planning mode and Custom Multi-Shot as a way to specify individual shots and durations. Multi-Shot must be enabled before using the custom controls; turning it off returns to single-shot generation.
Kling’s multi-shot article documents up to six shots and video durations up to fifteen seconds, with custom direction for framing, viewpoint, action, and camera movement. Availability and interface details should be checked in the model and account you use.
Those limits are capacity, not a target. Six shots in a short video can be useful for a montage, but a small human interaction may need only three. Start with the fewest views that establish the situation, show the change, and resolve it.
Write a story that the picture can carry
Our original exercise is a twelve-second scene: a woman notices a red glove left on a bus-stop bench and returns it to its owner. The story has an object, a discovery, and a response. It can be understood without narration, which makes the first generation easier to evaluate.
Define two fictional characters and a simple location. The finder wears a navy coat. The owner wears a tan coat and has the matching red glove on one hand. The bench remains beside the same bus shelter. These details are story information, not decorative prompt padding.
Now state the ending: the owner accepts the glove and acknowledges the finder. If the brief only says “a cinematic encounter at a bus stop,” the model has to invent the reason the people meet. An explicit visible resolution gives you a standard for deciding whether the clip works.
Allocate the twelve seconds before generating
| Shot | Duration | What happens | What the viewer learns |
|---|---|---|---|
| 1: establish | 3 seconds | The finder notices a red glove on the bench; the owner is nearby. | An object has been left behind. |
| 2: connect | 4 seconds | A closer view shows the finder lifting the glove and looking toward the owner. | She intends to return it. |
| 3: resolve | 5 seconds | A two-person view shows the handoff and a brief acknowledgment. | The glove reaches its owner. |
The arithmetic is simple: 3 + 4 + 5 = 12 seconds. The unequal durations are intentional. The handoff needs more time than the initial discovery because the viewer must read two people, an object transfer, and a reaction.
These are proposed editorial durations, not measured outputs. If the handoff repeatedly feels rushed, shorten the setup or extend the total within the available controls. Do not solve the problem by asking for more actions in the same five seconds.
Give each shot a start and an end
A useful shot description says how the action begins and where it should leave the scene. For shot two, the glove begins on the bench and ends in the finder’s hand as she turns toward the owner. That transition prepares shot three.
For the final shot, start with the finder holding the glove and end after the owner receives it. Asking the model to discover, pick up, walk across the shelter, hand over, embrace, and board a bus in one shot overloads the available time. Keep the action that resolves this story.
Choose a camera behavior only if it helps. A steady two-person frame makes the transfer easy to inspect. A dramatic orbit may hide the hands exactly when they matter. A modest move can add energy later, after the underlying action works.
Build a continuity anchor
Create one reference showing the location, wardrobe, and prop clearly. Image Lab can help prepare this scene anchor. Use it as a planning asset and, where the external workflow accepts it, a reference. Native Kling Multi-Shot is configured in Kling; it is not implied by creating a still in QuestStudio.
Beside the anchor, write a short continuity list: navy coat for the finder, tan coat for the owner, one loose red glove, one matching glove already worn, daylight from the same side, and an unchanged bench position. Review the object count at every cut.
Also track the glove’s state. Before pickup it rests on the bench. After pickup it belongs in the finder’s hand. After the handoff it belongs with the owner. A glove that reappears on the bench is a story failure even if every frame looks polished on its own.
Compare automatic and custom coverage fairly
Use automatic Multi-Shot when you want to explore how the scene might be covered. Give it the same story, cast, and ending. Evaluate whether the resulting angles make the action clear, rather than rewarding the clip merely for having more cuts.
Use the custom plan when the time allocation or specific views matter. Keep the story content stable so the comparison tells you something about coverage. If you change the location, add dialogue, and request a new visual style at the same time, you are comparing different creative briefs.
Save the most useful version of each approach and record the reason for choosing it. Automatic coverage might discover a strong reveal. The custom version might make the handoff easier to follow. Neither label guarantees a better film; the visible story is the deciding evidence.
Review cuts as pairs of frames
Pause immediately before and after each cut. Check the glove’s location, the finder’s hand, the owner’s position, and the direction both people face. Then play through at normal speed. Some continuity changes are harmless in motion; others make the viewer feel that a person or prop teleported.
Watch the scene without sound. Can someone describe the discovery and return after one viewing? If they think the finder is taking the glove away, inspect the look toward the owner and the final handoff. A caption explaining the plot is a weak repair for a missing visual connection.
If dialogue is later added, give it its own timing pass. A spoken thank-you must fit the visible reaction without delaying the object transfer into the final frame. Finish the silent visual story first, then decide whether words improve it.
Repair the smallest failed beat
If the first two shots work and the last one fails, keep their decisions intact while revising the handoff. You may need a simpler action, a wider frame, or more time. Regenerating everything with a more elaborate prompt can lose the parts that were already clear.
If the native sequence remains inconsistent, create individual shots and assemble them in an editor. QuestStudio’s Image and Video Labs can support separate asset creation with their available models. That route gives you manual control over the cut, but you still need the same prop-state and continuity checks.
Frequently asked questions
How is Custom Multi-Shot different from automatic Multi-Shot?
Automatic mode plans coverage from the scene prompt. Custom mode lets you specify shot details and durations after enabling Multi-Shot.
Should I use all six available shots?
Only if the story needs them. A three-shot scene can give important actions more time and make continuity easier to review.
Why does my prop change between shots?
Check its reference and state at each cut. Specify who holds it and when it moves, then simplify the failed action or regenerate that beat.
Does QuestStudio expose Kling’s native Multi-Shot controls?
This guide uses those controls in Kling. QuestStudio can help prepare scene references and separate shots using its available Lab workflows.