
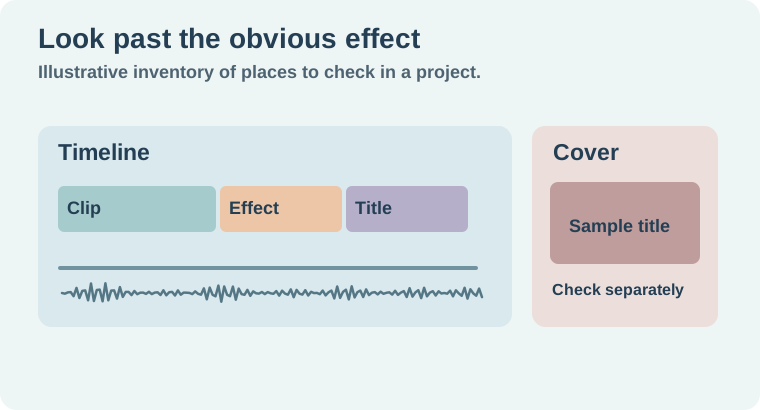
To remove CapCut Pro features from a project, duplicate the edit and find the items marked Pro. Remove or replace those items with features available on your account. Scan the main video, overlays, titles, effects, transitions, audio and cover. Then run the export again and review the revised result.
Start with the items named in the export prompt if it identifies them. A project can contain a paid item even when the visible video looks simple. A text effect or cover preset may be easier to miss than a transition between two clips.
Preserve the working edit before replacing assets
Keep an editable copy of the original. Name the replacement version so you can tell them apart. If a title was approved, save its wording and note where it begins and ends before removing a style. If a transition overlaps clips, inspect the edit point first. Replacing the transition can change how the next shot enters.
CapCut's Pro-feature removal instructions describe the Pro mark and where to check the project, including the cover. Use those marks and the actual export screen. A feature available to a colleague may be different on your device or account, so test the substitute in your own copy.
Inspect one kind of item at a time
- Check the main clips and overlays for premium effects, filters or adjustments. Open the settings on the affected clip so you can see which item is applied.
- Review text, titles and captions. Keep the copy and timing, then choose an available font, style or animation. Review the new layout after the swap.
- Check each edit point and any audio asset named in the prompt. Replace the item or remove it if the story still makes sense without it.
- Open the cover settings. Reselect or rebuild the cover using available items if it contains premium material.
- Export again from the replacement version. Check the prompt before making another broad change.
Keep a short log of what you changed. It helps when a second Pro marker appears and the first replacement is already working. If you remove several layers at once, it becomes harder to tell which change fixed the export and which one made the edit worse.
Replace the effect's job, then check the edit
Imagine a 20-second tutorial with a Pro title treatment, a transition at the reveal and a cover preset. The title's job is to tell viewers what they will learn. Replace its styling with available text and check the line break at phone size. A smaller font might fit, but a shorter heading can read better.
At the reveal, try a hard cut timed to the action. If the original transition covered a trim or overlap, watch the whole moment after changing it. Look for a missing first frame, an unintended hold, or a gap. The CapCut editing workflow covers these checks for short videos.
For the cover, keep the approved image and rebuild the text with an available style. Review the thumbnail itself. Exporting the clip does not prove the separate cover still communicates the subject. Check both proofs if the destination uses both.
When the prompt remains after the obvious edits
Use the actual list of items the export screen identifies, if present. Check elements outside the selected section, including a title or effect on a different track. Reopen the project to confirm you are testing the replacement version. If a template inserted several premium assets, open the affected pieces and inspect them individually.
For a stubborn case, make a clean short test project using only one source clip and the intended export settings. If that works, inspect the original project's extra layers and cover. If the clean test also prompts for Pro, read the exact wording and review the export settings. The prompt may be tied to a specific export option or feature rather than a visible overlay. Use CapCut's export-prompt help for that distinction.
If you are moving away from a subscription, the CapCut project backup guide covers preserving editable projects and their source files. Review your project copy before removing anything from the original.
Keep an export log for the replacement pass
Suppose a 20-second product edit uses a marked title style, a transition at the reveal, a filtered final clip and a cover made from a template. Replace each marked item in a copy and record its timeline position or the word Cover beside it. Watch the product reveal after changing the transition because the image can appear a beat earlier or later. Read the title at phone size after swapping its style. Replace the cover treatment and reopen the export dialog. Record the exact wording of any remaining warning. If the dialog clears, review the completed video from the opening through the end card. When the cover is exported or set separately, verify it there too.
How QuestStudio helps
Use Video Lab to prepare a separate supporting clip when a template asset needs an approved replacement. Import the chosen file and verify the edit in CapCut. If audio changes during the swap, follow the CapCut sound check to isolate the source, timeline and export.
Reopen the final export, play the title, the reveal and the last few seconds, and check the cover separately. Keep the revised project and the approved file together.
Download the capcut export replacement log.
Frequently asked questions
How do I identify a paid item?
Look for the Pro mark and inspect the items identified in the export prompt when it names them.
Can the cover trigger the prompt?
CapCut documents that a cover using Pro material can affect export. Check it separately.
What can I do if I want to retain the paid feature?
Use an option available on your account or keep the original project and choose the appropriate subscription route.
Why does a clean test export work?
The issue likely belongs to an item or setting in the original project. Review its layers, template assets, and cover.
What do I review after replacing the item?
Check the timing, legibility, sound and final cover, then reopen the actual export.