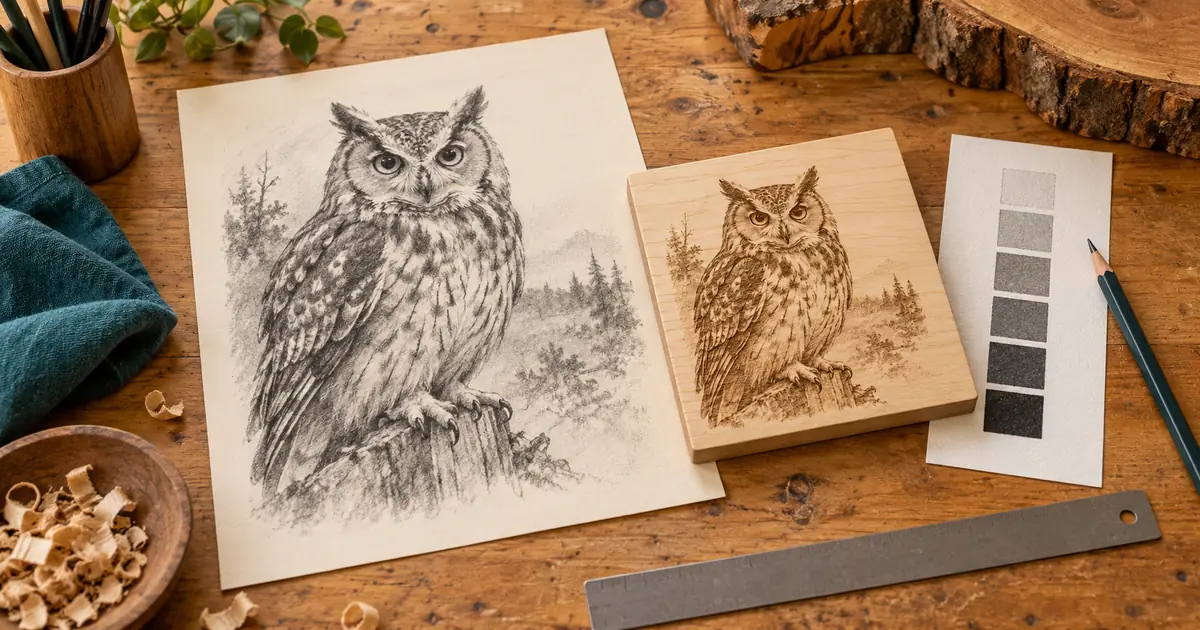

A beautiful owl on a monitor can become a dark oval on wood. The problem often begins before the engraving software opens: the source has tiny feathers, weak separation around the eyes and a background that competes with the subject.
Prepare AI laser engraving artwork around the finished object's size and the details that must remain recognizable. Keep a grayscale master, choose where dithering will happen and approve a sample on the actual material. Image preparation cannot supply a reliable power or speed setting for an unknown machine.
Decide what kind of file the job needs
This guide covers a raster illustration: an owl whose light and dark areas form the image. It does not cover cutting a silhouette or carving a depth relief. Those jobs need different preparation. If your customer needs editable outlines, use the AI image to SVG workflow before promising a vector deliverable.
For our planning example, the owl occupies a 100 mm square on a wooden plaque. The eyes, face outline and two broad wing shapes matter most. Individual feather strands are optional. That priority gives you a way to reject an impressive source that will be unreadable at the intended size.
Record the intended material and finish, the available image area and the person approving the sample. A pale unfinished wood and a coated dark surface should not share an approval simply because the same source file was used. Their physical results may differ substantially.
Generate a source with usable tonal structure
Ask for a clear grayscale illustration with broad tone groups. Avoid asking simultaneously for photoreal fur, intricate engraving, dramatic black backgrounds and extremely fine crosshatching. Those requests can bury the useful shape in detail.
Use this source-art prompt in Image Lab:
This produces a candidate illustration, not a machine-ready engraving file. Inspect the actual output. If the eyes merge into the face shadow, revise that specific region or generate a simpler source. Repeating “high quality” will not define which features must survive.
Keep the best source at its original resolution. Make edits on a copy. A useful master retains smooth tones because you can still adjust them later. A file already reduced to black and white dots has discarded much of that flexibility.
Calculate pixels from the physical layout
Physical width and pixel width need to agree. For an illustrative preparation exercise, a 100 mm image at 254 pixels per inch needs 1,000 pixels across: 100 divided by 25.4, multiplied by 254. This is convenient arithmetic, not a recommended setting for every laser or material.
Use the resolution requested by the operator or production process. Increasing the pixel count alone does not create recoverable source detail. If a source is too small, inspect the enlarged result carefully and simplify weak features instead of treating an upscale as proof of quality.
| Planning field | Owl example | What to confirm |
|---|---|---|
| Finished image area | 100 by 100 mm | Fits the actual plaque |
| Illustrative source resolution | 254 pixels per inch | Operator specifies the real requirement |
| Calculated pixel dimensions | 1,000 by 1,000 pixels | Export uses those dimensions |
| Essential details | Eyes, face, wing separation | Readable at finished size |
| Optional details | Fine feather strands | May be simplified |
| Approval object | Material sample | Same material and finish as the job |
Place the artwork in a document at the intended physical dimensions. Inspect a print or another trustworthy size reference when practical. A zoomed screen view is useful for finding artifacts, but it encourages you to value details nobody will see on the finished object.
Shape tones before creating dots
Start by removing unnecessary scenery and establishing a clean background. Then adjust the important tone relationships. The owl's face should separate from the body, and the eyes should remain distinct within the face.
Do not drive every shadow to black to make the preview look bold. Large dark areas can lose internal separation. Equally, extremely pale feather markings may vanish in the physical result. Your aim is an intentional hierarchy of tones that can be evaluated on a sample.
Review the silhouette separately from the interior. A clean outer edge with a muddy face is still an unsuccessful illustration. Conversely, a detailed face with a weak outline may disappear against the material grain. Record which problem you are correcting so each revision has a purpose.
If you previously prepared AI embroidery artwork, the idea of protecting important shapes will feel familiar. The production decisions differ: this file carries raster tones, not stitch directions or thread regions.
Choose one dithering stage
Dithering represents tones with patterns of light and dark pixels. Thresholding instead assigns pixels to one side of a cutoff. A grayscale engraving mode can use another interpretation of tonal values, depending on the software and machine. These are different production choices, not interchangeable export labels.
LightBurn's image-mode documentation describes its image-processing options. Use the documentation for your actual tool and the operator's established process when choosing between them.
If the engraving software will dither the image, deliver the adjusted grayscale source and let that stage perform the conversion. If you deliberately create the dot pattern elsewhere, confirm how the production software will preserve it. Avoid accidentally applying a second dithering pass.
That second pass can change a pattern you already approved. Resizing a finished dot pattern can also produce unwanted interference or soften individual marks. Set the target dimensions first and retain the grayscale master so you can remake the output cleanly.
Compare a small number of clearly named versions. For example, “owl-gray-v03” and “owl-dither-v03” tell the operator more than “owl-final-final.” State which file is the master and which is the production candidate.
Make the sample answer a specific question
Ask the qualified operator to use an established, appropriate machine setup and material procedure. This article does not prescribe laser operation or invent power and speed values. The sample's role here is to evaluate the artwork.
A useful coupon includes the owl face, a representative wing section and several tones from the actual source. Keep them at the final intended size. An enlarged test can hide the exact readability problem you need to discover.
Write down the source version, preparation method, physical dimensions and sample identifier. Photograph the sample consistently for discussion, but keep the physical object as the controlling reference when surface appearance matters.
| Observation on the sample | Next artwork decision |
|---|---|
| Eyes merge into the face | Separate local tones or enlarge the important feature |
| Wing becomes a solid dark area | Reduce unnecessary dense texture |
| Fine feathers disappear | Remove or strengthen only useful marks |
| Background competes with the owl | Simplify the source background |
| Dots form visible interference | Check resizing and repeated processing |
| Image looks good only when enlarged | Reassess the actual-size design |
Change one artwork variable between comparisons where possible. Otherwise, a better result will not tell you whether the improvement came from contrast, size or a different conversion. Keep the production setup recorded separately by the operator.
Package an understandable handoff
Deliver the original source, adjusted grayscale master, selected output and sample reference with clear names. Include the intended dimensions and identify any processing already applied. “Ready to engrave” is too vague if the recipient cannot tell whether the file needs conversion.
The engraving preparation worksheet records the size calculation, protected details and sample decision. Replace the example resolution with the production requirement. Leave approval blank until someone has reviewed the actual sample.
If you need a separate clean silhouette for packaging or a label, prepare that as another asset. The AI card game artwork workflow also demonstrates why one attractive source should not silently stand in for every final format.
Frequently asked questions
Is an AI-generated engraving picture ready for a laser?
No. It is a source candidate. Confirm dimensions, tones, conversion method and the actual material result in the production workflow. A convincing simulated engraving image does not establish how a physical sample will look.
Should I turn the image into an SVG?
Only when the job needs vector paths. A tonal owl illustration can remain a raster file. Automatically tracing it may create many unnecessary shapes and does not preserve the same tonal production behavior.
Should I always use black and white?
Not at every stage. Keep a grayscale master so tonal edits remain possible. The final production process determines whether the output uses a dot pattern, thresholded shapes or another supported interpretation.
Can I fix poor detail by increasing the resolution?
An upscale can provide a larger file, but it does not prove the detail is accurate or useful. Judge the important features at the intended physical size and simplify artifacts before approval.
Why does the wood sample differ from the screen?
The material, finish and production process affect the physical result, while the monitor emits light. A screen preview helps prepare the artwork; an actual material sample establishes whether the chosen preparation works for the job.
Start with a readable owl
Create one simple grayscale source and protect the few features that make it recognizable. The useful deliverable is an understandable file set with an approved sample, so the next person can reproduce the intended result without guessing.
Create the grayscale source in Image Lab
Hero image: AI-generated editorial illustration. Examples are original planning exercises, not measured model tests.