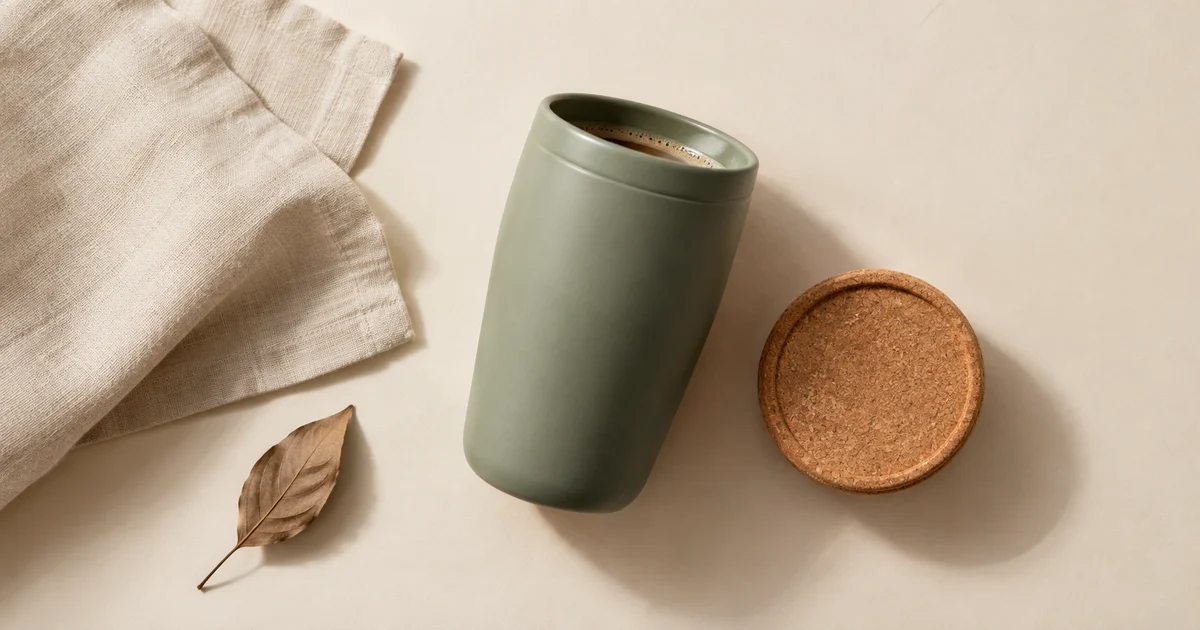

A generated flat lay can look polished while showing the wrong bundle. A second lid appears, a decorative scoop becomes a supposed accessory, or a round jar turns oval. The strongest product layout begins with a small inventory and a camera angle the source can actually support.
Download the flat lay inventory and layout · Style one product flat lay
Make an inventory before making a scene
Divide the objects into three groups: the product, items included with the purchase, and optional styling props. That sounds administrative until the generator puts a decorative spoon in the box. A beautiful composition can create a false expectation if viewers cannot distinguish the bundle from the atmosphere.
Our fictional example is one ceramic travel mug sold with one cork lid. Linen and a dry leaf are styling props. We want a promotional image with room for a short headline, not a technical photo proving capacity or durability. The hero illustrates the mood; it is not a verified listing photograph of a real SKU.
Write the count in the brief and check it after generation. One mug and one lid means exactly that. If you need to show several colorways, prepare references for the actual variants instead of inviting a model to invent a palette and treating it as available stock.
Use a source view that supports an overhead layout
A flat lay is generally arranged on a surface and viewed from above. If your only reference shows the product from a low front angle, a generated overhead view must infer the top, opening, cap, or hidden construction. That may be acceptable for a concept, but it is weak evidence for a sales image.
Photograph the real object from above when possible. Keep the camera parallel to the surface, avoid wide-angle distortion near the edges, and capture the full silhouette. Use enough light to distinguish the product boundary without a bright reflection obscuring the label. Save a separate close-up for any small text that must remain accurate.
For geometry that cannot tolerate alteration, use the real product cutout and generate only the supporting background. A composite gives you a way to keep the product pixels while styling the scene. The background replacement workflow covers that choice in more detail.
Choose one composition system
Three simple systems cover many small-product jobs. A tidy grid helps viewers count a kit. A loose diagonal adds movement around one focal item. An open corner leaves space for a headline. Pick the system according to what the image must communicate, not according to how many props you own.
| Layout | Best use | Watch for |
|---|---|---|
| Aligned kit | Show exactly what comes in a set | Unintended duplicates or props mistaken for included parts |
| Single-product diagonal | Make one hero product feel less static | Camera tilt that changes product geometry |
| Open corner | Leave a clear text or offer area | Generated objects filling the planned empty space |
For the mug, place the product left of center, the lid nearby, and the linen partly outside the composition. Leave the right third quiet. The mug should remain the largest visual anchor. The leaf adds a small color accent; it should not become a second focal subject.
Describe spacing in visible relationships
Instructions such as “perfect composition” leave the actual layout undecided. Specify that the lid sits beside the mug without touching it, the linen stays behind the lower edge, and the copy area contains no objects. Those relationships are easy to inspect.
You can sketch boxes on paper before writing the prompt. A rough arrangement helps you decide which gap matters. It also gives you a neutral reference when a generated scene is attractive but unsuitable for the planned headline.
Do not demand mathematically precise pixel coordinates from a general image prompt. If exact placement is required, finish the layout in a compositing tool. Treat the generation as a scene draft and the final layout as an editable design.
Use this reference-first flat lay brief
This example assumes you can upload a real overhead product photograph. Adapt the item names and included accessories. Keep factual claims and promotional copy out of the bitmap until the product and crop are approved.
The preservation request is an instruction to review, not a fidelity guarantee. Compare the new image with the actual product before you use it in a commercial placement. If the label changes, replace it from the approved artwork or return to a composite route.
Read the shadows as a second inventory
Every solid item touching the surface needs a plausible relationship to it. A lid floating above its shadow appears weightless. A leaf with a hard black outline looks pasted on. Shadows pointing in different directions imply lights that the rest of the scene does not explain.
First inspect the narrow contact area beneath each object. Then inspect the wider cast shadow. A small dark contact region can anchor a product while a softer surrounding shadow communicates the light size and distance. Avoid applying the same generic drop shadow to a mug, a thin leaf, and a piece of cloth.
If you replace the background but retain the original product, decide which original shadows remain useful. Keeping an old right-facing shadow while generating a new left-facing one creates a double-light problem. Repair the relationship rather than darkening everything.
Check round objects, folds, and labels separately
Round products expose perspective mistakes quickly. Compare the lid and opening: do their shapes make sense under the same viewpoint? An overhead jar beside a side-view cap suggests that the model assembled incompatible views. For a top-down shot, unexpected sidewall visibility can reveal a tilted camera or a product that has been rotated off the surface.
Fabric needs its own review. A linen corner should have folds and thickness, not flow through the product or become part of the mug. Keep the cloth simple if it repeatedly merges with the item. More texture is not always more realism.
Read labels at full size and at delivery size. A plausible word shape is not correct text. Check color names, quantities, symbols, and placement against approved packaging. Any uncertain label is a reason to repair the image, not something to conceal with a smaller crop.
Make the delivery crops before adding copy
Test the same master as a square, a vertical post, and the actual ad format you need. A composition can work wide but lose the lid when cropped vertically. Keep enough surrounding space to reposition the crop without shrinking the product until it becomes unrecognizable.
Add the headline in a layout editor. Use the real words at the real size. If the copy requires a dark block over half the product, the image did not leave enough quiet space. Move the text or revise the layout rather than accepting a compromised product view.
For a listing gallery, consider a clean factual image first and a styled scene later. The flat lay should answer a specific shopper question: what is included, how the pieces relate, or how the product looks in a particular setting.
Approve one arrangement before multiplying variants
Keep the product, light, and spacing fixed while testing one background choice. For example, compare ivory paper with pale stone. Changing the camera, props, lighting, product angle, and color together produces unrelated images that are difficult to evaluate as a set.
- The product matches the approved source.
- The included-item count is exact.
- Props do not imply extra accessories.
- All objects sit convincingly on the surface.
- The final crop and real headline both work.
Record the accepted prompt and source file. That becomes a reusable brief for a second actual SKU, with a fresh product reference and a new factual review.
How QuestStudio helps
For clothing that needs visible volume and a clean interior neckline, try the ghost mannequin photography workflow. It starts with garment and interior references so the edit does not invent construction details.
Use Image Lab for a reference-based scene draft, then use the product approval checklist before creating variants. Precise compositing and typography can be completed in your layout editor.
Google’s image-editing announcement describes editing uploaded images and changing backgrounds. It does not establish exact product fidelity. The inventory system, mug example, and review sequence here are original editorial guidance prepared September 24, 2026.
Frequently asked questions
What is AI flat lay product photography?
It is a generated or edited product composition arranged on a surface and viewed from above. A real overhead reference helps preserve the product’s visible construction.
Can I start with a front-facing product photo?
You can make a concept, but an overhead view may invent hidden details. Capture a real top-down reference or preserve the product in a composite when accuracy matters.
Why do my products look like they are floating?
Their contact shadows may be missing, detached, or inconsistent with the scene light. Check each object’s connection to the surface.
Should I generate the sale text inside the image?
Add approved copy separately after the layout passes. That keeps wording editable and easier to proofread.
How many props should I include?
Use only enough to support the product story. One or two clear props are often easier to control than a crowded scene, especially when item count matters.
When you need several dishes to look like one set, use the 12-dish AI menu photography workflow to approve lighting, portions, crops, and future additions.