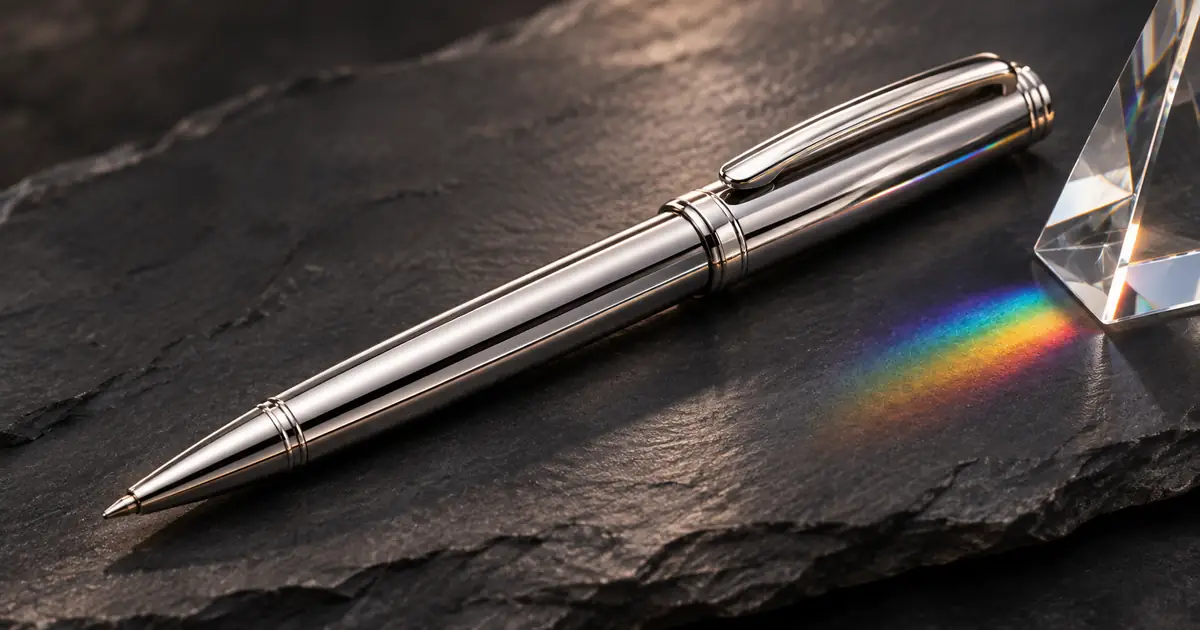

A silver pen looks sharp until you zoom into the highlight along its barrel. There is a thin purple edge on one side and a green edge elsewhere. Turning down purple saturation may hide the fringe, but it can also remove a real enamel accent. I would diagnose the edge before choosing a correction.
Chromatic aberration is an optical color-registration or focus problem. A colored outline in an AI image, composite, or heavily sharpened export can resemble it without sharing that cause. The source file and the pattern across the picture matter more than the color alone.
Identify the edge before editing it
Open the original capture, the edited master, and the delivery export at the same magnification. Choose one troublesome edge and a second edge that should remain unchanged. For a pen, the first might be its bright metal barrel against a dark backdrop; the second might be an intentionally colored clip.
If the fringe exists in the untouched photograph, investigate the capture and lens correction. If it appears only after cutting out the product, inspect the mask and the old background. If it emerges after sharpening or resizing, temporarily disable those operations. Do this comparison on copies so you can reverse the experiment.
Check the center and corners, not just the most obvious defect. A color displacement that changes across the frame provides a different clue from a uniform green outline around a cutout. Neither observation alone establishes a diagnosis, but both help you choose a useful next test.
Separate optical aberration from a compositing halo
Lateral chromatic aberration can show as displaced color edges, while longitudinal aberration can give different color fringes in front of and behind the focus plane. Adobe's chromatic-aberration guide explains that distinction. The correction appropriate for one is not necessarily the best correction for the other.
A masking halo is different. It can retain a trace of the previous background, or soften the boundary incorrectly. Follow the background-edge repair guide when that is the stage that introduced the defect. Moving color channels globally to repair a bad cutout can damage previously aligned details.
| Observation | First comparison | Useful next test |
|---|---|---|
| Fringes in the original capture | Center versus corners; near versus far detail | Documented lens or defringe controls |
| Old background color along a cutout | Mask enabled versus disabled | Local mask and edge-color repair |
| Rim appears only after export | Master versus resized export | Reduce export sharpening and compare |
| Colored boundary in a generated source | Approved product reference | Local edit or a better source |
Read an original channel-displacement example
The diagram below deliberately separates the red, green, and blue versions of a simple white edge. Their common overlap appears white; their mismatched boundaries become colored. The aligned version puts all three components back together. This is a constructed pixel-registration example, not a photograph from a defective lens.
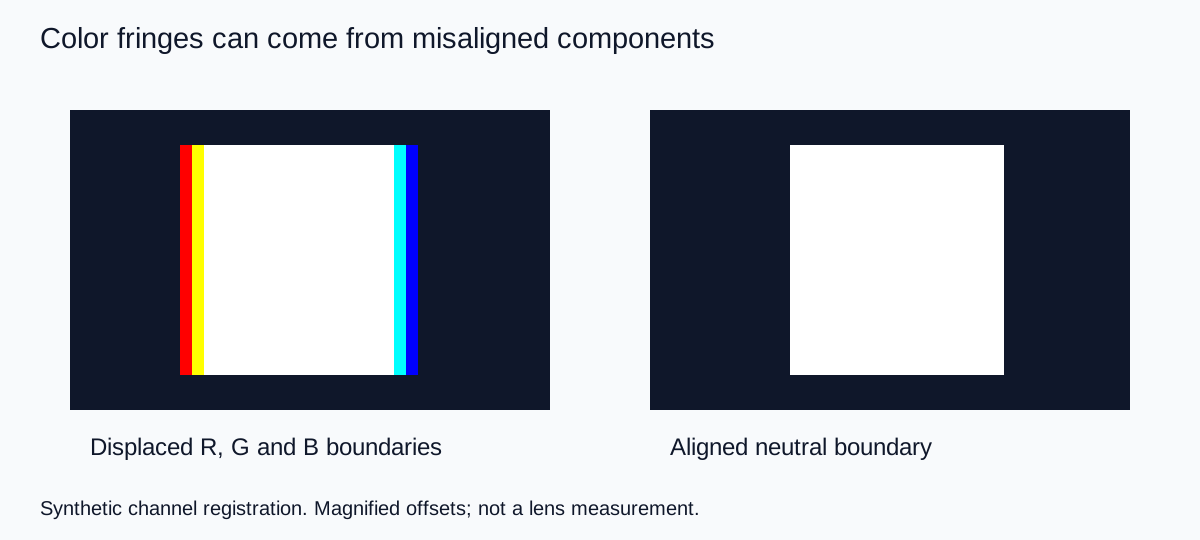
Use the example to understand why removing a color is not the same as restoring an edge. Desaturating the colored pixels can leave a gray rim. A global channel shift may fix one side while misaligning another. A lens-aware correction or a targeted treatment can be more appropriate, depending on the source.
For your comparison, keep the zoom and crop identical. Label the versions “original,” “lens correction,” and “local adjustment” rather than good and bad. Judge both the problem edge and the protected detail before choosing one.
Correct the smallest responsible stage
For a camera original, start with the editor's documented lens correction using the actual camera and lens information when available. Inspect the result rather than assuming a detected profile completes the job. Adobe documents color-fringe sliders in its Lens Correction controls.
If a residual fringe remains, use a narrow adjustment and watch what else it selects. A purple jewelry stone, painted trim, or iridescent coating may share the unwanted fringe's hue. Protect those regions with a mask instead of assuming every purple pixel is an error.
A practical stopping point is an edge that reads cleanly at the required delivery size while retaining its original width and detail. Do not erode a thin silver wire to remove its last colored pixel. If the correction makes small text thinner or removes a genuine reflection, reduce it.
When photographing the product again is practical, compare a different aperture, a less extreme contrast boundary, or another composition. Keep the product and lighting purpose consistent during the comparison. There is no reason to sacrifice a usable label or flattering material rendering solely to optimize a corner no one will see.
Preserve real color and material evidence
Reflective products can legitimately pick up surrounding colors. A blue card near a chrome pen creates a blue reflection; removing it is an art-direction choice, not automatically lens repair. Compare the shape and location of the color with the lighting setup.
Keep an approved product reference beside the correction. For color-critical merchandise, the product color workflow addresses the larger capture-to-export chain. An attractive neutral edge does not prove that the pen's enamel, plating, or printed logo matches the item being sold.
I would review one full-frame image and two tight crops: the troublesome edge and a deliberately protected colored feature. That small comparison is easier to judge than twenty slider experiments without a fixed reference.
How QuestStudio fits a generated-image workflow
In Image Lab, use your approved reference to explore a cleaner setting or a bounded edit when the selected model supports it. Keep the product's shape, finish, and colored details explicit. Treat a request for clean edges as a direction to review, not a guarantee of exact pixels.
Do not apply an invented lens profile to an AI image simply because its prompt mentioned a camera. Generated fringes can be visual artifacts rather than the output of that optical system. If the product must remain exact, preserve the real photograph in a composite and repair the surrounding edge in a layer editor.
Download the final candidate and check the actual web-sized file. A thumbnail can conceal a fringe that remains obvious in a large hero; an extreme zoom can also exaggerate a defect that is harmless in the intended placement. Approve the image for its real use, with the original intact.
Frequently asked questions
Is every purple edge chromatic aberration?
No. Reflections, masking contamination, sharpening, and generated-image artifacts can look similar. Compare the untouched source with each editing stage before choosing a correction.
Should I remove purple saturation from the whole photo?
Only if that broad change is justified by the image. A local mask is often safer when real product colors share the fringe hue.
Can an AI-generated image have lens-like color fringes?
Yes, it can reproduce that appearance. It does not follow that a specific camera lens profile describes the generated pixels.
Does stopping down fix every kind of chromatic aberration?
No. The result depends on the lens, aberration type, and capture. Compare a controlled test rather than treating one aperture as a universal fix.
What should I check after correction?
Check the troublesome edge, a protected colored feature, small text, and the final exported size. Reject a correction that removes real product detail.
Technical references
Continue with a useful next step
 Image
Product Photo Color Correction: Keep the Real Shade
Correct product photo color without changing the item. Follow a reference-led workflow for white balance, local casts, AI edits and final export checks.
 Image
AI Exploded View: Show Product Parts Without Inventing Them
Create a useful exploded-view product image from a verified part inventory, with clear spacing, plausible order, and a separate check for technical claims.
 Image
AI Product Catalog Consistency: A 100-SKU Workflow
Create consistent AI-assisted product images across 100 SKUs with a locked product specification, scene recipe, manifest, reference angles, acceptance criteria, and batch QA.
Hero: AI-generated editorial illustration. Supporting diagrams and exercises: QuestStudio.