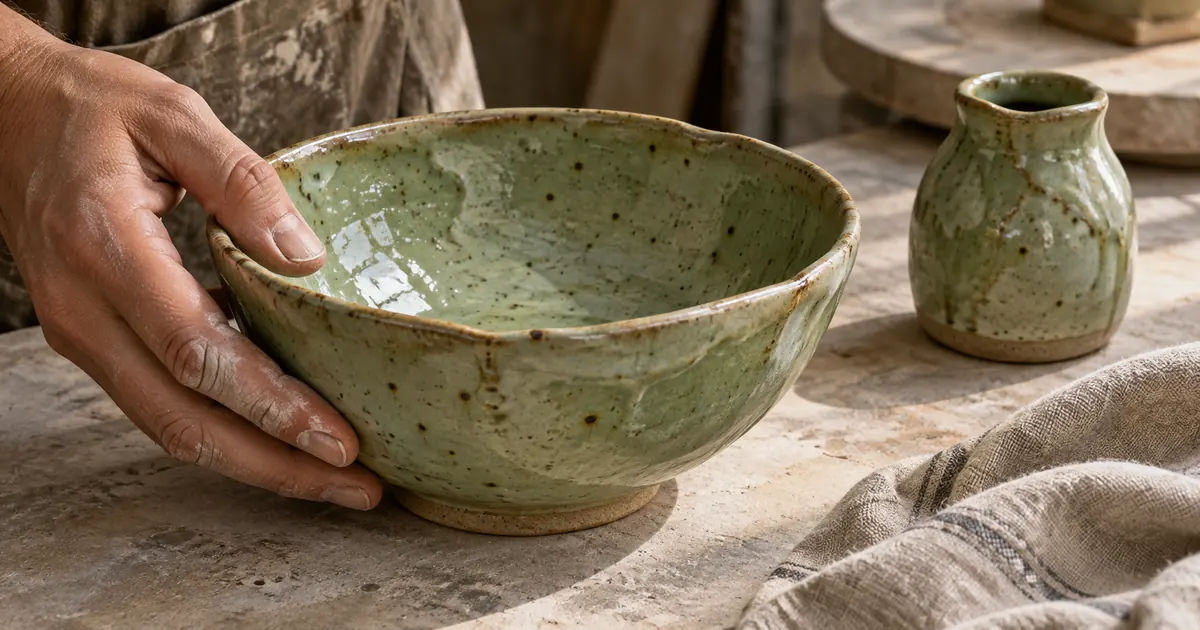

Handmade ceramics photography should show why a particular piece is worth choosing: its shape, glaze, rim, interior and actual scale. A background edit becomes a problem when it removes handmade variation, changes the glaze color or turns an irregular bowl into a perfectly symmetrical factory object.
Start with a small real-photo set and use AI only where you can still verify the piece. This workflow follows a fictional speckled bowl through a lighting plan, a five-view gallery and a final piece-by-piece review. It is about photographing a physical object, rather than placing printed artwork on a mug mockup.
Identify the individual piece or sale variant
Decide whether the customer receives the exact photographed object or another item from a handmade series. That distinction affects the gallery and the accompanying product information. A unique glaze pattern should not become a promise that every future bowl has the same marks.
Give the piece an ID and record its verified dimensions. Note the glaze, clay body, visible foot and any marks that should remain. Keep those notes tied to the source photographs rather than depending on a scene prompt to remember them.
Clean dust and temporary handling marks before capture. Do not remove meaningful material variation merely because it looks untidy at close range. If you are unsure whether a mark is a feature or a defect, settle that with the maker before editing it away.
Start with one broad light source
Place the piece on a stable, simple surface near a diffused window or another controlled light source. Take a test photograph and inspect where the glaze reflects the light. Move the light, camera or piece in small increments so you can see which change improves the surface.
For a glossy glaze, a broad highlight can reveal curvature but also cover the detail you want to show. Move the reflection away from the most important region. For a matte surface, a more angled light can help show carving or throwing lines without inventing texture in editing.
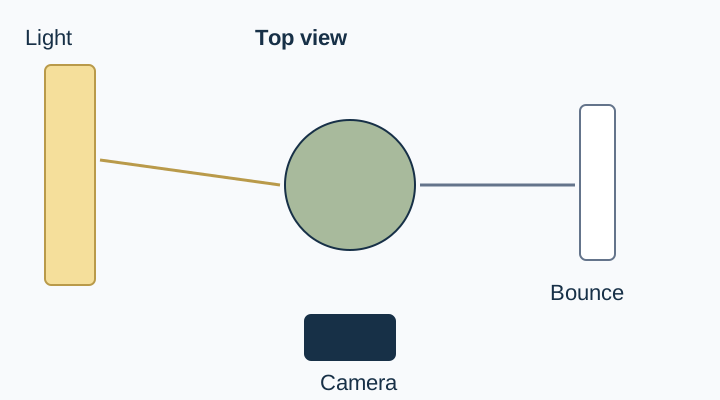
Maker Barta Ceramics' photography notes discuss testing light and controlling glare. Use that practical idea to make small source-photo improvements before trying to rebuild a difficult reflection later.
Make color review part of the capture
Avoid mixing different light sources without a reason. A warm room lamp and a cool window can produce different color casts across the same bowl. Turn off the unnecessary source or control the setup, then keep a neutral reference frame for your edit.
Judge the glaze against the actual piece under a consistent viewing condition. A screen with a strong warm display setting can make a corrected image look wrong. Do not chase a pleasing color that changes a muted sage glaze into saturated turquoise.
Keep the neutral-reference photograph even though it will not appear in the listing. It helps you understand whether a later change came from the scene, exposure or white balance. The Crafts Council phone photography guidance also stresses avoiding edits that alter how the work appears.
Capture five views with different purposes
Use a three-quarter hero to establish the piece, a lower profile to show its silhouette, an overhead view for the interior, a close detail for the glaze and a base view for the foot or maker's mark. Add a verified scale reference when it helps explain dimensions.
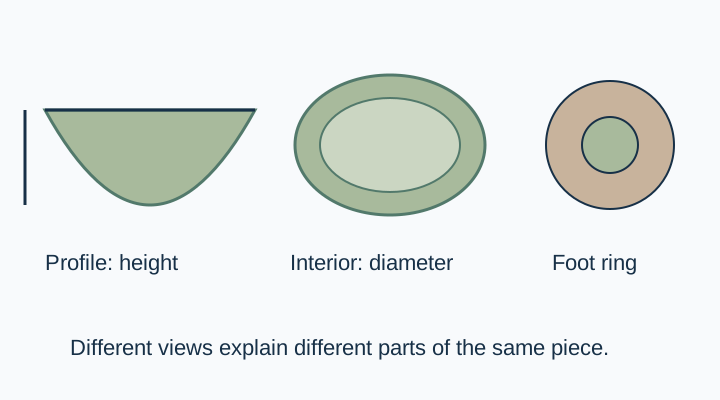
Keep the camera high enough to show what each view is meant to explain. An overhead frame is useful for the interior but can hide the height. A low hero can show the silhouette while concealing a special interior glaze. The gallery needs both when both matter.
For functional ware, photograph the relevant details without inventing performance claims. The appearance of a glaze cannot prove that the piece is safe for a microwave, dishwasher or food use. Use verified maker information for those statements.
Use a scene prompt that protects handmade variation
Choose a real view that already shows the shape you need. Ask for a quiet surface or environment without asking the model to redesign the object. Keep the source close enough for a side-by-side comparison.
Use the attached photograph of this exact handmade bowl as the product reference. Develop a restrained supporting scene on pale stone with soft light from the left. Preserve the actual rim shape, wall thickness, foot, glaze color, speckles, surface variation and proportions visible in the source. Keep the entire bowl readable and grounded on the surface. Do not make the bowl symmetrical, add a handle, remove glaze variation, change the material or invent a maker's mark.Review the outline first, then the glaze. A generative edit can smooth an uneven rim or move a speckle pattern while leaving the overall color close. If the piece has changed, use a controlled background replacement or retain the source photograph.
The transparent and reflective product guide gives more context for separating edges from the background. A ceramic glaze may reflect strongly without being transparent, so choose the relevant reflection checks rather than applying every glass-photography instruction.
Keep supporting scenes from implying the wrong size
A bowl placed beside an oversized spoon may look smaller than it is. A generated hand can create the opposite problem. Use real scale photographs or a dimension graphic based on verified measurements when size affects the purchase.
If the piece appears in use, keep the actual object in the source. Do not add contents that hide the interior glaze when that glaze is a selling feature. A context image should complement the factual views rather than replace them.
For printed designs on standard blank mugs, use the mug mockup workflow. That article owns artwork placement. This ceramic gallery owns the form and surface of the physical handmade piece.
Approve the item before applying a shop-wide look
Review the five views together for color and identity, then compare their outlines with the source. Check that the foot, rim and material variation belong to the same piece. Save the accepted edit settings and scene direction without assuming they work unchanged on the next glaze.
Download the ceramic gallery worksheet and give each output a piece ID, source view and approval note. If the next piece is glossy rather than matte, take another lighting test before repeating the setup. Consistent presentation should not erase genuine differences between products.
Explore the supporting environment in QuestStudio
Use Image Lab with the approved real view to explore a simple supporting scene. Check the product region against the source before choosing the image for a listing. The product approval checklist helps catch a changed material or mismatched variant.
The gallery is ready when someone can understand the piece from several useful views and the images still agree with the object on your workbench.
Download the ceramic gallery worksheet and replace its fictional example entries with your own approved sources.
Frequently asked questions
Should I remove irregularities from handmade pottery photos?
Remove temporary dust or handling distractions where appropriate, but preserve the actual shape and material variation. Ask the maker when a mark's meaning is unclear.
Why does a glossy bowl show a bright white patch?
The glaze reflects the light source. Adjust the light, camera or piece so the reflection helps show curvature without covering the important detail.
Is one overhead photograph enough?
It can explain the interior but may hide height and profile. Include other real views when those dimensions matter to the buyer.
Can AI make every bowl in a series look identical?
That could misrepresent handmade variation. Keep the actual item or variant visible and use consistent presentation without changing the product.
Does a realistic image prove the pottery is food-safe?
No. Use verified maker or product information for safety and care claims. Appearance alone does not establish those properties.