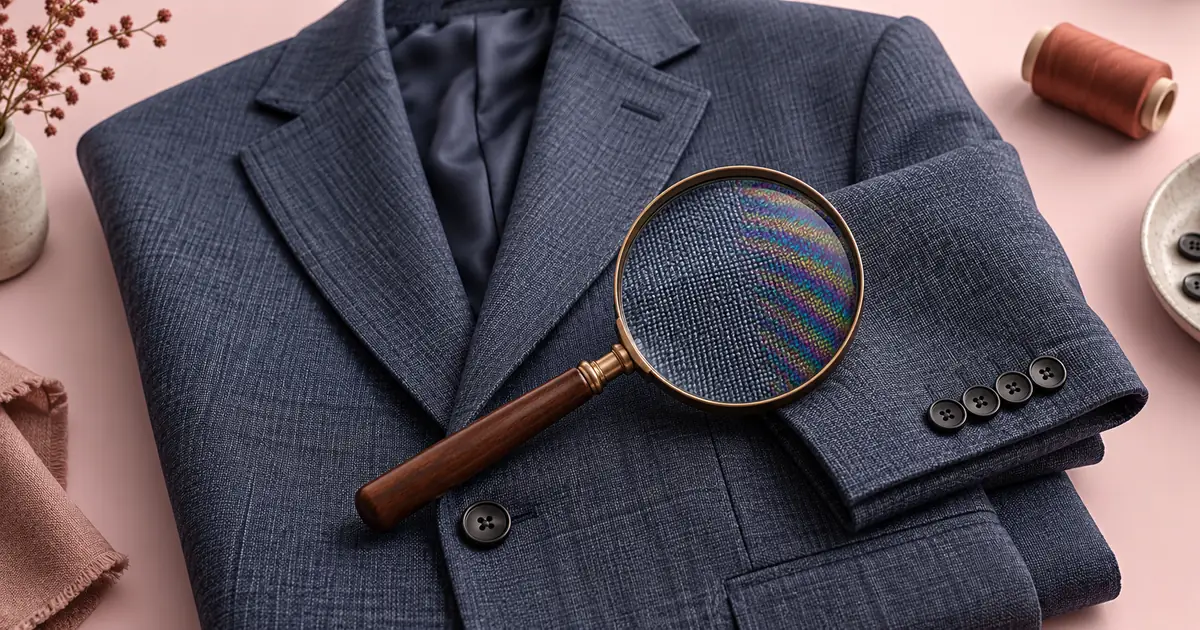

The jacket is gray in person, but the photo has green and purple bands across its sleeve. Before asking AI to replace the fabric, find out whether those bands exist in the source image or appear only after resizing.
To remove moire from clothing photos, compare the original at full resolution, a controlled local correction and the actual delivery sizes. Preserve seams, weave and color. A smoother sleeve is not an improvement if it now represents a different fabric.
Locate the stage that creates the pattern
Moire can occur when a fine repeating pattern interacts with a sampling grid. Clothing is a common subject because tightly spaced threads, checks and stripes can be difficult to represent. An additional pattern may also become visible during resizing or display.
Open the best available source, ideally the original raw file when one exists. View it at 100% in a suitable image editor. Then compare the exact export that looks wrong. Keep the crop and inspection area consistent.
Adobe's Camera Raw sharpening guidance recommends evaluating detail adjustments at 100% or greater. That view is useful for source inspection, but it is not the only view that matters. The customer may see an 800-pixel product image, not your full-resolution file.
| What you observe | First place to investigate |
|---|---|
| False color is present in the source at 100% | Capture or source development |
| Source looks clean but one resized export has bands | Resampling and export settings |
| Pattern changes when browser zoom changes | Display scaling as a contributing factor |
| Lines match the physical fabric and remain consistent | Real textile structure |
| Broad shading follows a fold without repeating bands | Lighting or garment shape |
These observations narrow the problem; they do not identify every cause automatically. A file may contain a real capture artifact and acquire additional interference when resized. Keep the source unchanged so the stages remain comparable.
Establish what the fabric actually looks like
Use another reliable photograph, the garment itself or an approved textile reference. Note the base color, weave direction, check spacing and texture around the affected area. Do not assume that every repeating line is an error.
For our example, a gray blazer has fine diagonal weave, a sleeve seam and three cuff buttons. The false color crosses the middle of the sleeve. The seam, buttons and narrow weave direction are protected details.
If the image is for a product listing, those details can influence what someone expects to receive. Avoid replacing a fine weave with generic smooth cloth merely because the AI edit looks polished. If no reliable source reveals the texture, explain the limitation to the person approving the image.
Color changes are a separate decision. The clothing recolor workflow helps when the intended task is a new colorway. Here the aim is to retain the garment's actual appearance while reducing an unwanted artifact.
Try controlled source adjustments first
Work on a duplicate or a reversible adjustment layer. Where your raw editor supports local moire or color-artifact correction, test it on the affected fabric region. The precise controls depend on the application and version.
Begin with a modest correction and compare it with the untouched image. Inspect the sleeve seam, thread direction and transition into nearby clean fabric. Increasing a correction until all texture disappears is an easy way to hide the problem and lose the product.
Separate false color from brightness texture when possible. If the objectionable bands are mainly colored, a localized color correction may preserve more luminance detail than broad blur. If there is a strong light-and-dark interference pattern, that same adjustment may be insufficient.
Do not stack sharpening on top of every failed correction. Sharpening may emphasize a pattern you are trying to reduce. Compare a conservative development version with your normal output treatment before adding another processing step.
Use AI only where the reference supports the repair
A generative edit can be useful when a small damaged area has enough neighboring texture to guide it. It can also invent plausible fibers. Treat it as a candidate repair that requires comparison, especially for product photographs.
Use your authorized photograph in Image Lab and choose a supported editing workflow. If the available control cannot confine the change adequately, use a local image editor or return to the source adjustment instead of accepting changes across the whole garment.
This instruction identifies what matters, but it is not a guarantee of pixel preservation. Compare the actual result with the original. Pay special attention to areas the prompt explicitly asked to protect; a model can still alter them.
If the sleeve becomes sharper than the rest of the garment, the repair may be conspicuous even when its pattern looks plausible. Match the local appearance to the source, not to an imagined perfect fabric sample.
Compare four views before choosing a candidate
Keep the unedited source, conventional correction and AI candidate side by side. Use the same crop and zoom. Start with the affected sleeve, then inspect the entire image for unintended changes.
The fourth view is the approved fabric reference. It answers a different question from the source comparison: does the corrected region still describe this garment? A pleasing invented weave can pass a before-and-after check if you judge only how smooth it looks.
| Protected feature | Acceptable change | Reason to reject |
|---|---|---|
| False green and purple bands | Reduced visibility | New color patches elsewhere |
| Diagonal weave | Retained recognizable direction | Random or reversed texture |
| Sleeve seam | Same position and shape | Moved, doubled or softened seam |
| Buttons | Same count and geometry | Added or melted button detail |
| Fabric color | Consistent with the reference | Warmer or cooler replacement cloth |
| Nearby clean area | Visually unchanged | Unnecessary generative redraw |
Inspect the boundary of any local edit. An abrupt change in grain, sharpness or brightness can create a visible patch. A wider blend is not automatically better if it begins altering protected seams.
Test the actual export sizes
Export fresh copies from the best master at the sizes the site or campaign will use. For a planning exercise, compare widths of 1,200, 800 and 400 pixels. These are example review sizes, not universal requirements.
View each file at its native display size, then in the intended page layout. Note whether a content system applies another resize or compression. A clean local export does not establish that the published rendition is equally clean.
If only one size shows the pattern, investigate that export path before making another permanent fabric edit. Try a controlled change in resampling or sharpening and keep the other variables fixed. Save the settings with the result so the next export can be reproduced.
Also check the image on a second ordinary display when practical. Display behavior can complicate a diagnosis, but one clean screen does not invalidate a problem visible in the real delivery environment. Record the conditions rather than declaring the artifact solved universally.
For a repeatable review, use the moire diagnosis worksheet. It separates source observations, repair comparisons and delivery-size results so a reviewer can see where the improvement occurred.
Know when to return to capture
If the underlying weave is unrecoverable and product accuracy matters, another photograph may be the most useful next step. A photographer can evaluate changes to capture distance, framing, lens settings or the garment arrangement in the actual setup.
Do not promise that one particular capture adjustment will solve every fabric pattern. The purpose of returning to capture is to obtain better evidence, not to follow an untested universal recipe.
Keep the approved master and exported files clearly named. Record whether the final image used a conventional adjustment, generative repair or both. The product-image approval workflow can help organize the broader review, while this worksheet preserves the specific textile checks.
Frequently asked questions
Can AI remove moire without changing the fabric?
It may produce a useful local correction, but it can also invent texture. Compare the candidate with a reliable fabric reference and inspect protected seams, weave direction and color before approval.
Why does moire appear only in the smaller image?
Resizing and display scaling can interact with fine repeating detail. Compare the source and each actual delivery size before assuming that the original photograph needs a generative repair.
Should I blur the whole jacket?
Broad blur can hide interference while removing useful texture and edge detail. Start with a controlled local adjustment, then review the corrected area at source and delivery sizes.
Is every striped pattern a moire artifact?
No. The garment may contain real stripes, checks or visible weave. Use the physical item or a trustworthy reference to distinguish the textile from false patterns introduced by imaging.
When is a new photograph better than another edit?
When the source does not provide reliable evidence of the fabric and accurate representation matters. A new capture can preserve real detail that repeated synthetic repairs would only guess.
Approve the fabric, then the export
Choose the smallest correction that solves the observed problem while retaining the garment's identity. Finish by checking the exact rendition people will see, because the source and the delivery file can fail in different ways.
Try a small fabric correction in Image Lab
Hero image: AI-generated editorial illustration. Examples are original planning exercises, not measured model tests.