
This guide turns a current search question into a repeatable production decision. It focuses on the source, controls, review, and destination checks that determine whether an output is actually useful.
What image-extender pages usually teach
Current ranking pages describe generative expand or outpainting as adding canvas beyond the original borders. Adobe shows a straightforward crop-and-generate workflow, while tool pages emphasize uploading, selecting an aspect ratio, and typing an optional prompt. That quick explanation correctly satisfies the basic “how” question.
The harder question is whether the new pixels belong to the same photograph. Trees repeat, horizons bend, reflections point to objects that do not exist, grain changes at the boundary, and a product or person may be quietly redrawn. This workflow is built around seam diagnosis and preservation.
Choose crop, reframe, or expand
| Need | Best first action | Why |
|---|---|---|
| Remove distracting edge | Crop | No invented pixels are required |
| Move subject within same content | Reframe | Composition changes without building a new world |
| Add breathing room | Expand modestly | New background can be simple and plausible |
| Turn portrait into wide scene | Expand in stages | Perspective and world logic need checkpoints |
| Recover a missing person or product | Use another source | Outpainting cannot reconstruct factual content it never saw |
Do not expand merely because a template is wider. Sometimes a background color, blurred fill, designed frame, or different source image is more truthful and more legible.
Prepare the source
Use the highest-resolution authorized file before social compression. Correct rotation, lens distortion, exposure, and obvious dust first. Keep a lossless master of the untouched original. Do not sharpen or denoise so aggressively that the center has a different texture from any plausible extension.
Record the destination dimensions and safe zones. A 9:16 story, 16:9 hero, 4:5 ad, and square product card require different subject scale. Plan all required ratios from the original master rather than repeatedly expanding an already generated expansion.
Build a continuity map
Mark every line or pattern that crosses the future boundary: horizon, shoreline, wall joint, road, shadow, reflection, fence, fabric, and depth layer. The extension must continue those facts. A seam is not only a visible edge; it is any broken world relationship.
Prompt the missing world, not the original
Weak: Expand this beautiful mountain lake into a cinematic landscape.
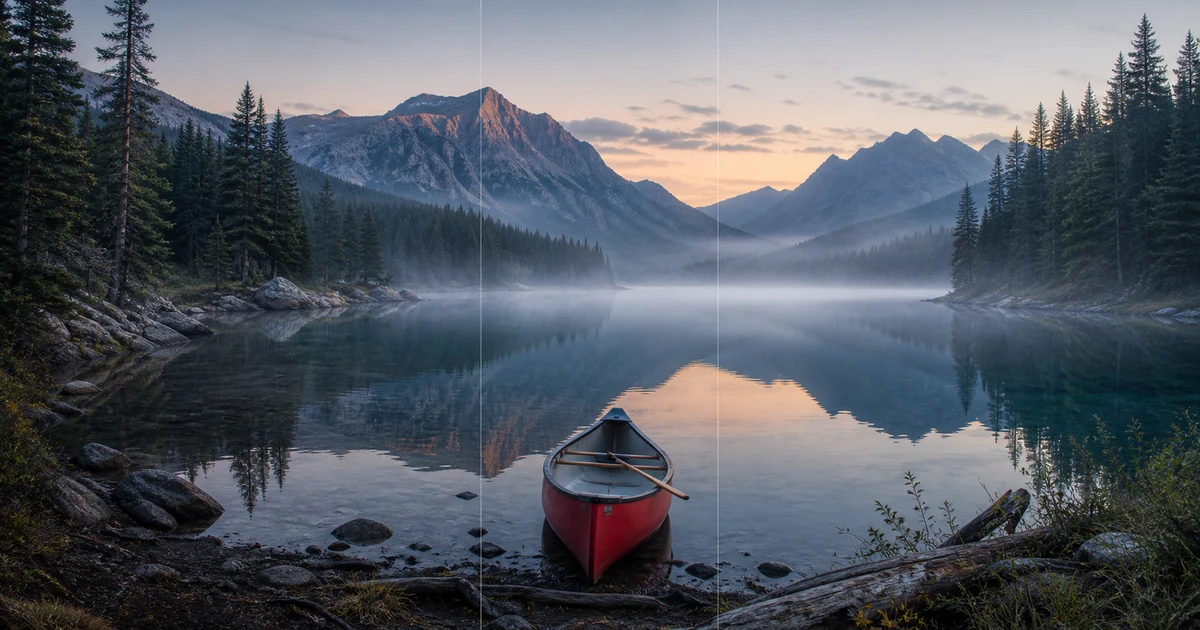
Controlled: “Extend only the left and right canvas to create a 16:9 landscape. Preserve every original center pixel, including the red canoe, paddle, shoreline contact, mountain shapes, mist, dawn color, and reflection. Continue the same alpine lake, waterline, pine forest, rock scale, atmospheric depth, and cool dawn light beyond both edges. The shoreline curves naturally away from camera, tree size decreases with distance, water reflections align with new trees, and fine grain matches the source. Add no people, buildings, boats, signs, or new focal objects.”
Unlike FLUX.2's conventional prompting guidance, an outpainting tool may expose a negative field. Use only the controls the selected tool provides. The preservation requirement remains the same: original content is the anchor, and the prompt describes the missing area.
Expand one direction at a time
- Save the untouched master and destination guide.
- Make a modest expansion on the side with the simplest background.
- Approve continuity at that seam before expanding another side.
- Return to the original master for a different aspect ratio.
- Finish exact edges, product copy, and layout in a normal editor.
Large one-step expansions give the model more freedom to invent a second scene. Staged expansion provides checkpoints and makes the failed boundary obvious. Avoid repeatedly saving lossy JPEG versions between steps.
Diagnose the seam
Bent horizon
Restate horizon height and vanishing point, then reduce expansion size.
Repeated trees or windows
Describe varied spacing and perspective; remove decorative complexity.
Wrong reflections
Match each reflected object, light source, angle, and water disturbance.
Brightness jump
Match exposure, white balance, haze, and light direction before grading.
Texture boundary
Match grain, sharpness, depth of field, compression, and material scale.
Original subject changes
Reject the version and strengthen the original-pixel preservation contract.
Review at three scales
At full size, inspect boundary pixels, repeated details, anatomy, product geometry, text, and noise. At fit-to-screen size, judge composition, visual weight, and whether the viewer notices the expansion. At destination size, check safe zones, subject recognition, CTA space, and whether compression exposes the seam.
Flip the image horizontally for a fresh composition check, then compare against the untouched original. Use a difference view inside the original bounds when the workflow should preserve those pixels exactly.
Example: one portrait master, three destination ratios
A vertical travel portrait must support a 9:16 story, 4:5 feed post, and 16:9 site hero. Keep the 9:16 source as the untouched master. The story may need only a crop. For 4:5, expand a small amount on the side where the landscape is simplest. For 16:9, return to the master and extend both sides in stages while preserving the subject and horizon.
Do not make the 16:9 file by expanding the already-generated 4:5 version. That compounds invented details and compression. Save a ratio-specific prompt, rejection reason, and final approval for each destination. Place copy only after the image passes, then verify that mobile and desktop crops do not hide the subject or expose a seam.
Final outpainting checklist
- The source is authorized, high quality, and preserved as a separate master.
- Expansion is more appropriate than cropping, reframing, or a designed background.
- Original identity, product, architecture, text, and center pixels remain correct.
- Horizon, perspective, scale, shadows, reflections, weather, and depth continue logically.
- Grain, sharpness, color, compression, and texture do not reveal the boundary.
- No repeated object or invented claim creates factual risk.
- Every required ratio was made from the master and reviewed at destination size.
QuestStudio Magic Editor provides an Image Expander for this workflow. Adobe's official Generative Expand tutorial demonstrates the basic canvas operation; the checks above protect continuity and source truth after generation.
If the canvas size is already right and only one local detail needs repair, use the choose a Magic Fill mask for a local detail repair guide. It includes an original exercise and a worksheet for reviewing the result.
Frequently asked questions
What is an AI image extender?
It uses generative outpainting to create new pixels beyond an image’s original borders, often to reach a new aspect ratio or add composition space.
Is outpainting the same as resizing?
No. Resizing scales existing pixels; outpainting invents new content outside the source frame.
Should I crop or expand?
Crop when existing content can satisfy the destination. Expand only when added context or breathing room is useful and truthful.
How do I hide outpainting seams?
Preserve original pixels and match horizon, perspective, lighting, reflections, grain, sharpness, texture scale, and compression across the boundary.
Can outpainting recover something that was outside the photo?
No. It can create a plausible continuation, not recover factual content the camera never captured.