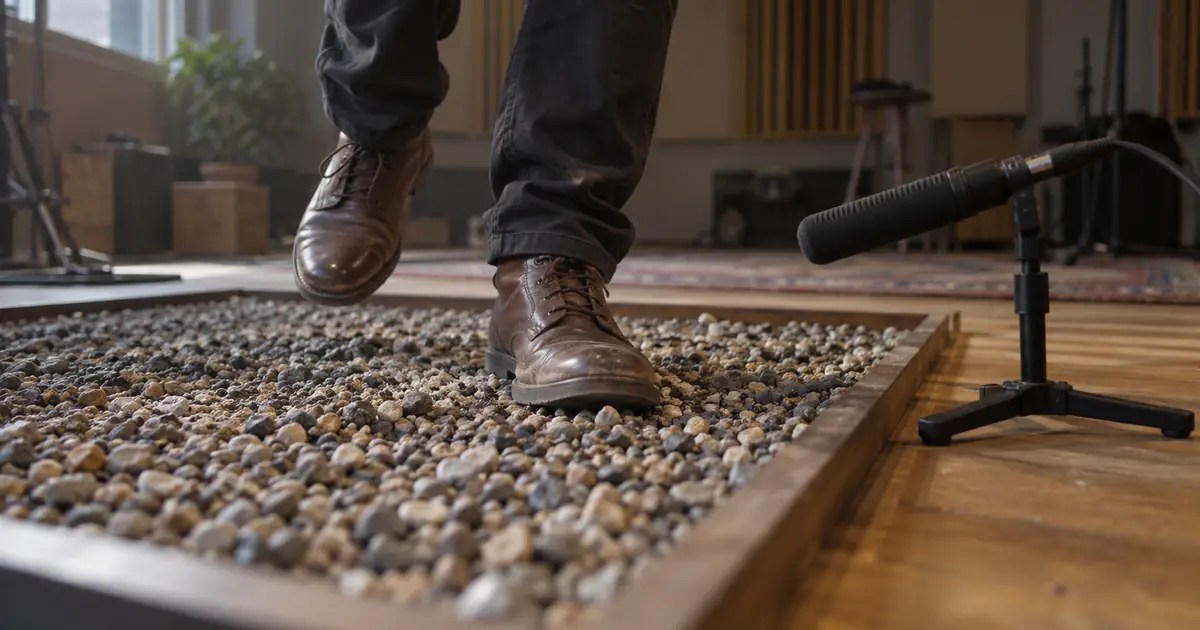

A walking shot can look convincing until the footsteps arrive half a beat late. The wrong shoe on the wrong surface can be just as distracting. Before generating audio, mark what the feet actually do. A short cue sheet gives you a better brief and a way to judge whether the soundtrack fits.
Download the footstep contact and sound cue sheet · Try Video Audio in Music Lab
Lock the picture before timing the feet
Use the version of the video you intend to edit. If you later trim the opening or change playback speed, the foot contacts will move relative to the audio. Save a clear picture version and note the timeline frame rate before creating the cue sheet.
Watch the clip silently at normal speed, then step through the important contacts. Mark the moment each shoe visibly loads onto the surface. A heel-to-toe step may contain more than one small sound, but begin with the main impact. You can add a scuff or weight shift after the main rhythm works.
Not every step will be visible. A cut may hide a foot, or the camera may show only the upper body. Mark those as inferred beats rather than pretending they are observed contacts. Use the visible steps and body movement to guide the rhythm, then listen for a natural continuation through the hidden portion.
Describe the shoe, surface and perspective
“Footsteps” leaves several important decisions open. A soft sneaker on carpet is very different from a hard boot on a hollow wooden floor. Specify the materials you can see, along with walking pace and the weight of the action. Avoid adding a dramatic stomp when the picture shows an ordinary walk.
Record surface changes explicitly. A person may walk across gravel, step onto a wooden porch and stop. One continuous gravel loop will miss the story of that transition even if its rhythm is close. Give the transition its own cue and review the first step on the new surface carefully.
Perspective matters too. A close shoe shot can support detailed grit and sole movement. A distant figure usually needs a quieter, less intimate sound. If the camera cuts closer, a slight change in detail can help the soundtrack follow the image.
Krotos’s footstep sound design guide describes useful layers such as the initial attack, the body of the sound and the surrounding space. It also emphasizes variations and perspective. Use those as listening categories rather than trying to make every step equally loud and detailed.
Build a cue sheet for a short walking shot
Here is a proposed eight-second scene: someone takes three steps over gravel, steps onto a wooden board and stops. The times below are planning examples, not measurements from a generated clip. Replace them with the contact times from your actual video.
| Example time | Visible event | Sound brief | Review point |
|---|---|---|---|
| 0.8 s | First boot lands on gravel | Short sole impact with loose grit | Does the main attack meet the contact? |
| 1.7 s | Second boot lands | Similar material, a different small crunch | Does the variation preserve the walking rhythm? |
| 2.6 s | Third step crosses gravel | One impact followed by a brief scrape | Is the scrape connected to visible movement? |
| 3.5 s | Boot lands on the wooden board | Firmer knock with less grit | Does the surface change at the right step? |
| 4.4 s | Other foot settles beside it | Quieter final contact | Does the walk stop when the body stops? |
| 4.4–8.0 s | Person remains still | Room or outdoor ambience only | Are there unwanted extra footsteps? |
The stopping point is as important as the first impact. A generator may continue a convincing walking rhythm after the person has stopped. Treat those extra beats as errors to remove, not as background texture.
If you prefer frame numbers, use the frame rate of your actual editing timeline. Record either elapsed seconds or a clearly labeled frame reference consistently. Mixing source timecode, timeline timecode and elapsed time in one unlabeled column makes repair harder.
Generate a useful first pass
Try Video Audio in Music Lab with your source video and this adapted sound brief.
Adjust the brief to the video instead of copying materials that are not present. If the clip shows sneakers on concrete, say that. If the camera is across the street, ask for a distant perspective. Keep the first pass focused on the footsteps so unrelated music or dramatic effects do not hide errors.
A video-conditioned generation can be a useful draft, but review the actual output. It may miss a contact, add a step or blur several impacts into a continuous texture. A text description also cannot guarantee exact frame alignment merely because you include a list of times.
If a combined output makes one stubborn error difficult to repair, consider a separate footstep element or a small set of suitable sound variations in your editor. Keep generation and final placement as separate decisions. The best source sound is not automatically the best full soundtrack.
Repair timing without flattening every step
Compare the main audio attacks with the marked contacts. When all impacts are offset by roughly the same amount, moving the sound clip may solve the problem. When one step is early and the next is late, a single global shift cannot align both. You need local edits or another take.
For local repair, split at quiet gaps where possible and move the individual sound toward its contact. Leave a short fade where the edit would otherwise click. Preserve a natural decay rather than cutting every sound off at the next marker. Listen through the whole movement after each change.
Avoid stretching one impact heavily to fill a longer gap. That can turn a crisp footfall into an unnatural smear. It is often better to move the event and let the space between steps remain quiet, or replace it with a more suitable variation.
Do not reuse one identical crunch for a long walk without listening for repetition. Alternate appropriate variations while keeping the shoe and surface consistent. A variation should change the small details of a step, not make the person sound as though they changed footwear every second.
Mix the walk into its environment
Start with the footsteps at a restrained level. Bring them up until the movement reads clearly, then listen with the dialogue or narration. If every shoe impact competes with a sentence, lower the footsteps or reduce the most distracting element. A technically aligned soundtrack can still be a poor mix.
Keep the space coherent. A tight dry impact in a visibly large room may need some room character; a long indoor echo may sound wrong on an open gravel path. Use the scene and the existing soundtrack as the reference. Do not add heavy reverb merely to make a small effect seem more impressive.
Check the cut between near and distant views. The same walking action can continue while its apparent distance changes. Adjust the sound’s prominence and detail to support that change, then watch without looking at your tracks to see whether the edit feels natural.
Export using the requirements of the destination or editing project. Listen to the rendered video from beginning to end, because a correct timeline does not rule out a muted track, clipped ending or export offset. Keep the final cue sheet with the accepted file so later picture changes can be traced.
How QuestStudio helps
Open Video Audio in Music Lab with an approved short silent video. Select a video-to-audio model that supports the clip length and use the surface-and-action brief to create a first pass. The Video Sound FX option is intended for short clips up to ten seconds; check the selected model’s current limits before uploading.
Review the result against the contact sheet before using it in a finished piece. For exact local timing adjustments, continue in a video or audio editor. This workflow does not assume QuestStudio provides a separate editable track for every footstep or that automatic synchronization removes the need to listen.
Begin with one walk and one surface transition. Once the contact timing, material and perspective work together, you have a repeatable method for the next shot.
The examples are proposed production exercises, not measured tool tests. The original hero image is an AI-generated editorial illustration.
Frequently asked questions
Can AI generate footsteps that match a video?
Video-to-audio tools can create a useful first pass. Check the actual impacts against visible contacts and repair misses or extra steps before using the result.
Should a footstep match the heel or the toe?
Start with the main visible weight-bearing contact. Some steps also need smaller toe, sole or scuff sounds, but align the main impact before adding detail.
Why do generated footsteps continue after the person stops?
The output may have continued a walking pattern beyond the visible action. Mark the stopping point in the cue sheet, then trim or regenerate the unwanted events.
Can I fix all timing errors by moving the audio track?
Only when the impacts share a similar overall offset. If the spacing between steps is wrong, use local edits or generate another pass.
Should every footstep use the same sound?
Small variations usually make a walk less repetitive. Keep the footwear, surface and perspective consistent while varying appropriate details.