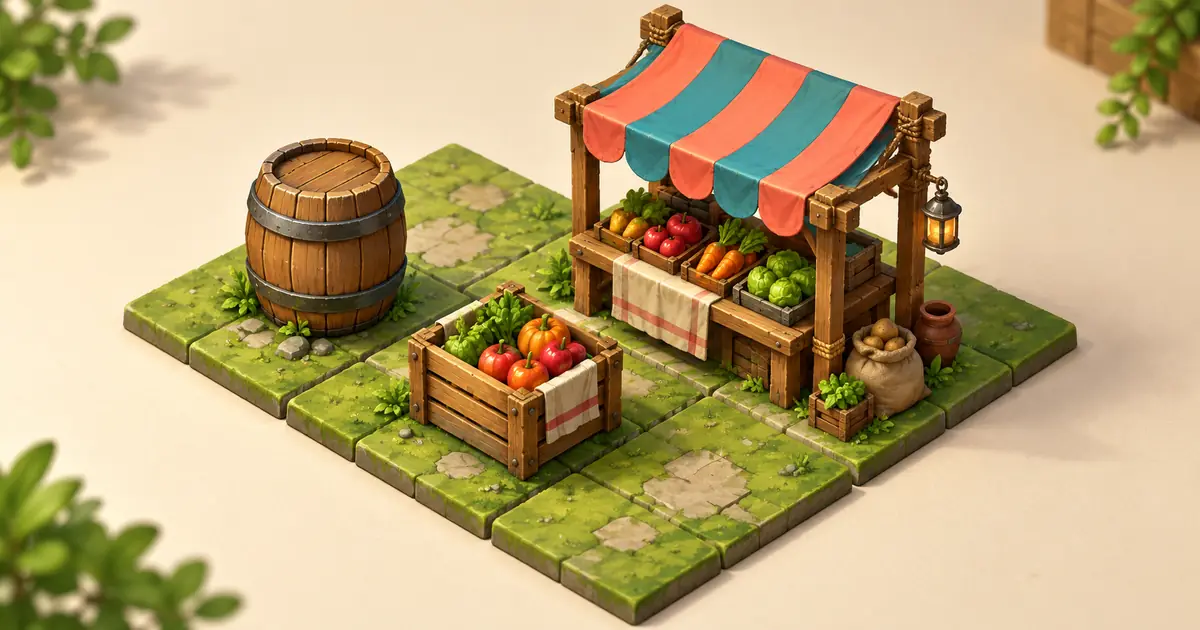

An isometric barrel can look excellent alone and still float above the floor when you put it in a game. The usual missing pieces are a shared camera, a defined footprint and a ground anchor that survives export.
Build AI isometric game props against one test scene before expanding the asset library. This guide uses a barrel, produce crate and market stall to show how to establish that agreement. AI helps create visual candidates; your editor or game engine determines placement, collision and draw order.
Give the set one scene to belong to
Begin with a small market corner, not fifty unrelated objects. Choose the floor tiles, lighting direction, palette and intended display scale. A barrel made for a close inventory view may contain much more detail than a barrel shown beside a tiny walking character.
Write down what the camera shows. In our example, the viewer sees the tops and two sides of objects. Vertical posts remain vertical in the screen image. Ground edges follow the same two diagonal directions as the floor.
The familiar 2:1 diamond used in many games is often called isometric, although its projection is technically dimetric. That distinction matters when someone supplies a mathematically different reference. Agree on the actual grid rather than relying on a label.
If you need frame-by-frame character animation, the pixel-art sprite sheet guide covers a different task. Here we are preparing static scenery pieces that must occupy a shared world.
Draw the tile before generating the prop
Use a diamond 128 pixels wide and 64 pixels tall for this worked example. From a tile center, the two ground-axis steps are 64 pixels right and 32 down, or 64 left and 32 down. These numbers describe our chosen layout, not a universal game standard.
Make a reference board with several tiles, a simple height marker and an existing approved object. A rough blockout is enough. Its job is to communicate angles and scale more clearly than “perfect isometric” can.
Scenario's isometric-tile tutorial shows the value of reference-guided construction. Apply that principle with whichever image workflow you use, then check the result against your own grid rather than assuming the reference was followed exactly.
| Prop | Intended footprint | Main scale comparison | First review question |
|---|---|---|---|
| Barrel | One tile | Below a standing character's waist in this scene | Does its base sit inside one diamond? |
| Produce crate | One tile | Lower than the barrel | Are its bottom edges parallel to the grid? |
| Market stall | Two tiles along one axis | Tall enough for the scene's character | Do all support posts meet their assigned ground points? |
A footprint describes the intended ground area. It is not automatically the same as the complete visible sprite bounds. A stall's awning may extend beyond its floor area, while a barrel's painted shadow may extend beyond its base.
Make one prop the reference for the rest
Generate the barrel first because its base and height are easy to compare. In Image Lab, use the grid reference when the selected workflow supports it, or create a simple candidate and evaluate it in your layout editor.
The prompt asks for a design direction; it does not create a verified grid anchor or transparent production file. Inspect the generated bottom edge and top ellipse. If the camera angle is wrong, fix the source before painting small details.
Place the accepted barrel on the reference board. Use its palette, edge treatment and lighting as the comparison for the crate. Then introduce the more complex stall. This sequence exposes consistency problems while only a few assets need revision.
A shared style should survive different object shapes. Do not make the crate circular or bend the stall supports merely to imitate the barrel's silhouette. Preserve the scene's camera and visual treatment while allowing each object to be structurally different.
Define a ground anchor, not just a canvas center
The anchor is the point your layout uses to position the prop. For this example, choose the center of the prop's ground footprint. On an upright barrel, that point is near the base, not halfway up the image.
Store the anchor relative to the exported image. If a 256 by 256 canvas has its anchor at 128, 208, and you trim 20 pixels from the left and 30 from the top, the new anchor is 108, 178. The artwork did not move in the world; its coordinates within the file changed.
That small arithmetic detail prevents an asset from jumping when an exporter removes transparent padding. Keep the untrimmed source, the trim offset and the final anchor together. If your engine uses normalized pivots, convert those pixel values using the final image dimensions and the engine's coordinate convention.
Do not guess whether an engine measures upward from the bottom or downward from the top. Confirm its actual import behavior with one prop. A visual placement test is more useful than a spreadsheet full of plausible but untested coordinates.
Test placement with neighbors
Create a small test patch containing two barrels, two crates and the stall. Put one crate in front of the barrel and another behind it. Place a barrel near each stall support. Look for both gaps and impossible overlaps.
A prop can align correctly at the center of an empty tile and still fail beside another object. A large baked shadow may cover its neighbor. A base drawn from a different angle may appear to cut diagonally across the floor.
| Test arrangement | Failure to look for | Likely correction |
|---|---|---|
| Barrel beside crate | Different ground slopes | Correct the source perspective |
| Two barrels on adjacent tiles | Inconsistent scale or excessive overhang | Adjust size or footprint |
| Crate behind stall post | Wrong draw order | Review scene sorting or split the asset |
| Character crossing the awning | Unnatural front/back switching | Separate overhead and ground pieces |
| Trimmed versus untrimmed export | Prop jumps position | Recalculate the anchor from trim offsets |
A single flat sprite may be unable to support every desired overlap. For example, a character might need to pass behind a front post but in front of the back wall. Splitting a stall into carefully planned layers can be more reliable than asking a sorting rule to solve an impossible arrangement.
Ground-based sorting is common in this style of scene, but its implementation varies. Test your actual engine or compositor. Do not assume that a filename containing “isometric” makes the draw order automatic.
Separate appearance from collision
A painted barrel's visible outline does not define its collision shape. The game may need a simpler footprint so the character can move naturally around it. The awning may be visible overhead without blocking the same floor area as a support post.
Have the person building the scene define collision and interaction zones. Add those decisions to the asset record. AI-generated shadows, decorative ropes and loose produce should not silently become obstacles just because they are visible.
This is also where scale becomes a gameplay question. If the market path is intended to fit a character, place the character there and test movement. A scene can look spacious in a large illustration while offering too little usable space at the intended camera zoom.
For artwork designed to be read on physical cards instead, use the card-game art workflow. Its readability tests address a different display context and should not substitute for a world-placement test.
Export a small, documented set
Keep each prop's source image, cleaned export, footprint, anchor and trim offset under one stable identifier. Export with the transparency and color settings your project needs. Inspect edge halos against both a light and a dark background before importing the complete set.
The isometric prop worksheet starts with the three market objects and space for your actual measurements. Its example footprints are design decisions to verify, not measured properties of an AI output.
Use a consistent naming pattern such as market-barrel-v02 and keep the reference board alongside the files. Record the accepted display scale. That prevents a future contributor from matching the source's full-resolution appearance instead of its in-game appearance.
If cleanup requires editable geometric shapes, the AI image to SVG workflow explains that conversion separately. A vector export still needs the same placement and anchor checks.
Frequently asked questions
Does an isometric prompt guarantee the correct projection?
No. The phrase gives a visual direction but does not verify the resulting angles. Compare the prop with an explicit grid and approved scene reference, then correct or reject incompatible candidates.
Is a 2:1 diamond true isometric projection?
It is commonly used under the isometric label in games, but it is technically dimetric. Use the actual tile proportions and axis directions in the project specification so collaborators share the same geometry.
Should the pivot be at the center of the image?
Usually the useful placement reference is connected to the ground footprint. The canvas center can move when padding changes. Choose a ground anchor and preserve its relationship to the exported image.
Can one image handle every character overlap?
Not always. A tall structure with foreground posts and overhead parts may need separate layers or a different scene representation. Test the required crossings before committing to a single sprite.
How many assets should I generate before testing?
Start with a small set that exposes different shapes, such as a barrel, crate and stall. Test placement, scale and overlap before expanding the library. This makes a shared camera or anchor problem much cheaper to correct.
Build the market corner first
One accepted prop and one trustworthy grid can guide a useful collection. Finish the small scene, document how the files sit in it and expand only after those objects behave consistently together.
Make one market prop in Image Lab
Hero image: AI-generated editorial illustration. Examples are original planning exercises, not measured model tests.