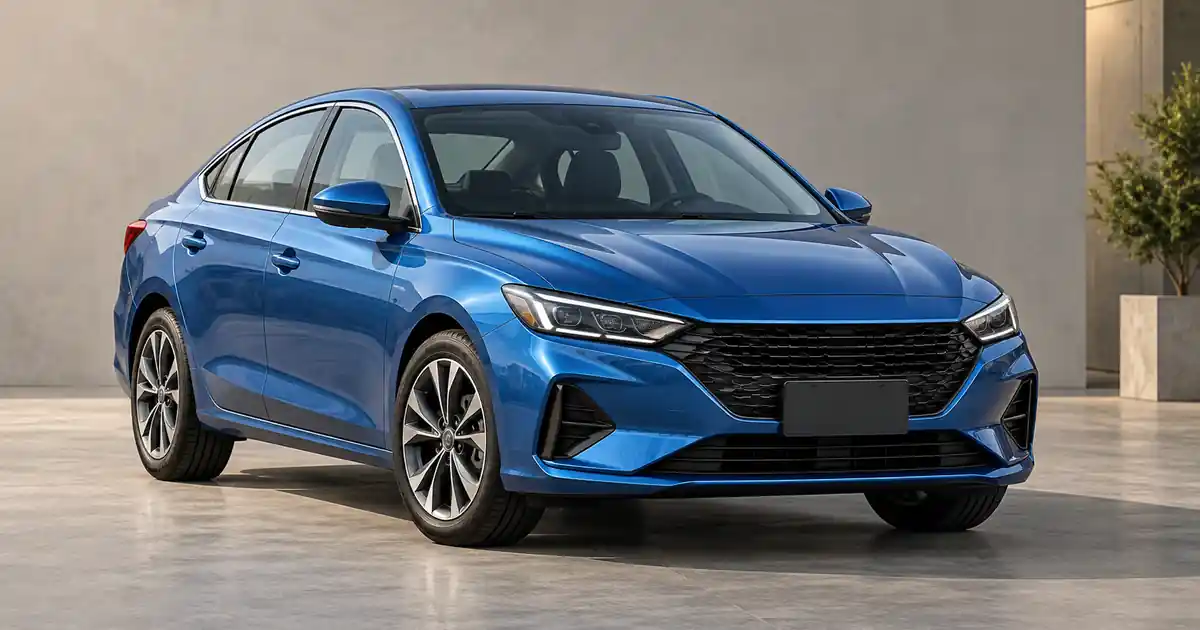

A clean background can make an inventory photo easier to read. It should not turn the car into a different trim, repair a dent in the picture, or invent a set of wheels. AI car photo editing for a dealership needs a narrower brief than an automotive concept image: improve the setting while preserving the specific vehicle and its condition.
Download the six-view vehicle photo and export manifest · Test one inventory background edit
Set the boundary between presentation and vehicle facts
Write down which changes are allowed before the first edit. Removing a distracting background, adjusting exposure within a faithful range, and presenting a consistent crop are different from changing equipment, body shape, paint color, or visible damage. The latter changes what the image communicates about the car.
Use the actual inventory record and original photos as your reference. Do not substitute a similar model from a generator, even if it shares the make and color. Wheel designs, lighting elements, mirrors, badges, roof features, and interior equipment can differ within the same model family.
Keep condition documentation separate and clear. If the original photograph shows a mark that a buyer needs to understand, do not erase it because it resembles visual clutter. Improve the photograph around the vehicle while keeping the vehicle itself an honest representation.
Capture a useful six-view exterior sequence
| View | Main purpose | Detail to check |
|---|---|---|
| Front three-quarter | Primary listing image | Front fascia, wheel design, mirrors |
| Rear three-quarter | Rear shape and equipment | Lights, exhaust, tailgate or trunk |
| Straight front | Symmetry and frontal condition | Grille, lamps, bumper |
| Straight rear | Rear condition and identifiers | Trim, lamps, visible features |
| Driver-side profile | Body line and wheel relationship | Doors, sill, both wheels |
| Passenger-side profile | Opposite-side condition | Panels, mirrors, both wheels |
This is a starter exterior sequence, not a complete inspection or listing checklist. Add actual interior photos, cargo space, equipment details, and condition close-ups as the listing requires. A synthetic exterior background does not replace those records.
Use a repeatable camera height and enough distance to avoid exaggerated perspective. Keep the whole car inside the frame, including mirrors and the shadow area near the tires. Leave working space around it so the final crop does not force the editor to invent missing bumper edges.
Make the source photograph easy to separate
Choose a capture location with reasonable contrast between the car and surroundings. A dark car against a dense dark fence creates a difficult edge. A busy lot reflected across every panel can remain visible after the background is replaced, creating a mismatch with a clean studio wall.
Use soft, consistent light when available and avoid clipping bright highlights on reflective paint. Check that the tires and lower body are not lost in deep shadow. Walk around the car and notice reflections before taking each view. A small change in capture position may solve a problem that would be difficult to edit convincingly.
Retake blurry or incomplete photos rather than asking AI to reconstruct critical detail. If a wheel is partly outside the frame, a plausible invented wheel is still not evidence of the actual equipment. Good source capture protects accuracy and reduces review work.
Choose a background that fits the camera and light
Photoroom’s dealership photography workflow discusses standardized backgrounds and vehicle-photo production. The useful production principle is to keep the presentation repeatable; vendor cost or sales claims should not be assumed to apply to your dealership.
Choose a restrained background with a believable floor plane. Its horizon, perspective, and light direction should agree with the source photograph. A low front-three-quarter photo cannot be placed convincingly into every room simply by shrinking or enlarging the car.
Use the same setting family across the inventory without forcing identical placement onto incompatible source angles. A side profile needs a different amount of horizontal space than a front view. Consistency should make the vehicle easy to compare, not crop off its defining shape.
Protect the vehicle and inspect the mask
Use a selective or foreground-preserving workflow when available. Check the mask around wheel spokes, mirror gaps, roof rails, antennas, windows, and the underside of the car. These are places where a broad automatic selection can remove real detail or retain fragments of the old background.
Glass needs special attention. A window may contain interior detail, reflections, and a view through to the other side. Treating all glass as empty background can remove seats or change the apparent cabin. Compare the candidate with the original before approving any transparency treatment.
Make the car sit on the ground
Inspect the contact area under each visible tire. A gap, a disconnected shadow, or an incorrect floor angle makes the car appear to float. The shadow should explain the lighting and support the vehicle, not simply form a generic dark oval beneath it.
Check that the new floor does not cut into the tires or obscure the lower body. Look at wheel roundness and their relative sizes. If one wheel changes shape during the edit, do not compensate with a more dramatic crop; return to the protected source or revise the local boundary.
Reflections must also make sense. A glossy car in a plain room may still show the original lot in its paint. Sometimes retaining a modestly cleaned original setting is more credible than manufacturing a pristine studio environment. Choose the amount of transformation your source can support.
Review vehicle identity before reviewing visual polish
| Check | Compare against the original |
|---|---|
| Equipment | Wheels, mirrors, roof features, lamps, and trim remain the same |
| Paint | Color and finish are faithful under the new presentation |
| Body | Panel lines, door count, proportions, and visible condition are preserved |
| Glass | Interior and reflections remain plausible; no erased seats |
| Grounding | Tires meet the surface and shadows agree with the light |
| Set consistency | Each view still depicts the same inventory vehicle |
Review each candidate beside its source at the same scale. Then review the entire set together. A repeated background may hide a mismatched car if the files were assigned to the wrong stock number, so inspect identity and organization as well as visual quality.
Record specific corrections. “Rear wheel changed to a different design” is actionable. “Make it more realistic” invites a broader rewrite. If a detail must remain exact, preserve it from the source instead of repeatedly asking the model to reconstruct it.
Create an export manifest the listing team can trust
Keep the internal inventory ID at the start of every filename, followed by the view and version. For example, STOCK123-front-three-quarter-v02 identifies both the vehicle and the image’s role. Use your own existing ID system; do not invent a new one that disconnects photos from the inventory record.
Maintain separate source, candidate, and accepted folders. In the manifest, record the final filename and intended display order. A listing team should not have to choose among five near-identical experiments or guess which image received approval.
Export at the destination’s current dimensions, format, and quality requirements. Open the files and inspect the actual listing preview. Automatic cropping can clip a mirror or bumper even when the master is correct. Keep the original photographs available for future condition review and re-export.
How QuestStudio helps with one controlled trial
Use Image Lab to test a supported image-editing workflow on one authorized inventory photo. Keep the brief limited to the setting and compare every vehicle detail with the source before expanding to a full set.
QuestStudio is an asset-creation option in this process; this guide does not claim automatic dealership inventory synchronization or a dealer-management integration. If your operation needs automated file routing, approval, or bulk processing, verify those capabilities separately.
For the next trial, choose one difficult but representative source: reflective paint, clear wheel details, and a visible grounding shadow. Count correction effort and rejected outputs, then decide whether the process saves work across the actual six-view sequence.
About this guide
This is an editorial production method, not a claim that every AI model can perform every step. Examples and worksheets are illustrative; no measured generation results are implied. The hero is an original AI-generated illustration. The illustrated hero is not a photograph of inventory for sale.
Frequently asked questions
Can AI edit dealership photos without changing the car?
A foreground-preserving or carefully masked workflow can limit the edit to the setting. Verify the result against the original; a prompt alone does not guarantee that vehicle details stay unchanged.
What should never change during inventory background editing?
Preserve the actual body, paint, wheels, trim, equipment, interior details visible through glass, and condition. Keep the original photos for comparison.
Why does the edited car look like it is floating?
The floor perspective or tire contact shadow may be wrong. Inspect the ground plane and each visible tire rather than adding a generic shadow.
Does QuestStudio connect directly to dealership inventory systems?
This guide makes no such claim. It describes creating and reviewing an image asset, then organizing accepted files for your existing listing process.