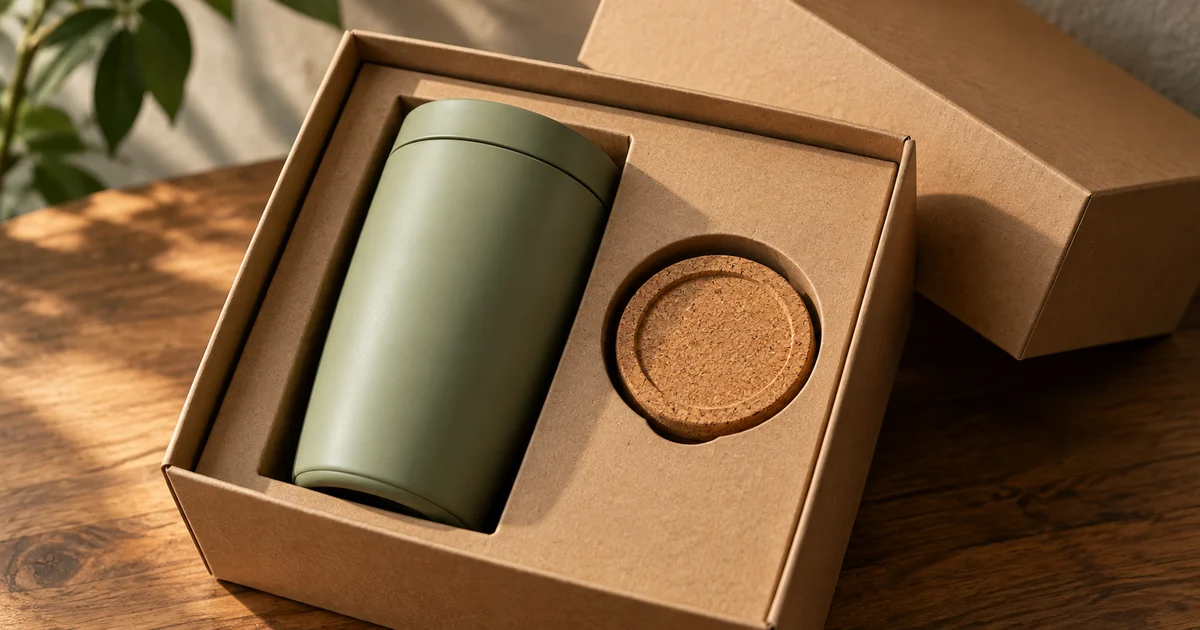

The lid rises, the camera moves closer, and a second charger appears inside the box. An unboxing has more continuity problems than a simple product spin because the scene changes state. Planning those states makes the reveal easier to generate and much easier to review.
Download the unboxing state and continuity sheet · Test one product reveal shot
Decide whether this is a demonstration or a concept
A real unboxing demonstrates what someone receives and how the package opens. A stylized reveal can be more imaginative: a floating lid, colored light, or a product rising from mist. Both can be useful, but they communicate different things.
Write the intended use before generating. Our fictional example is a promotional reveal of a travel mug with a cork lid in a fitted cardboard insert. It is not a customer review and does not establish durability, temperature retention, or how the product feels in a person’s hand.
If the opening mechanism, tactile experience, or included accessories are the central claim, record those details from the real package. AI can support the setting or transitions. It should not become the source of facts about an item you have never seen.
Count everything that can enter or leave the box
Make a short inventory: one mug, one lid, one cardboard insert, one box top. Include tissue, printed cards, cables, tools, and spare parts when they are actually supplied. Mark props separately so they do not quietly become part of the bundle.
Photograph the package closed, fully open, and with the product removed. Keep a clear view of the insert. A closed-box photo alone cannot show where the mug sits or how deep its recess is. Any generated interior would be a reconstruction.
Keep approved label artwork and a product detail image nearby. Small text often looks plausible while being wrong. The continuity review should include both object count and the actual words or symbols the audience can read.
Map the package states before mapping the camera
The box changes through time. Write the state at the start and end of every shot, including the location of pieces that leave the frame. This gives you a way to compare clips that were generated independently.
| State | What must be true | Common failure |
|---|---|---|
| Closed | Lid fits the same base and corners align | Box proportions change before opening |
| Opening | Lid follows the real hinge or lift direction | Hinged lid detaches or passes through the base |
| Open | Product and accessories match the inventory | Extra pieces appear in previously hidden space |
| Product detail | Removed product matches the earlier item | Color, silhouette, or lid construction changes |
For the mug example, the top lifts off rather than rotating on a hinge. That choice belongs in the reference and motion direction. “Open the box beautifully” does not tell a model which physical mechanism exists.
Use four short shots instead of one complicated take
A manageable sequence is a closed-package introduction, a short opening movement, an open-box hold, and a product detail. The middle movement carries the hardest geometry. The surrounding stiller shots establish facts and give you places to cut.
A sample fifteen-second plan might allocate three seconds to the closed box, three to the lid lift, four to the open-box view, and five to the product detail and copy. These are editing targets. Generate lengths supported by the selected model and trim useful segments to fit.
Keep the camera similar across the opening and open-box shots so the lid position and insert remain easy to compare. You can change angle for the final detail after the viewer understands the package. A cut is often more reliable than asking a camera to orbit through newly revealed space.
Test the opening movement by itself
Runway’s image-to-video guide recommends clear motion descriptions and a clean source image. For an unboxing, use that principle to isolate the lid movement before adding hands, camera motion, or effects.
This prompt assumes the chosen workflow has enough reference information to represent the interior. If only the closed state is available, prepare an approved open state or use a cut to a real open-box shot. Do not treat a plausible invented insert as evidence of the real packaging.
Add hands only when they help explain the action
Hands can make a reveal more personal, but they also introduce grip, occlusion, finger count, and contact problems. A hand should touch the lid at a plausible point and move with it. If the fingers slide through cardboard or the lid moves before contact, the shot feels disconnected.
Use a real opening clip when physical interaction matters. For a generated concept, simplify to one hand movement and a stable camera. Avoid asking the same short shot to remove a lid, unwrap tissue, lift the product, rotate it, and point to a feature.
Review the occluded moments carefully. The product may change while hidden behind a hand and reappear with different proportions. Compare a frame immediately before the obstruction with the first clear frame afterward.
Check continuity at the cuts
Save the exit frame of one shot and the entrance frame of the next. Compare the box angle, lid position, product orientation, tissue fold, shadow, and accessory count. The camera may change, but the physical state should remain understandable.
If the lid exits to the upper right in one clip and lies at the lower left in the next, either show the intervening placement or choose a framing that does not create a contradictory expectation. The goal is clear spatial storytelling, not pixel-identical shots from different angles.
When a clip changes the mug color or invents a second lid, replace that segment. A fast transition may hide the error on first viewing, but a product image should withstand a pause. Use the packaging consistency guide for detailed label and silhouette checks.
Use sound without pretending it proves the product
A soft cardboard movement or a gentle reveal accent can make the edit easier to follow. Keep effects synchronized with visible events. A click before the lid moves or a metallic impact on a paper box draws attention to the assembly.
If the sound is synthesized, treat it as sound design. It does not demonstrate the actual latch, material, or acoustic behavior of the product. For an authentic demonstration, use the real opening sound or clearly present the piece as a stylized promotional scene.
Add promotional copy separately and keep it factual. “See what is included” belongs beside an accurate inventory. A claim about performance needs its own substantiation; an attractive reveal cannot supply it.
Know when to use a simpler fallback
If the lift keeps failing, cut from closed box to open box with a short sound bridge. If tissue repeatedly changes shape, remove it from the concept only when that does not misrepresent what comes in the package. If a label will not survive motion, use a real static detail at the end.
Set a small test budget around the difficult movement. After several attempts fail in the same way, change the method: real footage, a still-image edit, or a more modest reveal. Repeating the entire prompt with stronger adjectives rarely tells you why the package is still breaking.
The practical deliverable is a trustworthy sequence, not proof that every second was generated. Keep the approved source images and state map with the final file so future variants preserve the same product facts.
How QuestStudio helps
Prepare a clean product scene in Image Lab and test the simplest reveal in Video Lab. Select a supported reference workflow and inspect the available controls; multiple references and endpoint controls vary by model. Finish assembly, text, and sound synchronization in your editor.
Before delivery, review the sequence once at normal speed and once frame by frame around the opening and every cut. Count the included items again in the final export. The fictional mug, packaging plan, prompt, and hero are editorial examples prepared September 24, 2026, not an observed product-performance test.
Frequently asked questions
Can I make an AI unboxing video from one product photo?
You can make a stylized concept, but one photo may not show the packaging interior or opening mechanism. Use additional approved references or real footage for those facts.
Why do extra accessories appear in the box?
The model is inventing hidden space or losing continuity. Keep a fixed inventory and compare the open state against the real package.
Should I use a single continuous shot?
Only if it stays reliable. Short shots with clear package states are easier to review and replace.
Can I present the clip as a customer review?
A generated reveal is not evidence of a customer experience. Describe the asset according to what it actually shows.
What is the easiest fallback for a broken lid animation?
Use an accurate closed-box shot followed by an accurate open-box shot, joined with a simple cut and appropriate sound.