
A beautiful wide shot can still leave the audience lost. If the door moves between shots, the harbor switches sides, or the next interior seems to belong to another building, the opening image has not done its job. An establishing shot should introduce a place you can keep using.
Download the review worksheet · Plan a readable opening shot
Decide what the audience needs to know
An establishing shot tells viewers where the scene happens and often when it happens. It can also establish mood, scale, isolation, or the relationship between places. It does not need to show every building in the neighborhood. Select the facts that matter to the next action.
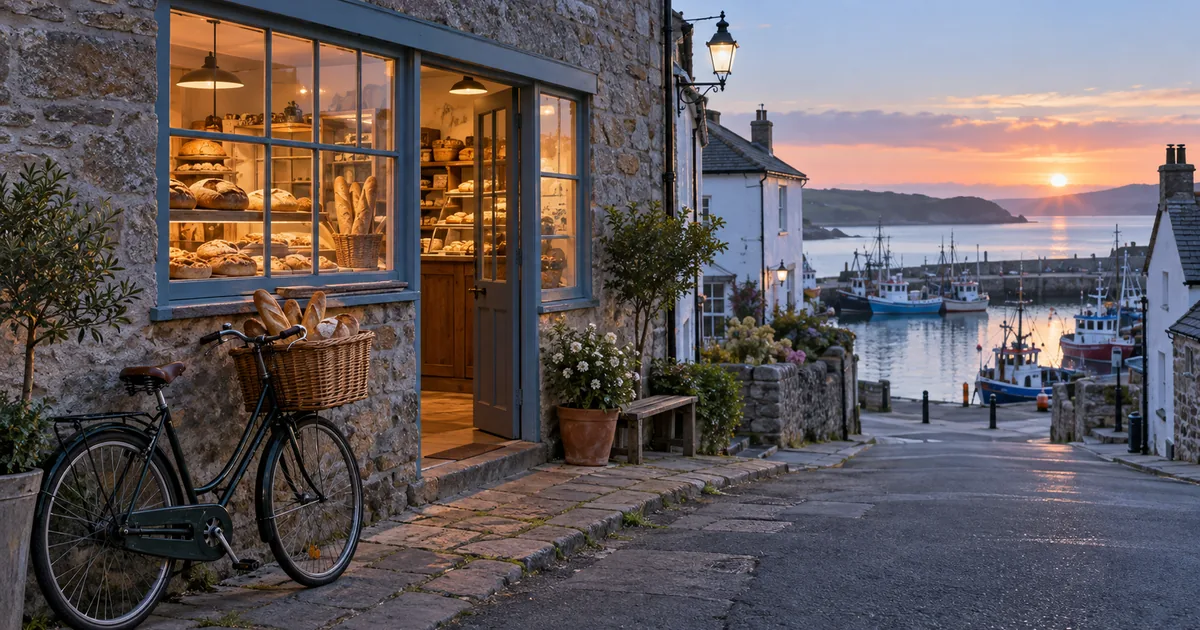
For our fictional bakery, the audience needs to know three things: it is beside a harbor, the entrance is on the left of the visible facade, and the shop is opening at dawn. A bicycle by the door becomes a useful anchor. This invented setting avoids implying that a generated exterior documents a real business.
Write a one-sentence purpose before the prompt: “Introduce a quiet harbor bakery before the owner unlocks the door.” If the scene is instead about a crowded city, the same quiet composition would communicate the wrong information.
Draw a small coverage map
A rough map can be just words and arrows on paper. Put the bakery in the center, the door on the left, and the harbor to the right from the establishing camera’s viewpoint. Mark where the next camera will stand. This is a production aid, not a demand that a text model follow exact coordinates.
| Shot | Required information | Anchor to preserve |
|---|---|---|
| Wide exterior | Bakery beside the harbor at dawn | Door left, harbor right, bicycle by door |
| Closer entrance | Owner reaches the bakery | Same door material, bicycle placement, light direction |
| Interior detail | Work begins inside | Compatible window light and approved interior reference |
The third shot does not have to show the harbor, but it should not contradict the light or architecture already established. If you need an exact interior, prepare that reference separately. An exterior image cannot prove the floor plan behind the wall.
Choose a camera position that explains the relationship
A very high aerial view may show the town but hide the entrance. A ground-level view may make the shop inviting but conceal the harbor. Pick the lowest-complexity view that includes the required facts at the size they need to be seen.
For the bakery, a modest wide three-quarter exterior is enough. The facade stays readable, the harbor occupies part of the right side, and the bicycle can be seen without becoming the main subject. Keep the horizon level unless a tilted viewpoint serves the story.
The Runway camera reference provides movement vocabulary. Here, a locked view or restrained push-in keeps attention on geography. A sweeping orbit can reveal more of the building, but it also creates more hidden surfaces to invent.
Write the location before the atmosphere
Start with the concrete arrangement. Then add time, weather, and the small amount of movement the shot needs. Words such as cinematic, breathtaking, and epic do not tell the model where the entrance belongs. They should never replace the spatial brief.
For a real location, start with authorized reference material and verify the result against it. For the fictional location, save the accepted still or first frame as the project’s visual reference. The generated hero on this page illustrates the proposed geography, not an observed place or tested video output.
Approve the wide shot at delivery size
View the shot as the audience will see it. If it will live in a phone feed, the bicycle may disappear into a few pixels. You may need a closer composition or a stronger anchor. Do not judge only on a large desktop preview.
Ask someone unfamiliar with the brief to describe where the door and harbor are. Their answer is more useful than asking whether the shot looks cinematic. If the image communicates the place incorrectly, simplify it. Remove a second door, competing storefront, or foreground obstruction.
- The required location facts are visible.
- The horizon and architecture remain coherent.
- The subject of the next shot is easy to locate.
- The final crop preserves the important anchors.
- Any lettering is approved separately or absent.
Make the next shot before generating ten variations
The real test is whether you can cut to the entrance without rebuilding the bakery. Generate or prepare the closer view using the accepted reference and repeat the door, bicycle, materials, and dawn-light constraints. Compare both frames side by side.
If the close-up moves the bicycle to the other side, decide whether the difference can be explained by the camera position. Do not call every change a continuity error: perspective changes relationships. A new door color or a different handle, however, needs an intentional explanation or a repair.
Use the screen-direction workflow when people move between the two views. Keep the owner’s approach consistent so they do not appear to reverse direction after the cut. A simple map helps distinguish a legitimate angle change from a flipped scene.
Know when a wide shot is not needed
Some openings work better with a close detail followed by a wider reveal. A hand unlocking a flour-dusted door can create curiosity before the harbor appears. In that case, the later wide shot still needs to connect to the detail already shown.
An establishing shot is also different from a master shot. A master typically covers the scene’s action in a sustained wider view; an establishing image may be brief and contain little action. Do not force all dialogue or movement into the opening simply because it is wide.
For short commercial pieces, one clear location cue may be sufficient. Test the edit with the shot removed. If the audience still understands the setting and the opening becomes stronger, the shot may be unnecessary. Coverage should serve the piece, not a checklist of film terms.
How QuestStudio helps
Use Video Lab to build one opening shot from a clear scene brief. If starting with an image, prepare and approve that image first. Keep the coverage map beside your outputs so model comparisons use the same location requirements.
The storyboard workflow helps plan the larger sequence. The partial camera arc guide is useful when a later shot must reveal a new side of the location. Complete exact shot ordering, sound, and timing in your editor, then review the sequence as a whole.
For a shallow-water scene, the underwater video workflow checks moving light against stable rocks, fish anatomy and occlusion continuity.
Frequently asked questions
What makes a good AI establishing shot prompt?
It identifies the location facts viewers need, a clear camera position, time and light, and a small number of consistent visual anchors.
Does an establishing shot have to be aerial?
No. A ground-level or modest elevated view can establish a location if it communicates the relevant relationships clearly.
How long should the shot last?
Use enough time for the viewer to understand the required information in the actual edit. Complexity, motion, delivery size, and pacing matter more than a universal duration.
Can I generate a real shop from its name?
A name alone does not verify its appearance. Use suitable real references and check the result if the image is meant to represent an actual place.
Start with one version you can inspect. Plan a readable opening shot, then use the worksheet to decide what needs another pass.