
Book product photography should explain the physical edition a reader will receive. The front cover matters, but so do the spine, thickness, binding, page block and interior layout. A flat cover graphic cannot establish those details, and a convincing generated mockup can invent them.
Build the gallery around an actual copy when physical accuracy matters. This workflow separates approved cover artwork from the photographed book, then plans the views and checks needed for a useful author or shop listing. The example uses a fictional clothbound notebook called Garden Notes.
Identify the edition before arranging the scene
Record the format, trim size, cover finish and relevant edition information. A paperback and hardcover carrying the same artwork are different physical products. Keep their source photographs and output files separate.
Use the actual sample to inspect the spine, corners and page block. Check whether the cover has flaps, whether the binding opens flat and whether the interior is lined, illustrated or blank. If the sample is an early proof, identify any features that will change before sale.
For an author preparing artwork rather than product photographs, the book cover design workflow covers the separate cover-to-print job. Here, the cover file is one input to a gallery that must describe a real object.
Plan a gallery with different reading questions
A front three-quarter view shows the cover and physical depth together. A straight-on cover photograph helps readers inspect the artwork. A spine view explains the shelf appearance, while an open-book image shows the interior experience. Add a detail when paper, binding or finish needs a closer look.
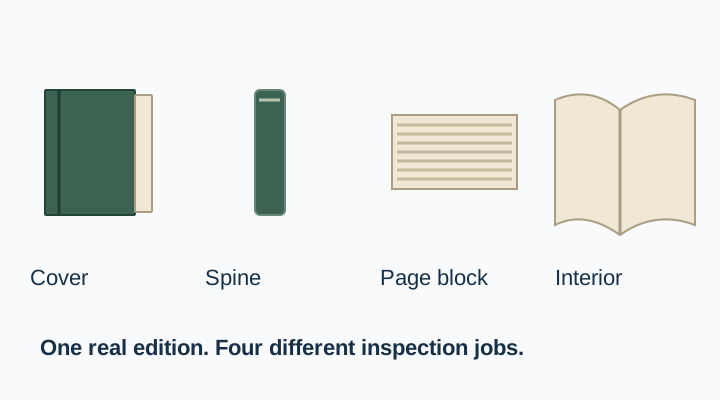
Decide what each photograph needs to prove before adding props. An elaborate desk scene may communicate mood, but it can hide the binding and make the book's size hard to judge. Capture the factual views first, then create a supporting environment if the destination and purpose call for it.
The product shot-list guide gives the broader planning method. The book-specific task is to keep the artwork, edition and physical construction connected across the set.
Give the cover enough readable space
Start with a clean, square source of the cover. Keep the camera aligned when the purpose is to inspect typography, and use a separate angled frame to show thickness. Those views serve different jobs and do not need to compete.
Move the light when a shiny cover reflection crosses the title. Darkening the entire image may make the lettering harder to read without solving the reflection. A restrained highlight near an edge can help show a finish, but it should not erase an important word.
Keep approved cover artwork available as a separate file. If lettering becomes distorted in a generated scene, return to the real photograph or a controlled placement workflow. The image text workflow explains why exact production text needs its own review rather than a general request for readable letters.
Check the spine and page block together
In the Garden Notes example, the source record describes one green clothbound hardcover with cream pages and no jacket. A candidate image that adds a dust jacket or changes the page block to bright white should be rejected for a factual listing, even if it looks more polished.
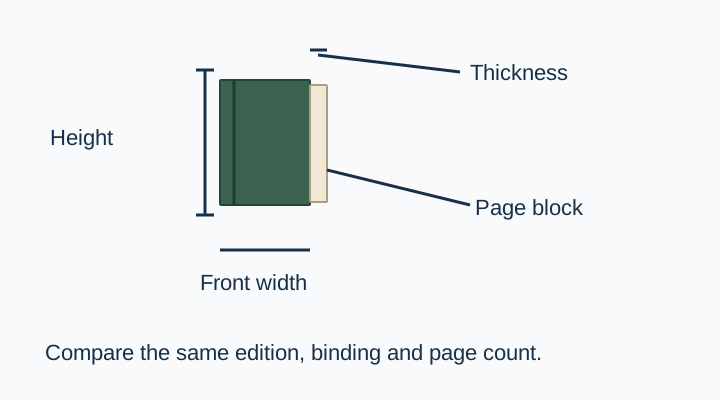
Look at where the cover meets the pages. The hinge, corners and page edges should agree across angles. A mockup can show a paperback bend in one frame and a rigid board in another. Review the set as one physical object, not as isolated attractive pictures.
If thickness matters, photograph the actual book beside an appropriate verified scale reference or use a dimension graphic. Avoid estimating page count from the apparent thickness of an AI image.
Treat an open-book view as evidence
Photograph the spread that represents the product accurately. For a workbook, show a useful example of the real page layout. For an illustrated book, use a spread you are authorized to display. Keep any private notes or personalized information out of a public source.
A generator can create plausible-looking lines and paragraphs that do not appear in the book. Do not use those invented pages to demonstrate the actual contents. If you only need a decorative concept, keep it distinct from the factual gallery.
Hold the book in a way that suits its construction. Do not force a binding flat to imitate a different format. Let the real sample determine the pose, and choose another view when an important detail would otherwise be hidden.
Write a scene brief around the approved source
Use a photograph that already shows the desired angle. Describe the environment without asking the model to rebuild the edition. Keep the scene simple enough that the book remains the main subject.
Use the attached photograph of this exact book as the fixed product reference. Create a supporting scene on pale linen with soft side lighting and a restrained natural contact shadow. Preserve the cover artwork, readable lettering, trim proportions, spine thickness, cover finish, binding and page color shown in the source. Keep the complete book visible. Do not add a jacket, change the edition, invent interior text, add awards or redesign the cover. Review every product detail against the original before use.The prompt sets requirements, not guarantees. Inspect the actual cover and spine at a useful zoom. If the output changes a title, barcode or binding detail, use the source or a more controlled editing method instead of accepting a distant resemblance.
Keep promotional concepts and listing views organized
A campaign might need a book beside flowers, a reading chair or a gift wrap. Keep those files under a clear campaign label and retain the factual gallery separately. A scene prop should not suggest an included accessory unless it actually ships with the order.
Keep filenames tied to the edition and view: a hardcover spine should not enter a paperback listing because both folders share the same title. Record the cover version as well, especially when artwork changes after a proof copy was photographed.
Download the book-gallery worksheet and connect each output with its source view. The product photo approval checklist adds a final review for variant identity and implied contents.
Explore one supporting environment in QuestStudio
Use Image Lab with your approved physical-book source to explore a quiet supporting scene. Compare the product region with the original before saving the result. Keep the source cover and interior files available for any later correction.
The gallery is finished when a reader can recognize the cover and understand the physical edition. A good scene supports those answers without replacing them.
Download the book-gallery worksheet and replace its fictional example entries with your own approved sources.
Frequently asked questions
Is a cover graphic enough for a book listing?
It explains the artwork, but it does not show physical thickness, binding or interior construction. Add real views when those details matter to the sale.
Can I use one mockup for paperback and hardcover editions?
Keep the physical formats separate. Their cover construction, spine and page block can differ even when the artwork is similar.
How should I show the interior?
Photograph an authorized real spread that represents the edition. Do not present invented generated text as actual book content.
What if the AI changes the title lettering?
Reject the changed version for a factual product image. Use the approved artwork with controlled placement or return to a clear source photograph.
Can a generated spine establish page count or thickness?
No. Use verified edition information and measurements from the actual sample rather than the appearance of a generated object.