
To replace an image in Canva without disturbing a layout, first identify what contains the picture. A photo inside a frame has a replacement workflow. A free-standing image, a background and a decorative graphic are different objects, so selecting each one can reveal different controls.
This guide follows a common task: replace the photograph in a finished promotional layout while preserving the frame, text and spacing. It also explains why a replacement can look wrong even when the correct file was selected. The diagrams are original layout illustrations, not screenshots of Canva's interface.
Identify the object before changing the image
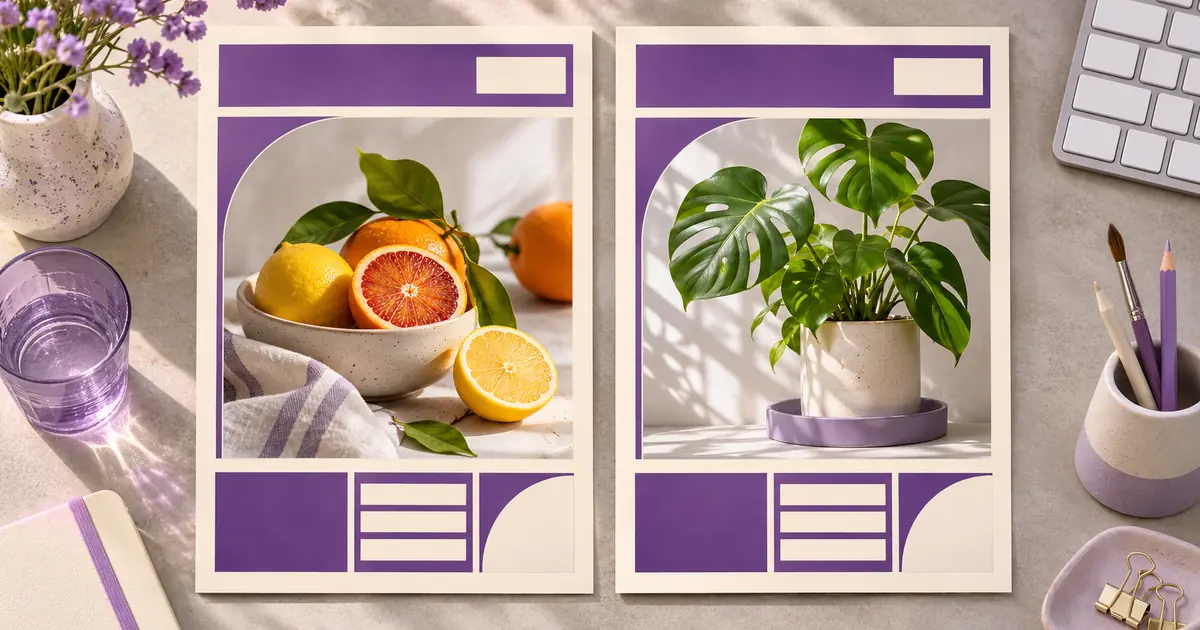
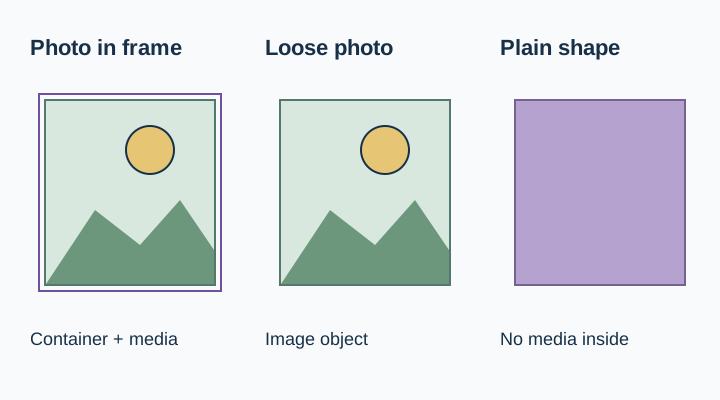
Click the picture once and examine what is selected. If it belongs to a frame, the surrounding shape contains the media. A circular portrait and a rectangular product window can both be frames. A plain photo added directly to the page is an image object without that separate container.
Do not assume a rectangle is a frame. Shapes and graphics can resemble photo containers while behaving differently. The Canva frames guide distinguishes frames from regular shapes and documents the Replace control for a selected frame.
Duplicate the page before editing. Keep the original layout as a visual reference while you change one image at a time. If the design has several similar product photos, use a source-to-slot map: hero window takes bottle-front-v3.png; detail circle takes pump-close-v2.png. This prevents a correct replacement operation with the wrong asset.
Replace the media inside a frame
In the desktop editor, select the frame. Use Replace in the toolbar, then choose the intended media from the available source area, such as Uploads, Photos or Projects. Select the new image and review how it fills the frame. Canva's current help page documents this path for frames; the exact placement of controls can vary with the editor context.
Another documented approach is to drag media over the frame until it snaps into the container. Watch the frame itself, rather than releasing the image somewhere else on the page. If the new photo appears as a loose object on top of the design, undo that action and repeat with the target frame clearly selected.
After replacement, compare the frame's outer position and size against the duplicated original. The intended operation changes the media inside that container. If the frame moved or another element disappeared, return to the copy and identify the mistaken selection before changing additional objects.
For a product layout, compare the exact variant as well. A blue bottle from the correct folder can still be the wrong label version. The product-photo approval checklist provides a source comparison process for packaging and product details before a layout goes out.
Adjust the crop inside the frame
Double-click the image inside the frame to adjust its content. Reposition the photograph and use the available resize handles to change how much of the image fills the container. Finish the edit with Done when the intended subject is visible. These controls are described in Canva's frame documentation.
Keep the distinction clear: moving the frame changes the layout; moving the photo within the frame changes the crop. When the layout dimensions are already approved, start with the second operation. Do not stretch a product merely to make its edges reach the frame boundaries.
Canva's resize and crop guide also explains image sizing and cropping. Cropping changes what is shown in the design; it does not establish that the original asset has been deleted from the editable project. Review the export as the deliverable your audience will actually see.
Understand why a landscape image loses its subject
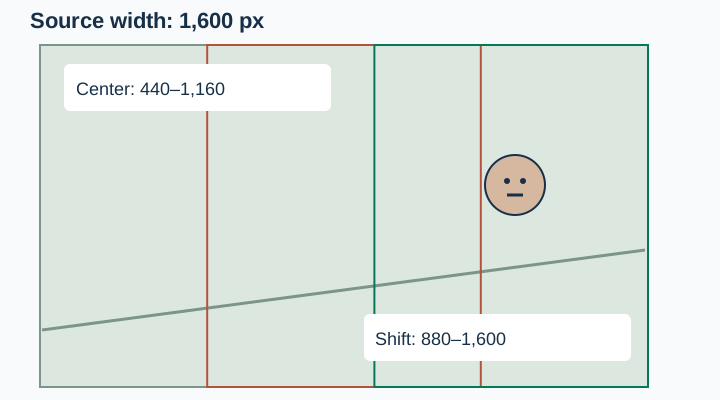
Consider an illustrative source that is 1,600 pixels wide and 900 pixels tall, placed into a 400 by 500 portrait frame. Filling the frame without distortion uses the height as the limiting dimension. The scale is 500 divided by 900, or about 0.556.
At that scale, the frame shows 720 pixels of the original source width. A centered crop therefore shows source coordinates 440 through 1,160. A subject centered around coordinate 1,250 can be cut off even though the correct image was inserted.
Moving the crop window to show source coordinates 880 through 1,600 brings that subject into view. The diagram illustrates this geometry. It is a calculated example, not a claim that Canva displays source-coordinate numbers or uses this exact image in its interface.
If an important feature still cannot fit, choose a different source aspect ratio or reconsider the frame. A tight face crop and a complete full-body portrait require different space. For a product, the label, cap and base may all need to remain visible, so a wider source composition can create unnecessary work.
Handle a free-standing image separately
If the selected object is a regular image and the frame Replace control is absent, add the replacement image as a separate object. Compare its position, dimensions, rotation and layer order with the original before removing the old object. Use the editor's positioning controls where available, and check the result visually on the duplicated page.
Preserve the source proportions. Matching a width and a height independently can distort a bottle, face or book. If the new source has a different aspect ratio, decide whether to crop it or change the layout deliberately. Do not hide the mismatch by stretching the image until it appears to fit.
Avoid deleting the original before the replacement is in place. Keeping it briefly provides an alignment reference, but remove the superseded object from the finished page once the comparison is complete. Inspect the layer arrangement so an invisible old photo does not unexpectedly reappear when another element moves.
A full-page background is another object role. Confirm that you selected the intended background or image before applying any operation; do not expect every image-related object to expose the same frame controls. For this workflow, return to an actual frame when the goal is a reusable photo slot.
Review one page before repeating the change
Check the complete page at normal viewing size. Read the headline and captions, inspect the photo crop, and confirm that the new image does not cover nearby text. Then zoom in to review sharpness, edges and the exact product or person shown.
Export a sample PNG and reopen it. The sample should have the intended page dimensions, correct image and readable text. Repeat the replacement on other pages only after that one-page check passes. This is a visual review step, not evidence that every editor preview and every export format behaves identically.
For a campaign, prepare a small asset map before editing: filename, destination page, frame purpose and required visible details. Image Lab can help prepare a supporting scene from an approved source, while the Canva page remains the place to verify the final layout. Review any generated product details against real references before insertion.
The downloadable worksheet keeps those decisions together. Finish by comparing the exported page against the duplicated original: the new image should be intentional, the crop should support the message, and every unchanged layout element should still sit where the design requires it.
Download the asset-to-frame worksheet and replace its fictional example entries with your own approved sources.
Frequently asked questions
Where is Replace in Canva?
Canva's desktop frame documentation places Replace in the toolbar after selecting a frame. A regular image, shape or graphic may expose different controls. Identify the selected object before expecting the frame replacement workflow.
Why did my new image appear on top of the frame?
It may have been added as a separate image instead of inserted into the frame. Undo the action, identify the target frame and use its Replace control or drag the media over it until the frame accepts it.
Can I replace a frame photo without moving the frame?
Yes, replacing the media inside a frame is the relevant workflow. Afterwards, compare the frame's size and position against a duplicate of the original page, then adjust the crop inside the frame if needed.
Why is the subject cut off after replacement?
A frame with a different aspect ratio must hide part of a source image when it fills the container. Reposition the image inside the frame, or choose a source composition that leaves enough room for the required subject.
Should I check the design before or after exporting?
Do both. Check the editor layout, then reopen a sample export to verify the intended page dimensions, image, crop and readable text before repeating the replacement across other pages.