
You asked for a dolly zoom and got a camera rushing toward someone’s face. The clip may look dramatic, but it has missed the defining relationship: the camera changes position while the zoom compensates, keeping the subject roughly the same size as the background appears to change around them.
Download the review worksheet · Plan one dolly zoom shot
Separate a dolly zoom from an ordinary zoom
A zoom changes the field of view without moving the camera position. A dolly move changes the viewpoint by moving the camera through space. A dolly zoom combines the two in opposition. Moving toward the subject while widening the view is one version; moving away while narrowing the view is another.
In a generated clip, these are descriptions of a desired visual result. They are not a guarantee that the model simulates a physical lens. A convincing result should still preserve a coherent scene. A background that stretches like rubber is not automatically an acceptable interpretation of the effect.
| Requested result | What to look for | Common miss |
|---|---|---|
| Simple push-in | Subject becomes larger as the viewpoint moves closer | Mistaken for a dolly zoom |
| Optical zoom | Tighter view from essentially the same position | No meaningful viewpoint change |
| Dolly zoom | Subject size stays similar while background relationships change | Digital warping or a growing face |
Build a reference with visible depth
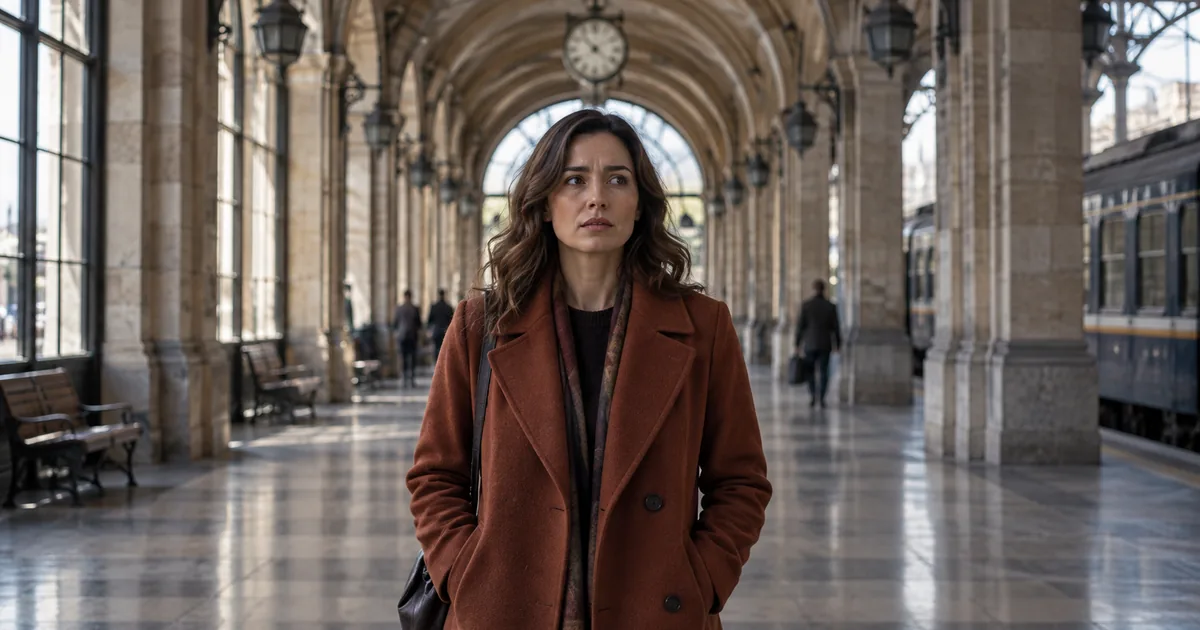
Our example is a fictional traveler standing in a station corridor. Repeating arches and distant doors give the background recognizable landmarks. Her coat provides a clear silhouette. The hero image illustrates that starting arrangement; it is not a frame from a completed video test.
A blank wall gives you little evidence to judge. A cluttered crowd introduces independent movement that can hide failures. Begin with one still person, a readable floor, and two or three fixed background anchors. Keep the person away from the frame edge, where an aggressive movement may cut off the head or shoulders.
If using image-to-video, inspect the still first. Crooked doorframes or an ambiguous shoulder will often become more distracting in motion. Repair or replace a weak reference before asking the video model to solve camera movement and source-image errors together.
Write the movement as one physical relationship
Put the subject and action first, then the camera instruction, then the framing constraint. Avoid appending an orbit, a crane rise, a whip pan, and a lens change to the same short shot. Every additional request makes it harder to tell which part failed.
For an uploaded starting frame, replace the first sentence with a description of that actual frame. Do not add landmarks the image does not contain. Runway’s camera prompting reference is useful for naming movement clearly; the acceptance method below is our own editorial workflow.
Use a three-frame review sheet
Export or pause on the first stable frame, the midpoint, and the final stable frame. Use the same display size for all three. Measure a consistent subject feature, such as head-to-waist height, as a share of frame height. Avoid measuring a coat hem that flutters independently.
Write the actual measurements rather than forcing a universal pass percentage. For example, an illustrative sequence of 42%, 43%, and 42% suggests stable framing. A sequence of 42%, 55%, and 68% suggests the subject is growing. These numbers are examples of interpretation, not results from a model benchmark.
| Frame | Subject height / frame height | Background anchor | Geometry check |
|---|---|---|---|
| Start | Record your measurement | Choose one arch or door | Face and vertical edges |
| Middle | Measure the same feature | Compare size and position relative to subject | Look for bending or duplicates |
| End | Repeat without changing crop | Confirm a coherent relationship change | Check final identity and architecture |
A stable subject alone is insufficient. A simple background animation could pass that one test. Inspect whether the corridor remains a connected place, with objects occluding one another plausibly. Then watch the entire clip for a brief failure between your sample frames.
Diagnose the miss before changing the prompt
If the face grows steadily, the zoom compensation may be missing. Make that relationship more prominent and reduce the movement. If the subject shrinks, the zoom-out may dominate the move. If the arches breathe or melt, simplify the scene and ask for a smaller perspective change.
If the person walks toward the camera, explicitly make them stationary and remove action language such as “approaches” or “advances.” If the shot cuts, remove montage or transition wording. A cut can disguise a framing change, but it defeats the purpose of this continuous camera exercise.
Change one variable per attempt and keep a short note. A smaller move with coherent geometry is usually a more usable production choice than an extreme move that needs explanation. If the effect is essential and repeated attempts fail, use a controlled compositing or camera workflow instead of endlessly intensifying the adjectives.
Choose where the shot belongs in the edit
A dolly zoom draws attention to a moment. Give it a reason: a realization, an unsettling reveal, or a change in how the character perceives the space. A shot that is technically convincing can still feel arbitrary if nothing in the scene motivates it.
Leave a short stable moment before or after the move so the editor has somewhere to cut. Check the delivery crop before approving the clip. A vertical crop can remove the arches that make the background change readable, even when the wide master works.
For an adjacent shot, hold screen direction and lighting consistent. Use the establishing-shot geography plan to give viewers a clear sense of the location before distorting their perception of it. Use the partial-orbit workflow when the goal is revealing another side of the subject instead.
How QuestStudio helps
Open Video Lab with one prepared scene and one bounded movement request. Compare the outputs against the same three-frame sheet rather than choosing only the most dramatic thumbnail. For image-to-video, upload the approved source in a model and mode that support it.
The video quality-control checklist adds checks for flicker, anatomy, text, and export readiness. Finish any precise timing or compositing in your video editor. Keep the successful prompt, source, model selection, and review notes together so the next attempt starts from an actual decision.
Frequently asked questions
What should an AI dolly zoom prompt include?
Name the camera movement and opposite zoom, keep the subject stationary, and specify that its apparent size should remain similar throughout the shot.
Is a dolly zoom the same as zooming in?
No. A dolly zoom combines camera translation and an opposing zoom. An ordinary zoom alone does not change the camera viewpoint.
Why does my AI dolly zoom look warped?
The model may imitate the effect by deforming the background. Try a smaller move and a simpler reference, then inspect architecture and the full clip.
Can I create this from one image?
Image-to-video can attempt it, but the model must infer changing views and hidden scene details. Treat the result as a generated interpretation and review it.
Start with one version you can inspect. Plan one dolly zoom shot, then use the worksheet to decide what needs another pass.