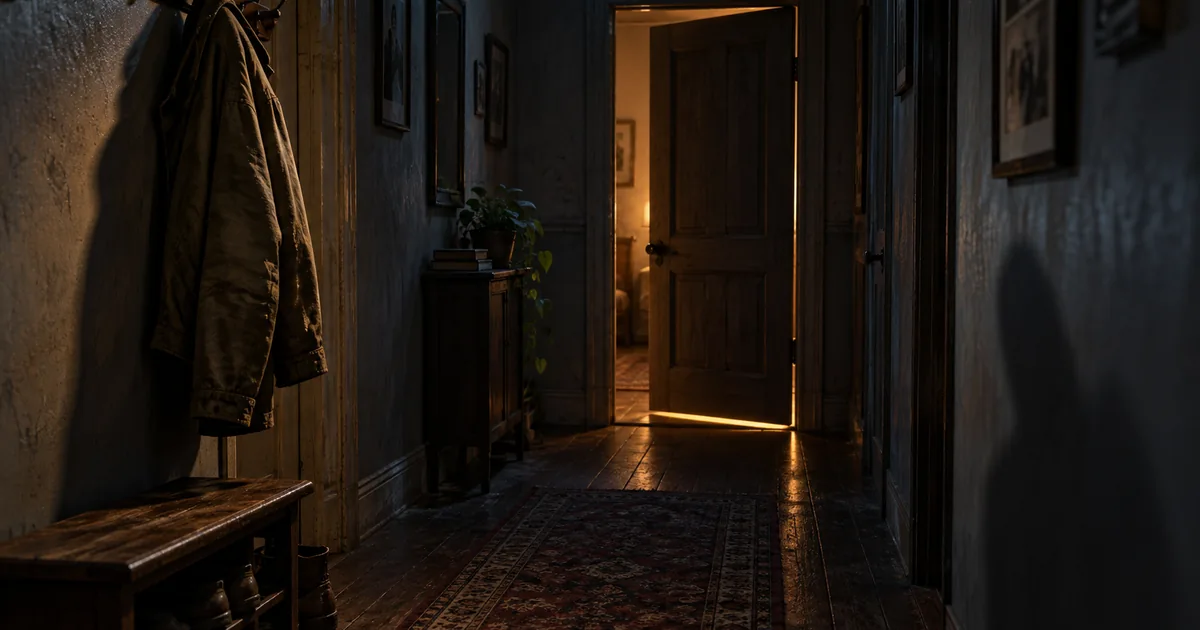

An AI horror short needs more than an eerie room and a loud sound. The viewer has to notice something, form an expectation, and then see that expectation fail. This 24-second exercise uses one hallway and a coat so you can concentrate on suspense, screen direction and a clean ending.
Download the six-shot horror cue sheet · Create the first horror shot in Video Lab
Write the event in one sentence
The story for this exercise is simple: a coat hanging in an empty hallway disappears, then its sleeve reaches into the frame from behind the camera. There is no visible monster, dialogue or elaborate transformation. The audience only needs to understand where the coat was and where it should not be.
That distinction makes the ending achievable. You do not have to generate a coat walking down a corridor with perfect cloth physics. You need a clear before, an empty hook, a reaction in the sound, and a sleeve entering a new position. The edit creates the impossible event.
Give the fictional film a working title, such as “The Second Knock,” for your production files. Keep title graphics separate from the generated frames. The visual idea should remain understandable even when the audience never reads the title.
Establish the hallway geography
Make one approved still of a narrow hallway. Put the coat hook on the left wall near the camera and a closed door at the far end. Choose one warm light source near the door and a cooler ambient tone closer to the camera. Record those decisions in the cue sheet.
Create a simple location map on paper: camera, hook, door, light. Every shot must agree with it unless the story deliberately changes something. If the hook switches walls accidentally, the viewer may read the reveal as a continuity mistake.
Keep the set ordinary enough that the single impossible event stands out. Floating dust, moving wallpaper, a flickering chandelier and a shadow creature all compete with the coat. Your first pass needs fewer elements, not more horror adjectives.
Use this six-shot plan
| Time | Shot | Visual job | Sound job |
|---|---|---|---|
| 0-4 seconds | Wide hallway | Establish coat on left, closed door ahead | Quiet room tone |
| 4-7 seconds | Coat detail | Show still sleeve and occupied hook | First distant knock |
| 7-11 seconds | Door view | Hold on the closed door | Second knock, slightly nearer |
| 11-15 seconds | Return to hook | Reveal the coat is gone | Room tone thins, no loud sting |
| 15-20 seconds | Original wide | Give time to search the empty hallway | Soft fabric movement behind camera |
| 20-24 seconds | Sleeve enters foreground | Pay off the changed position | Small cloth sound, then a clean ending |
The durations are an editorial plan, not a promise that a generator will obey exact timestamps. Render clips with enough usable material, then trim them in your editor. If a selected model has fixed durations, the final shot length still comes from the cut.
Read the plan without looking at images. If the event is unclear on paper, extra rendering will not solve it. The return to the hook is essential because it connects the remembered coat to the later sleeve.
Generate reference frames before motion
Approve the wide hallway first. Use it as the visual reference for closer views where supported. Prepare a separate empty-hook frame for the reveal, keeping the wall, hook, light and camera angle consistent. This is a controlled change to the set, not a new hallway design.
For the final shot, a sleeve partially entering the near edge may be easier to direct than a complete figure. Keep the coat material recognizable from the early detail. Do not let the model turn the sleeve into a hand, tentacle or different garment unless you intentionally rewrite the story.
The storyboard workflow can help organize these frames. Here, the board is particularly useful because it distinguishes an intentional impossible event from accidental object drift.
Direct one action per clip
Use this only for a shot whose job includes that light change. For the coat detail, ask for still fabric and a stable camera. For the ending, ask for one slow sleeve entrance at a specified edge. Do not paste the entire six-shot story into every request.
Runway's image-to-video guide recommends clear motion descriptions built around the source image. In this exercise, the still establishes the set, while the prompt adds the one event needed for that clip. Short, separable requests also make failed shots cheaper to diagnose in your own workflow, though no generation-cost claim is assumed here.
Build the rough cut before the final sound
Place the shots on a timeline and use temporary knocks and cloth sounds. Watch the sequence at normal speed. Can you remember the coat's position by the time it disappears? Is the empty hook on screen long enough to register? Does the sleeve arrive after the viewer has had time to search?
If the empty hook is missed, hold that shot longer or make its framing clearer. Do not compensate with a caption explaining that the coat vanished. If the sleeve is unclear, choose a simpler final composition. The best repair may be a still held in the edit rather than another complicated motion pass.
Keep the total duration flexible until the story works. Twenty-four seconds is the exercise target. A clear 26-second cut is more useful than an incomprehensible 24-second cut. Tighten only after the visual logic survives.
Give every sound a location and a purpose
The first knock belongs near the distant door. The later fabric sound belongs behind or close to the camera. That change in apparent location supports the story without a spoken explanation. Use volume, timing and the available stereo space carefully, then check the result in mono or on a phone speaker too.
Avoid filling every second with drones and impacts. A steady background can establish the room; a small interruption can draw attention. If every cue is loud, the sleeve entrance has nowhere to go. Keep peaks controlled and listen at an ordinary playback level rather than using volume as the entire scare.
Generate or source individual sound elements you have permission to use, and place them in the editor. Do not assume a video model's built-in audio will match the final cut. If a generated clip contains unwanted speech or music, replace or mute that layer as appropriate to your edit.
Review the film in three passes
- Story pass: show it to someone without explaining the premise. Ask what moved and when they noticed it.
- Continuity pass: compare hook side, door state, coat color, light direction and camera height across cuts.
- Delivery pass: watch the exported version on a phone with sound, then without sound, and check the final frame and audio tail.
Keep a short repair list. Fix an unreadable reveal before a minor wall-texture mismatch. A technical imperfection that does not distract may be acceptable for a small creative exercise; an accidental extra coat destroys the story's central fact.
If you plan to share the film, describe it as an AI-assisted fictional short. Platform suitability depends on the actual content and destination. This non-graphic exercise does not require a fabricated real event or a claim that the footage was captured in a real haunted building.
How QuestStudio helps
Use Video Lab to create the individual clips from approved references. Build or refine stills in your image workflow, then assemble the shots and audio in your video editor. Keep the six-shot cue sheet nearby so each generation has a defined place in the film.
Frequently asked questions
Can one prompt make the whole film?
It may create a multi-event clip, but separate shots give you more control over timing, continuity and the reveal. The final narrative comes from the edit.
Do I need a monster?
No. This exercise creates tension through a changed object position. A clear impossible event can carry a short film without a visible creature.
Should I add narration?
Only if the story needs it. This six-shot example is designed to work without dialogue, so narration may explain what the images should already communicate.
What if the coat changes between shots?
Return to the approved reference and repair the inconsistent shot. The coat’s appearance is a story fact, not an optional styling detail.
Is 24 seconds a required platform length?
No. It is a manageable target for this exercise. Choose the final duration and export settings for your actual destination.
Make the reveal readable
Finish the rough cut before chasing a more dramatic look. Once a viewer understands the missing coat and the sleeve, refine the atmosphere. Start with the wide reference shot in Video Lab.
The worked example is a proposed creative exercise, not a measured model benchmark. The hero is an original AI-generated editorial illustration.