
If you are trying to make AI video and keep bouncing between text-to-video and image-to-video, you are asking the right question. These two workflows can look similar from the outside, but they solve different problems.
Text-to-video is best when you want to explore ideas from scratch. Image-to-video is best when you already have a visual you want to preserve. That pattern shows up consistently across current comparison guides, especially in marketing, e-commerce, and creator workflows.
This guide will help you choose the right starting point, avoid the most common quality mistakes, and build a simple workflow that gets you to a usable result faster.
What text-to-video means
Text-to-video AI generates a video from a written prompt. You describe the subject, setting, action, mood, and sometimes camera movement, and the model creates the scene from scratch. That makes text-to-video strong for ideation, concept testing, and story exploration.
Text-to-video is usually the better choice when:
- You do not have a source image yet
- You want to test multiple creative directions quickly
- You are brainstorming scenes, ads, or visual concepts
- You care more about possibility than precision
A simple example:
That prompt gives the model room to invent the whole world.
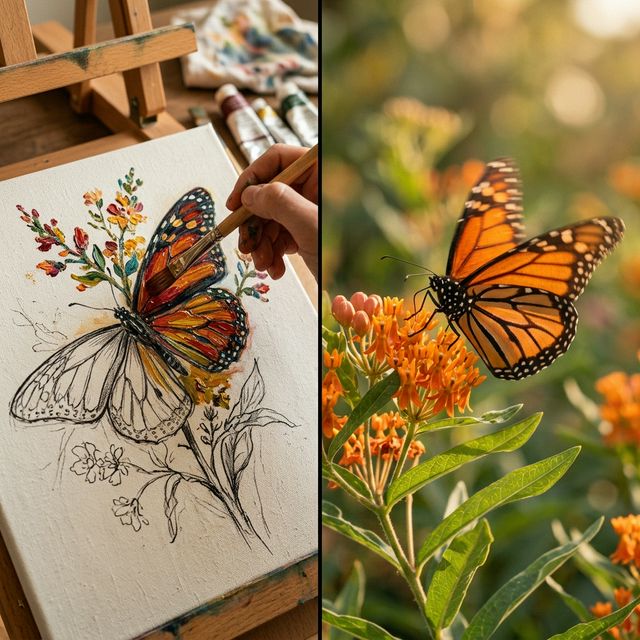
What image-to-video means
Image-to-video AI starts with a still image and animates it. Instead of inventing the whole frame, the model uses your image as the anchor and adds motion on top of it. That usually makes it more predictable and more useful for content where the subject needs to stay recognizable.
Image-to-video is usually the better choice when:
- You already have a strong still image
- You want to animate a product photo
- You need better character or brand consistency
- You want to turn finished art into a short moving clip
A simple example:
In this case, the prompt is lighter because the image is already doing most of the visual work.
The real difference: freedom vs control
The easiest way to understand the comparison is this:
Text-to-video
More creative freedom
Strong for concept generation and exploration when you are still finding the look.
Image-to-video
More visual control
More reliable for products, branding, and scenes where consistency matters.
That tradeoff is one of the clearest patterns across recent AI video comparison pages. Text-to-video is usually framed as the better option for concept generation, while image-to-video is described as more reliable for products, branding, and scenes where consistency matters.
If you start with words, use text-to-video. If you start with a visual, use image-to-video. That sounds simple, but it saves a lot of wasted generations.
When text-to-video is the better choice
Text-to-video is strongest early in the creative process.
Use it when you want to:
- Test several ad concepts fast
- Explore different moods or settings
- Build a rough storyboard from prompts
- Create scenes that do not exist yet
- Find a visual direction before locking anything down
It is especially useful for creators and marketers who need speed in the idea stage. Because you are not dependent on source assets, you can move fast and try lots of variations. That speed-to-ideation advantage is one of the most repeated benefits in current guides.
The downside is that text-to-video is usually less stable. Since the model is inventing everything, it has more chances to drift. Characters can change, products can distort, and style can shift between generations even when the prompt stays close.
When image-to-video is the better choice
Image-to-video works best later in the workflow, once you already know what you want the shot to look like.
Use it when you want to:
- Animate a finished product image
- Bring a portrait or character to life
- Create cleaner ad visuals from approved stills
- Maintain brand colors, shape, or design details
- Get more usable clips from fewer tries
That is why image-to-video tends to perform well for product marketing, character animation, and social content built from existing artwork. It is generally more predictable because the model is constrained by the source image.
The tradeoff is creative range. If the source image is weak, the video will usually inherit that weakness.
Why image-to-video often looks better faster
A lot of beginners assume text-to-video should be easier because you only need words. In practice, image-to-video often looks better faster because the still image handles so much of the scene design for you.
The model does not have to guess who the subject is, what the composition should be, what the colors are, what the product shape looks like, or what overall style to follow.
That is why image-to-video can feel more efficient once you already have a strong base image. Some recent comparisons even frame it as producing more usable outputs per attempt in real-world workflows.
Why motion consistency is hard in both
No matter which workflow you choose, motion consistency is still one of the biggest quality challenges in AI video.
This is where things go wrong:
- Faces subtly change across frames
- Hands warp or merge
- Jewelry or clothing details disappear
- Backgrounds flicker or shift
- Object placement changes mid-clip
This happens because the model has to maintain identity, anatomy, texture, and scene logic over time. That temporal consistency problem remains one of the hardest parts of modern AI video generation.
Text-to-video usually struggles more because it is inventing the whole scene. Image-to-video usually struggles less, but it can still break when motion is too strong or the clip runs too long.
What controls quality the most
The model matters, but your inputs and settings matter just as much.
1. Starting asset quality
For text-to-video, this means prompt quality. For image-to-video, this means source image quality.
Bad prompt in, vague clip out. Weak image in, unstable clip out.
If your image is blurry, crowded, badly cropped, or low detail, the model has less reliable information to animate. If your prompt is too generic, the model has too much room to guess.
2. Motion strength
Bigger motion usually means bigger risk.
Subtle motion often gives cleaner faces, better product integrity, more stable backgrounds, and more believable clips. Aggressive motion often gives more visible artifacts, stronger drift, less control, and more retries.
3. Camera movement
One simple camera move is usually better than several dramatic ones.
Safer options: slow push-in, slight pan, gentle pull-back, mild orbit.
Riskier options: fast orbit, big zooms, multiple camera directions in one short clip, dramatic angle changes.
4. Duration
Short clips are usually easier to keep stable. Longer clips create more opportunities for detail drift and scene errors, which is why so many current tools and guides lean into short clip lengths first.
If you want something longer, it is often smarter to build it in short sections.
The best quick workflow for most people
The fastest workflow is not picking one method forever. It is using both in the right order.
Step 1: Generate ideas with text-to-video
Start broad. Explore scenes, moods, and angles. Do not chase perfection yet.
This is where text-to-video shines: creative discovery, rapid concept variation, quick tone testing, and finding a scene worth keeping.
Step 2: Pick the strongest frame or look
Once you see a direction you like, lock the visual idea down. That might mean saving the best generated frame, recreating the look in an AI image generator, refining the still with image to image AI, or building a cleaner character base with an AI character generator.
Step 3: Move to image-to-video for control
Now animate the approved still instead of asking the model to reinvent the whole shot every time. This gives you a better chance of preserving the subject, getting cleaner product shots, reducing wasted generations, and improving repeatability.
Step 4: Iterate on the winner
Generate a few short versions. Pick the cleanest one. Then adjust one variable at a time: motion strength, duration, camera move, wording, model choice.
Step 5: Upscale or polish after the motion works
Do not polish too early. First get a clip worth keeping. Then improve quality with tools like an image upscaler, background remover, or video finishing tools in your pipeline.
How QuestStudio helps
QuestStudio fits this workflow well because it is not built around only one kind of generation. It lets you move between text-to-video and image-to-video without rebuilding everything from scratch.
That is useful when your real question is not "Which format is better?" but "Which format is better for this stage of the project?"
In QuestStudio, you can compare multiple video models side by side, switch between text-to-video, image-to-video, and video-to-video workflows, test different durations and aspect ratios quickly, keep prompts organized in Prompt Lab, and move from image generation to video generation in one place.
A practical workflow looks like this: brainstorm concepts in Planning Lab, create or refine the still in Image Lab, animate it in Video Lab, save working prompts in Prompt Library, and compare final outputs in one place.
That makes it easier to answer real production questions, like whether a concept should stay in text-to-video longer or whether it is ready to move into image-to-video for a more polished result. For direct side-by-side testing, the most relevant starting point is image to video AI, and for broader concept generation you can also explore AI video generator workflows.
A simple rule for choosing fast
Use text-to-video first when: you need ideas, you want variety, or you are still finding the look.
Use image-to-video first when: you already have the look, you need consistency, or you care about product or character fidelity.
Use both when: you want to explore fast, then refine with control.
For most creators and marketers, that hybrid workflow is the sweet spot. It also matches the direction of many current guides that recommend using text-to-video for ideation and image-to-video for more controlled outputs.
Related guides
FAQ
Is text-to-video better than image-to-video?
Which is easier for beginners?
Why do text-to-video results change so much?
Why is image-to-video better for products?
Should I use text-to-video or image-to-video for social media ads?
What matters most for AI video quality?
Can I use both in the same workflow?
Conclusion
Text-to-video and image-to-video are not rivals so much as different starting points. One is better for discovering ideas. The other is better for preserving visuals. If you know when to switch from one to the other, you get faster iterations and better final clips.
To test that workflow in practice, compare models in QuestStudio and see how the same concept performs across different approaches with image to video AI and broader AI video generator workflows.